Showing posts with label Land Rover. Show all posts

Friday, 13 January 2017

Getting some wiring done on the Land Rover

Yesterday I got some more work done on the Land Rover. I wanted to do something a little cleaner than stripping the axle further so I decided to get some work done on the wiring.
Originally the only fuses in these cars are the 2 you can see in the left of this picture. I had added the terminal block in the middle to make life easier for connecting stuff up. But it still wasn't fused.
So I removed the terminal block and added these fuse boxes I got from AliExpress. They were quite cheap and you can see and feel it in the build. But they are solid enough that I have no doubts they will suffice.
When I ordered them I thought that not having a bus bar connecting all of the fuses would be an advantage. However as I started to wire in the stuff I already have that needs to be fused I realised that really it does all need to be connected to positive supply. So I just daisy chained together the top pins so they are all live and the devices will connect on the bottom.
This is one of the reasons I want to add my own fuse panel. This has been added by a previous owner and seems to have been set up for running spotlights and such from. However I do not need the switches there and the fuses can be moved elsewhere. This will clear up a heap of space so I can build a gauge cluster there.

Anyone who has been around me for a little while knows I like to be able to see what the car is doing. Particularly considering that work I am putting into this I want to be able to monitor it's behavior so that if something starts to go wrong I can start taking it easy or something to help it along. At this stage I am looking to add a voltmeter, tacho, oil pressure & probably manifold vacuum gauges. I may also add an oil temp gauge, but that can happen later; Particularly if I start working this a bit harder.

It does look pretty bad in here. But if you pull it out all the way with the speedo cable removed then it is all quite clear. Though with the fuses wired up now hopefully I will be able to leave this as it is for quite some time.
This is where I got up to. I still need to drill out the rivets that hold the plate on for the old fuse panel. But it was starting to get late and the mosquitoes had come out so it was time to call it a night.

Cheers,
Rex

Sunday, 8 January 2017

Well that's one down.

I've been making some progress on disassembling the hubs for the Land Rover. I even now have one of them completely apart and even the oil and muck cleaned off it.
There are nearly all of the parts. The Free Wheeling Hub is underneath the rag in the foreground and the bearings are sitting on the other side of the parts washer. I want to soak them in petrol or some other fairly strong solvent that will not have much water in it.
To make life easier for myself I decided to get a new toy. On the right is what I have been using and on the right is a new parts washer from Supercheap Auto. I was looking at the prices for a replacement circulation pump when I saw Supercheap have a sale on these parts washers which meant that they were only a few dollars more than the pumps I was looking at. So for the extra few dollars what I got was essentially the bucket (the one I have been using is still serviceable), the spout and the electrics. All of this is stuff I could have gotten, but not for that price and not that quickly. Also the bucket has a shelf in it so I don't have to have all of my parts floating in the degreaser. Also it is made from metal rather than plastic which means it will handle more knocks than the plastic one will.
I discovered a heap of bolts that I'd left in the plastic bucket. I would've found them, but probably not before they got all mixed up.

Now I need to get a clean plastic crate and put all of these parts in it with a splash of kerosene or something to form an oily film so that the parts can't rust. Then I can start pulling down the other one.

In the meantime however, it's getting warmer and I've remembered that I have A/C so I'm going to do some inside projects instead now.

Cheers,
Rex

Wednesday, 4 January 2017

More pieces again

Now that I have a workbench that is usable I wanted to start getting the hub(s) torn down for the Land Rover to see if there are any more surprises waiting for me.
Even though I had cleaned it with the pressure washer before there was still enough oily grime to make my hands too dirty to use my phone.
I must admit, this did surprise me a little. This is the joint that allows the drive to flex as the wheels turn. In newer cars and ever slightly newer Land Rovers these are CV joints not a simple universal joint like this. However these do have the advantage of being simple, easy to replace and not much to wear out. This one is in quite good condition and has no play in it at all. So that's one part I don't need to replace.
However this may be a problem. There appears to be a crusted up bit on the tapered section to the left of the land that the bearing runs on. I'll have to double check the other hub as I disassemble it to see if this needs to be a smooth surface. If it doesn't that that finish will be fine as there is nothing loose or flaky on it. But if there is a bearing or seal on it, then the tapered part will need replacing.
Just like christmas again. I sprayed down the driveshaft with a fair bit of WD-40, then wrapped it in pallet wrap. These parts will be stored in an un-heated spot and it could be a little while for everything to arrive that I will need to get this put back together. So I'd rather do this and have to cut it off once I'm ready for them then have to clean up rusty parts that were fine.
It took me a few seconds to work out how the seal come off from here. Turns out it is just a close fit around the flange.
Oooh, Shiny. This is in quite good condition, with no pitting. The flange is a little dirty but there are no problems here.
So this gets the same spray and wrap treatment.

That's all I've got so far. I will be pulling apart and cleaning the parts of the freewheeling hubs next. As I'm disassembling everything I am making sure it is clean enough for it to be put back into service without any extra work. So it is taking a little while to get it done. But you can be sure it will get done.

Cheers,
Rex

Saturday, 31 December 2016

Serious disassembly has now started

Yesterday I continued on with the work I discovered I need to do on the Land Rover the other day. Namely to remove the front axle so I can get easily to all sides of the hub assemblies and the diff because they seem to have managed to fill with water and grit.
This jack has been doing quite a bit of work since I bought this land rover. It is just the one that came with my ute for replacing the occasional flat. Whereas for a while now it has been lifting up the land rover almost regularly to pretty close to the limits of the jack.
Hmmm. There seems to be a problem here. Unfortunately the wheels had to come off to be able to fit under the bullbar.
That will fit a bit better.
Now I found another problem. This whole assembly is way yonder too heavy for me to pick up and put the wheels back on. So I just dragged it until it would be in a spot where I can pull it apart without it getting in the way.
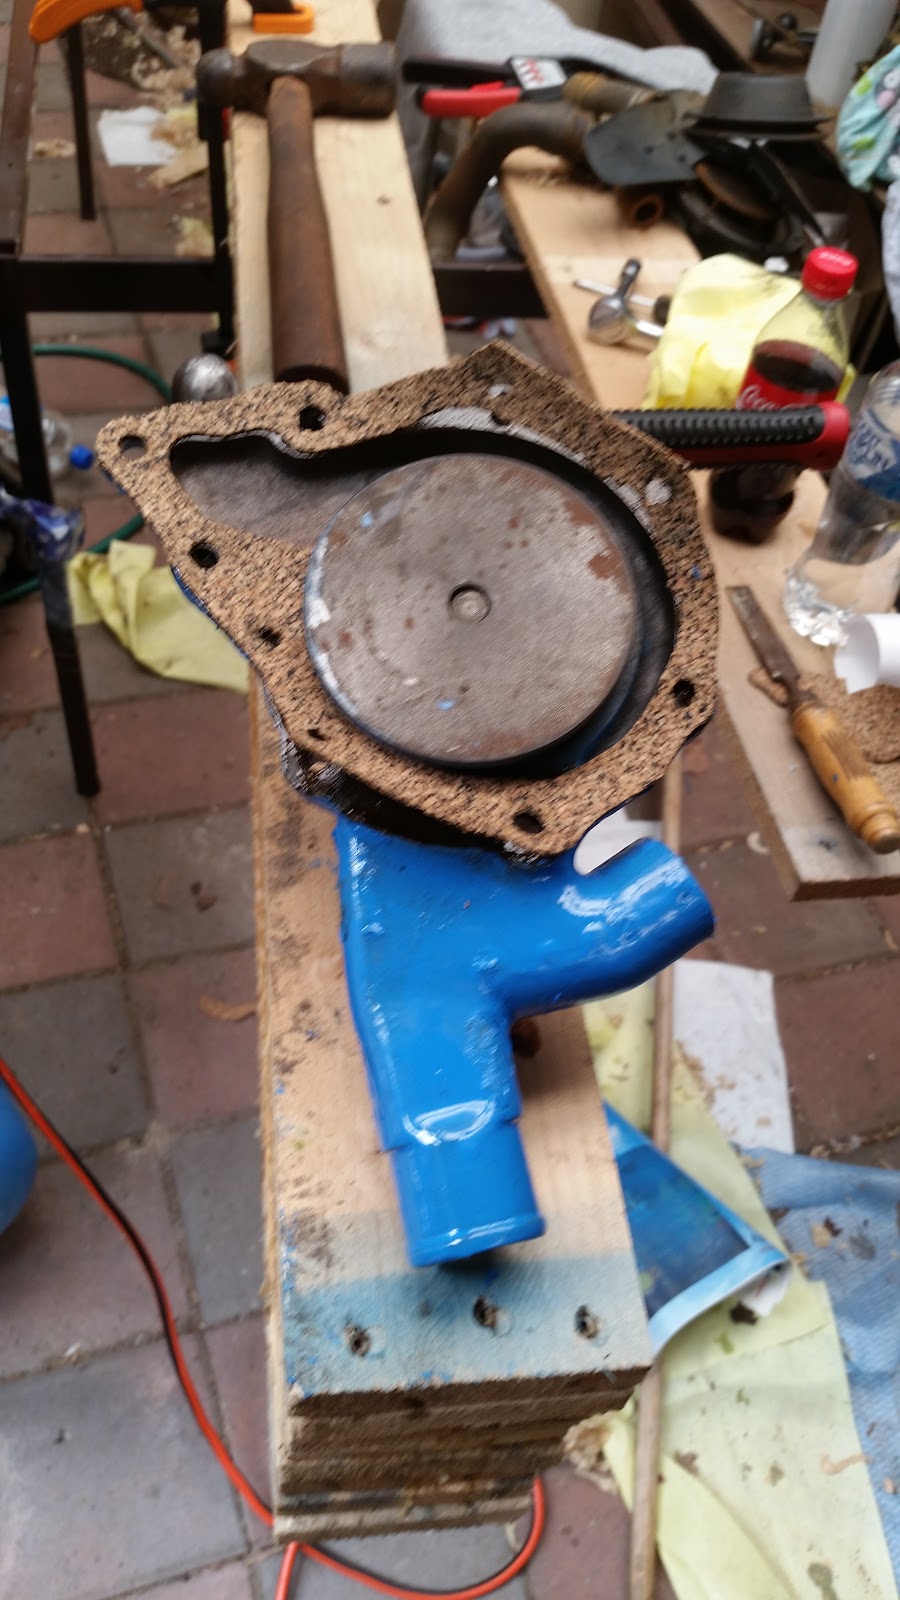
This process has made me want to remove everything and do a complete restoration rather than just a quick get back on the road. This rod (Not sure what it's called. Ties the hubs together so they turn at the same time.) has ball joints at each end. This is what they look like:
There is no more rubber boots at either end and both of them are stiff and don't really move very well at all. These will both need to be replaced and I will need to check the other ball joints as well. Also when I detached the prop shaft from the diff I discovered that the bolts were surprisingly loose.
These are issues that would get fixed with normal maintenance on any car but from the previous use I was told about. There would have been between practically none and actually none.

One grotty hub with the axle still in. I figured that I would clean everything up a bit so it's a little nicer while I'm pulling this all apart.
It's a bit hard to tell in the pictures, but just a few minutes with the pressure washer and the bulk of the grot and oil have been washed off. As it was starting to get pretty warm and I had been hit with a fair bit of spray from cleaning this up and needed a shower. I decided to call it a day. So a heavy coat of WD-40 and this is ready for me to finish pulling apart and cleaning properly.

I'm tossing up while I have everything apart getting some proper chassis paint and cleaning everything with a wire wheel and painting it properly.

Cheers,
Rex

Monday, 26 December 2016

A frustrating discovery.

Today I was hoping to start using my shiny new tools that I was lucky enough to recieve at Christmas. One of the front wheels on the land rover has had a leak on the back of it, apparently from a failed swivel ball seal. The procedure from replacing one of these can be somewhat of an ordeal at the best of times so I figured I'd have a crack when I had the week off work. However I only got this far:
I thought that I could pull the axle out, then I could separate the hub from the axle and replace the seal without actually removing the hub or the brake hose. Unfortunately as I broke the seal that should have been holding in a heap of EP90 oil there wasn't any oil come out. In fact there was a little water come out. All of a sudden this job went from something that would be a pain but doable in a few days, replace a seal with a generic one from one of the shops in town and then all done. To, dismantle the entire hub assembly, degrease, clean & check for rust on every component. Get new seals & bearings where needed, clean, paint and reassemble. Then I will have to do the other side to make sure that it has not had the same issue.

My unfortunate discovery, with a little old brake fluid to start the cleaning process.

Actually come to think of it, I might pull off the front axle, leave the body on jack stands and strip it all down. Just to be sure that the diff is good as well and it hasn't had it's oil contaminated.

Anyway, watch this space. Lots to happen soon on this now.

Cheers,
Rex

Thursday, 17 November 2016

Parts on order

I'm back at a point where I can start buying more parts to get the Land Rover back on the road.

You may have noticed that there are some lights missing from it. Namely the indicators, park & brake lights.
If you hadn't, this picture shows where 2 of them go nicely.

I have ordered a set of replacements from Rover Parts which will look like this:
Image from http://www.roverparts.com.au/

They are not quite exactly identical to the original parts. However they have just come off a later model. They will still fit in the same space and get wired up the same.

I have tested some of the wiring that is still in the back. The wire for one of the indicators is still good and works, but I'll need a helper to test the brake lights. Also I'm hoping a little more load from more lights will mean that the indicator flasher can has enough current going through it to cause the lights to actually flash.

Another post coming regarding the install.

Cheers,
Rex

Monday, 7 November 2016

Back door now installed

I have had a door for my Land Rover since I bought it, however it was not installed, nor did it have enough bolts to just put it on. So on the weekend I fixed that.

In this photo you can just see a hand holding the door on. Before you could use the top hinge to locate it and hold it in place. This didn't really do much other then prove the door fitted. But it was a start.

The nuts I found were too small for the holes that have been drilled in the frame of the door. So I had to make up a backing plate to stop them from pulling through. This came from a piece of scrap angle I had sitting around. A few minutes with the grinder and the drill and it was ready to go.

It is still a mess inside. But that isn't as obvious now with the door shut. I'm not sure if it's supposed to, but the geometry of the hinges means that it half wants to open itself. Not a bad thing, but interesting.

Unfortunately for now this is my latch. I don't quite have a complete lock mechanism for the door so while I sort out how to lock it properly this will do.

This was a nice, fairly quick project that has definately helped make the car more weatherproof. Hopefully soon I will have the brakes sorted and then I can move onto the next part. Possibly the lights which are missing.

Cheers,
Rex

Wednesday, 5 October 2016

Long weekend, Means more time on project cars

So with Monday being a public holiday for me I decided to get some more work done on the land rover. I didn't get a whole lot done but I made some good progress on fixing what was stopping the car from moving properly. First I removed the screws that hold on one of the brake drums.
Some jobs just can't be done without the proper tools. In this case an impact screw driver. Greatfully borrowed from dad. Turns out this was the easiest drum to do. Later in the evening I tried to get the fronts loose. No luck at all. Until I brought out the blue wrench. With a little bit of heat I managed to get the screws free. I didn't get the front drums off as they were still pretty stiff and I didn't want to bang too much as it was starting to get late.

What I did manage to do however was completely loose my brake pedal. No, It was still on the floor. It just went all the way there without any resistance. The brakes were always a little spongy since I bought it so they were on the to do list. But this made it a bit more urgent.
Could this be the cause? The inner part of this reservoir seems to be for the clutch as it was still working and had a bit of fluid still there. However the outside did not have any left at all.
The fix? No. But the first step. After filling the reservoir up I could hear the master squeezing something around. For a little I was worried that the master may be dead and started thinking about ways to test that. Then I realized. I was overthinking this.
If the reservoir was empty then the master would have been sucking air. If it was sucking air then it would have been pushing air out. Then there would be air in the brake lines. Therefore the brakes probably need to be bled.
This is what ended up coming out before the bubbles stopped. This was on one wheel. As soon as I nipped the bleeder back up the brake pedal was firmer than it ever has been. I only ended up bleeding the one wheel as that has restored the brakes to where I am happy with them for now. Currently all 4 wheels are off and it is on stands so I am not going to be trying to stop it any time soon. Also I may be pulling some stuff apart on the brakes depending on what is needed which means that I will need to bleed it again. No point doing something twice.

Now I need to go up the front and see if I can find the problem and fix it so the car will roll freely in high range.

Cheers,
Rex

Monday, 3 October 2016

No More Leaks

On Saturday I finished putting the new gasket that was needed onto the waterpump on my Land Rover. I talked about the beginning of the process here.
The problem I had was that I needed some kind of gasket as a spacer to make sure that the impeller doesn't contact the block as the back of the housing. I decided to have a go at making a gasket out of cork from scratch for the spacer.
Armed with a memory of instructions I found on the internet on how to do this I got started. Getting the outside shaped was amazingly easy. With my ball peen hammer I tapped around the edge of the housing which cut the cork on the corner of the housing.
The rest was a bit more difficult. The bigger open spaces allowed me to use the same hammer technique, however when it got in close to the impeller the hammer couldn't reach anymore so I had to resort to using scissors and checking against the housing regularly.
To get the bolt holes we got 2 hammers, set the ball peen of one over the hole and tapped. This cut the cork or at least made a mark, enough so that I could cut the rest of the hole out with scissors.
You can just see the pump in place. I probably should have painted the fan shroud while I had it out, but I didn't really have the abrasives to clean it up enough for good painting.
In the middle you can see a temperature gauge reading about 80 Degrees Celsius. This was after driving around a bit and seeing how the brakes go and so on. Because the fan is always going it probably takes a little longer to warm up than I am used to with a more modern car, but it still gets there no worries so no concerns there.
Now sitting in the back of the yard so I could get the fireball dinghy out. It will move under it's own power, but only in low range. in high range there seems to be something holding it back. I know the brakes need some work so that is my current theory, one of the wheels might not be letting go properly. After that issue is fixed it should be driving well, just needs a full fluid change then I can get on to making sure it will pass rego.

Cheers,
Rex

Thursday, 29 September 2016

Charging Batteries

While I've got the front of the engine bay apart for replacing the water pump here I have the battery sitting on my back veranda not doing much. So I figured I would give it a charge. However I don't have a proper battery charger. I do have a more sophisticated tool that will charge a battery though.
Enter the laboratory power supply. This one is a fairly cheap one that I picked up off ebay a couple of years ago. It's noting to write home about but it is more than enough for this job. The reason it will work for this is that I can set it to output a maximum of 13.8V which is the standard charging voltage for lead acid batteries. It also has a constant current mode which would be useful for smaller batteries which should be charged slower, but a big one like this can probably handle as much as this relatively small supply will provide.

I just used a set of jumper leads to connect the battery as they are all that I have that will fit the posts built into the battery.

Here we are after about 1/2 to 3/4 of an hour. The battery is still accepting .52A of current into it at the full charging voltage of 13.8V which means that it is essentially full. Certainly close enough for me. Tomorrow or the day after I am going to pull the 2nd battery out of the Land Rover and see if it will charge up. The previous owner said that it didn't charge for him but I want to see exactly what happens as sometimes a "dead" lead acid battery can be brought back to life.

I will leave this battery on charge until I go to bed tonight to trickle it up as much as it will, then I will take it off the charge to reduce the risk of something going wrong, boiling, hydrogen production, etc.

Cheers,
Rex

Fixing the Land Rover

I've made a start on what needs to be done on my new Land Rover. The biggest thing that had to be done first was replace the water pump. The one that was on it had failed so badly that the weep hole in the housing has a stream coming out of it, even when the engine isn't running. I want to get this fixed so I can keep the engine full of coolant and be able to just start it when I need to move it, rather than having to top it off and then try and do everything as quickly as possible.

This is the new pump. I ordered it from E-Bay. It is still raw metal though so I grabbed a can of Kill-Rust paint that I had sitting around and made it not raw metal.
Looks pretty good. I think I will start doing this to all of the parts I take off, to help protect them and also to make the engine bay look a bit cleaner.

We thought it would be easiest to remove the radiator entirely. I forgot to take a picture, but here it is without a rad. There was about 12 bolts with nuts holding it on so we had to take off the grill and then with 2 of us remove all of them, making sure that it didn't fall down as we undid the last few bolts.

Here is the fan and pulley removed. There is a light coat of rust on the inside of the pulley caused by the leak from the pump. Interesting to note the blade and hole spacing is not even. 2 sides are longer and 2 are shorter. Weird.

Really good access now the radiator is out of the way. The water pump is front and center, ready to be removed.

And now it's gone. It is a little crusty inside the housing, however noting is loose so I'm not going to worry about cleaning it other than the gasket surfaces.

The new pump didn't come with a gasket so I was going to have to work something else out. To get this finished that night we were going to try this to seal it up, which should have worked. However the impeller is so deep that without the thickness of the gasket then it collides with the block and can't spin. So I am going to have a crack at making a gasket for this as a spacer as much as anything and then I should be able to start driving this around the yard.

Cheers,
Rex