Yesterday I continued on with the work I discovered I need to do on the Land Rover the other day. Namely to remove the front axle so I can get easily to all sides of the hub assemblies and the diff because they seem to have managed to fill with water and grit.
This jack has been doing quite a bit of work since I bought this land rover. It is just the one that came with my ute for replacing the occasional flat. Whereas for a while now it has been lifting up the land rover almost regularly to pretty close to the limits of the jack.
Hmmm. There seems to be a problem here. Unfortunately the wheels had to come off to be able to fit under the bullbar.
That will fit a bit better.
Now I found another problem. This whole assembly is way yonder too heavy for me to pick up and put the wheels back on. So I just dragged it until it would be in a spot where I can pull it apart without it getting in the way.
This process has made me want to remove everything and do a complete restoration rather than just a quick get back on the road. This rod (Not sure what it's called. Ties the hubs together so they turn at the same time.) has ball joints at each end. This is what they look like:
There is no more rubber boots at either end and both of them are stiff and don't really move very well at all. These will both need to be replaced and I will need to check the other ball joints as well. Also when I detached the prop shaft from the diff I discovered that the bolts were surprisingly loose.
These are issues that would get fixed with normal maintenance on any car but from the previous use I was told about. There would have been between practically none and actually none.
One grotty hub with the axle still in. I figured that I would clean everything up a bit so it's a little nicer while I'm pulling this all apart.
It's a bit hard to tell in the pictures, but just a few minutes with the pressure washer and the bulk of the grot and oil have been washed off. As it was starting to get pretty warm and I had been hit with a fair bit of spray from cleaning this up and needed a shower. I decided to call it a day. So a heavy coat of WD-40 and this is ready for me to finish pulling apart and cleaning properly.
I'm tossing up while I have everything apart getting some proper chassis paint and cleaning everything with a wire wheel and painting it properly.
Today I was hoping to start using my shiny new tools that I was lucky enough to recieve at Christmas. One of the front wheels on the land rover has had a leak on the back of it, apparently from a failed swivel ball seal. The procedure from replacing one of these can be somewhat of an ordeal at the best of times so I figured I'd have a crack when I had the week off work. However I only got this far:
I thought that I could pull the axle out, then I could separate the hub from the axle and replace the seal without actually removing the hub or the brake hose. Unfortunately as I broke the seal that should have been holding in a heap of EP90 oil there wasn't any oil come out. In fact there was a little water come out. All of a sudden this job went from something that would be a pain but doable in a few days, replace a seal with a generic one from one of the shops in town and then all done. To, dismantle the entire hub assembly, degrease, clean & check for rust on every component. Get new seals & bearings where needed, clean, paint and reassemble. Then I will have to do the other side to make sure that it has not had the same issue.
My unfortunate discovery, with a little old brake fluid to start the cleaning process.
Actually come to think of it, I might pull off the front axle, leave the body on jack stands and strip it all down. Just to be sure that the diff is good as well and it hasn't had it's oil contaminated.
Anyway, watch this space. Lots to happen soon on this now.
I'm back at a point where I can start buying more parts to get the Land Rover back on the road.
You may have noticed that there are some lights missing from it. Namely the indicators, park & brake lights.
If you hadn't, this picture shows where 2 of them go nicely.
I have ordered a set of replacements from Rover Parts which will look like this:
Image from http://www.roverparts.com.au/
They are not quite exactly identical to the original parts. However they have just come off a later model. They will still fit in the same space and get wired up the same.
I have tested some of the wiring that is still in the back. The wire for one of the indicators is still good and works, but I'll need a helper to test the brake lights. Also I'm hoping a little more load from more lights will mean that the indicator flasher can has enough current going through it to cause the lights to actually flash.
I have had a door for my Land Rover since I bought it, however it was not installed, nor did it have enough bolts to just put it on. So on the weekend I fixed that.
In this photo you can just see a hand holding the door on. Before you could use the top hinge to locate it and hold it in place. This didn't really do much other then prove the door fitted. But it was a start.
The nuts I found were too small for the holes that have been drilled in the frame of the door. So I had to make up a backing plate to stop them from pulling through. This came from a piece of scrap angle I had sitting around. A few minutes with the grinder and the drill and it was ready to go.
It is still a mess inside. But that isn't as obvious now with the door shut. I'm not sure if it's supposed to, but the geometry of the hinges means that it half wants to open itself. Not a bad thing, but interesting.
Unfortunately for now this is my latch. I don't quite have a complete lock mechanism for the door so while I sort out how to lock it properly this will do.
This was a nice, fairly quick project that has definately helped make the car more weatherproof. Hopefully soon I will have the brakes sorted and then I can move onto the next part. Possibly the lights which are missing.
I've had some trouble in the past with getting a white buildup around the negative terminal of the battery in my rodeo ute. I have always been able to get it going again, but it has always been some fiddling around when it gets bad.
When this happened the second time I bought a new battery terminal and put it in the car. Ready for me to install it. However because the problem didn't come back I didn't end up getting it installed.
Yesterday I had the same problem. I park on a slope at work and there is enough electricity getting through the terminal to hill start it, which I did. However when I got home there wasn't even enough getting through to run the central locking. So I had to fix it.
This is the old terminal. Just an extension of the crimp that gets bolted around the battery post. It looks pretty rubbish for a factory part, but I guess it's worked for the last 10 years.
This is the new part. I just cut the strap off the crimp and left the main body of the crimp alone so all of the little wires would stay in one bundle. According to the packet this terminal is lead which is the same material as the battery post so there should be no compatibility problems there. What will be interesting is if the problem goes away, or if it moves to where the wires meet the new terminal.
So with Monday being a public holiday for me I decided to get some more work done on the land rover. I didn't get a whole lot done but I made some good progress on fixing what was stopping the car from moving properly. First I removed the screws that hold on one of the brake drums.
Some jobs just can't be done without the proper tools. In this case an impact screw driver. Greatfully borrowed from dad. Turns out this was the easiest drum to do. Later in the evening I tried to get the fronts loose. No luck at all. Until I brought out the blue wrench. With a little bit of heat I managed to get the screws free. I didn't get the front drums off as they were still pretty stiff and I didn't want to bang too much as it was starting to get late.
What I did manage to do however was completely loose my brake pedal. No, It was still on the floor. It just went all the way there without any resistance. The brakes were always a little spongy since I bought it so they were on the to do list. But this made it a bit more urgent.
Could this be the cause? The inner part of this reservoir seems to be for the clutch as it was still working and had a bit of fluid still there. However the outside did not have any left at all.
The fix? No. But the first step. After filling the reservoir up I could hear the master squeezing something around. For a little I was worried that the master may be dead and started thinking about ways to test that. Then I realized. I was overthinking this.
If the reservoir was empty then the master would have been sucking air. If it was sucking air then it would have been pushing air out. Then there would be air in the brake lines. Therefore the brakes probably need to be bled.
This is what ended up coming out before the bubbles stopped. This was on one wheel. As soon as I nipped the bleeder back up the brake pedal was firmer than it ever has been. I only ended up bleeding the one wheel as that has restored the brakes to where I am happy with them for now. Currently all 4 wheels are off and it is on stands so I am not going to be trying to stop it any time soon. Also I may be pulling some stuff apart on the brakes depending on what is needed which means that I will need to bleed it again. No point doing something twice.
Now I need to go up the front and see if I can find the problem and fix it so the car will roll freely in high range.
On Sunday we were lucky enough to have some great weather and took our boats out. We took out both of the dinghy we have, both my parent's Vagabond and my Fireball. It was a good day, despite both of the boats needing some repairs that we have been putting off since we last used them. The fireball needed a pintle for the rudder put back on after this trip. The vagabond needed the line that hauls up the centerboard to be fixed. That line had been getting sun burned for some time and on the last trip it finally failed, thankfully both were easy fixes.
Before bolting the pintle back on I put some silicone onto the back of it to ensure that water can't get into the buoyancy chamber at the back. I put way too much on but it is a lot easier to clean up a little silicone before it sets then to repair a rotted out hull.
The vagabond all hooked up and ready to go. To put the new line in the centerboard we had to lift the boat up, drop the centerboard out then run the new line through the hole in it and then put it all back in. Not very long to do thankfully.
This is the lake now. I have never seen it this full before. WE have been very lucky and gotten a lot of rain recently. The ground now has so much water in it that almost as soon as we get significant rain now it starts running off and into the rivers and dams.
For a comparison this is what it looked like before. Where the above photo was taken is further up the bank to the right. Quite a long way up.
Unfortunately I didn't get any photos while we were sailing, but it was a very good day for it and we got some good speed up. Nicole did very well as crew, despite me putting the leeward rail into the water quite a long way a few times.
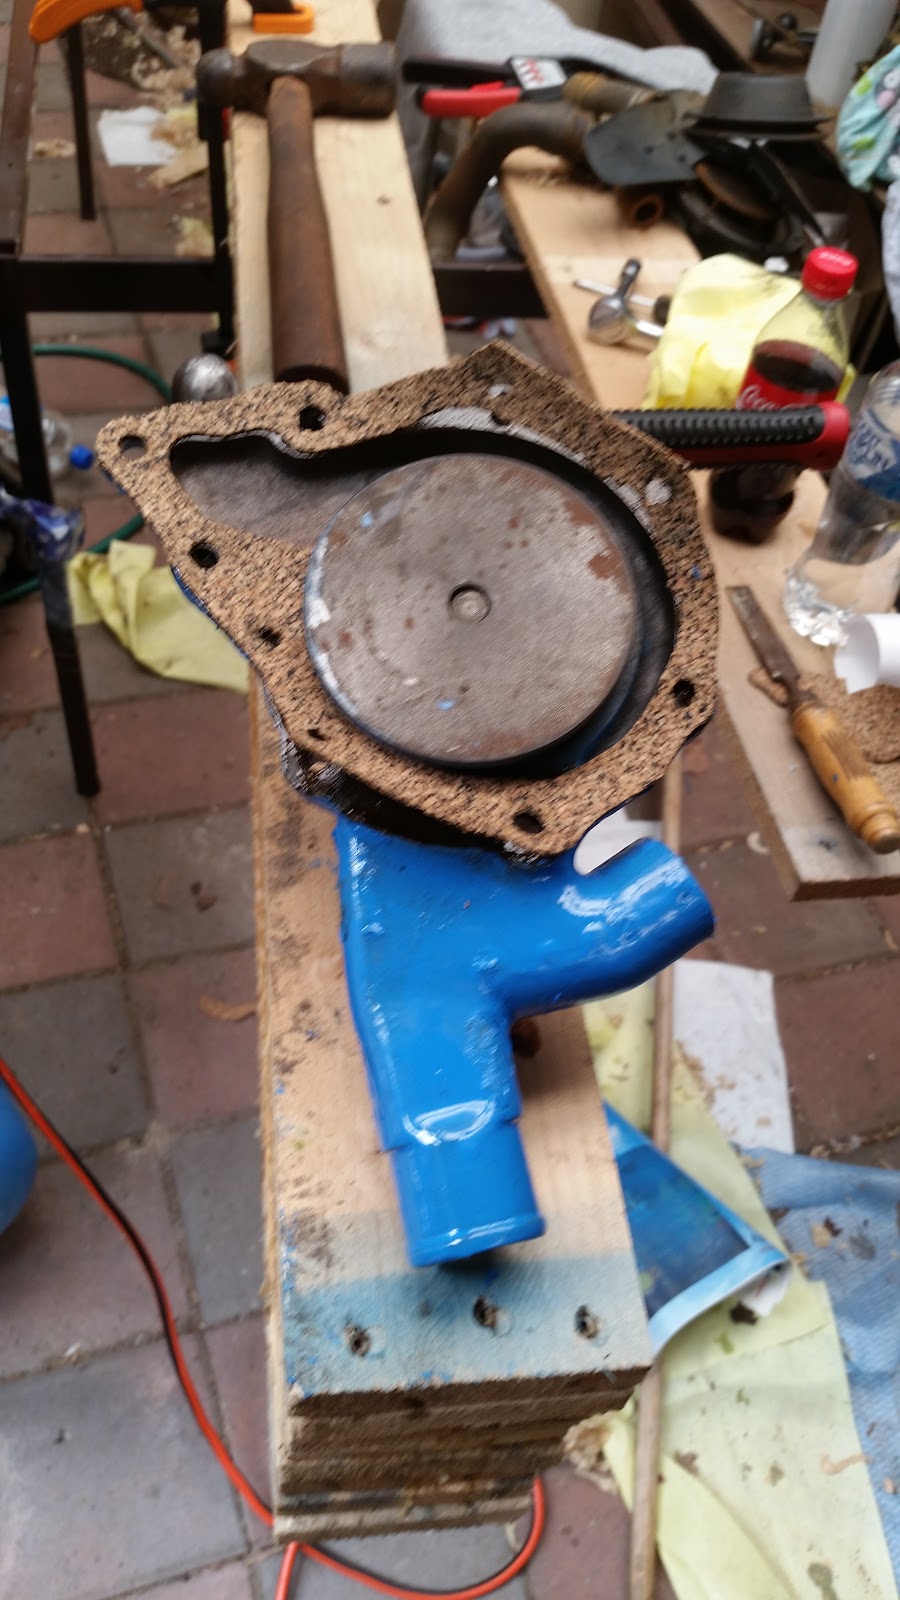
On Saturday I finished putting the new gasket that was needed onto the waterpump on my Land Rover. I talked about the beginning of the process here.
The problem I had was that I needed some kind of gasket as a spacer to make sure that the impeller doesn't contact the block as the back of the housing. I decided to have a go at making a gasket out of cork from scratch for the spacer.
Armed with a memory of instructions I found on the internet on how to do this I got started. Getting the outside shaped was amazingly easy. With my ball peen hammer I tapped around the edge of the housing which cut the cork on the corner of the housing.
The rest was a bit more difficult. The bigger open spaces allowed me to use the same hammer technique, however when it got in close to the impeller the hammer couldn't reach anymore so I had to resort to using scissors and checking against the housing regularly.
To get the bolt holes we got 2 hammers, set the ball peen of one over the hole and tapped. This cut the cork or at least made a mark, enough so that I could cut the rest of the hole out with scissors.
You can just see the pump in place. I probably should have painted the fan shroud while I had it out, but I didn't really have the abrasives to clean it up enough for good painting.
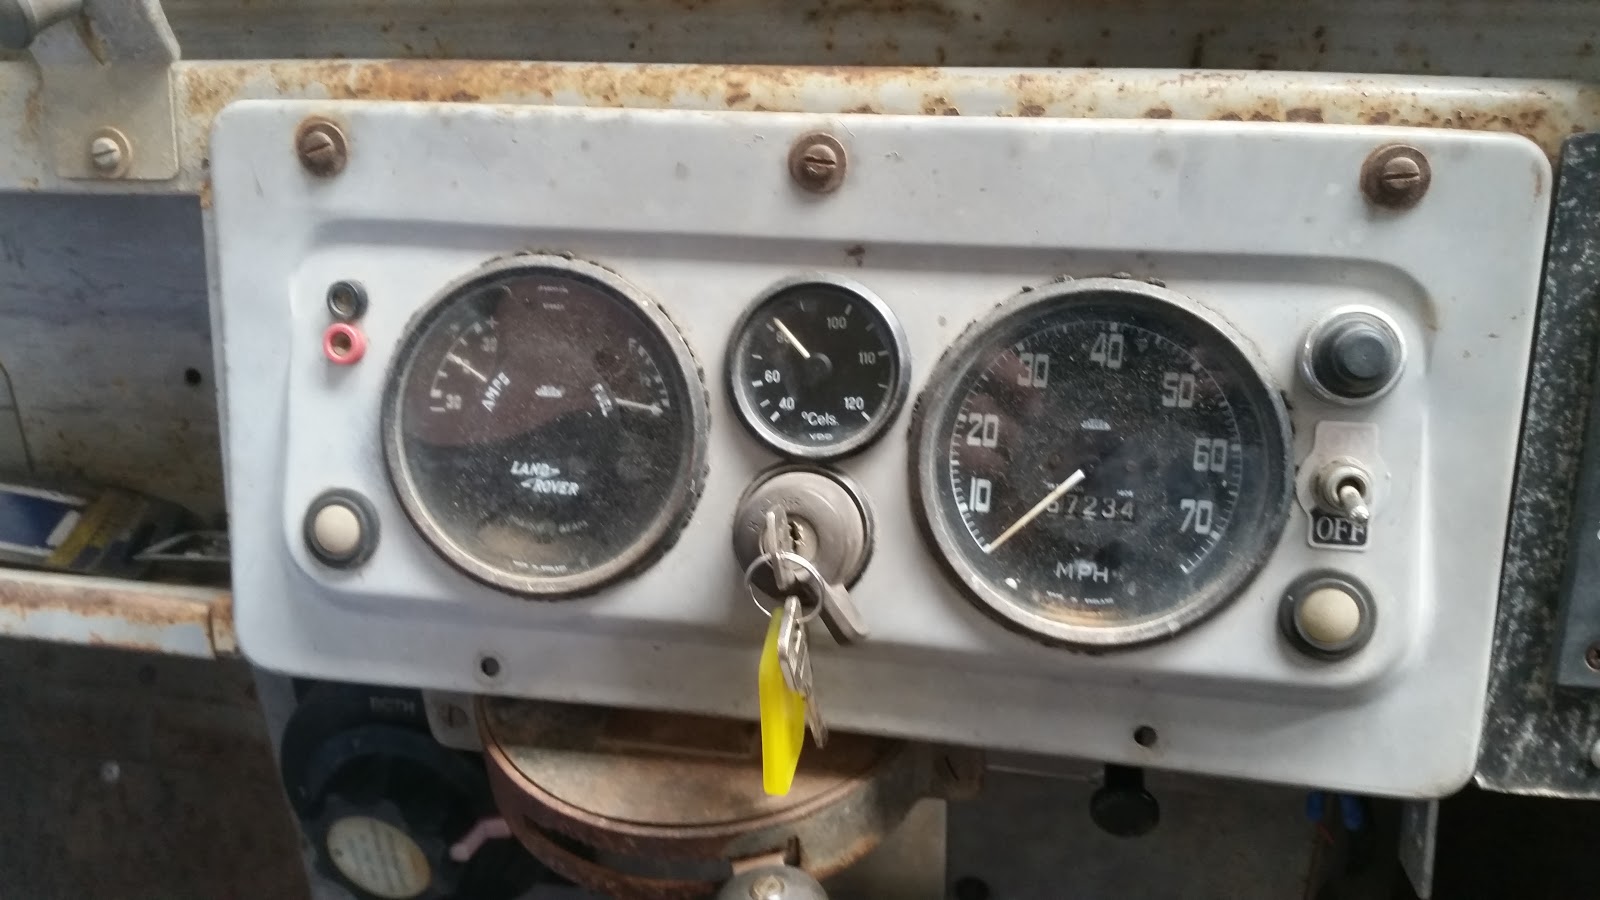
In the middle you can see a temperature gauge reading about 80 Degrees Celsius. This was after driving around a bit and seeing how the brakes go and so on. Because the fan is always going it probably takes a little longer to warm up than I am used to with a more modern car, but it still gets there no worries so no concerns there.
Now sitting in the back of the yard so I could get the fireball dinghy out. It will move under it's own power, but only in low range. in high range there seems to be something holding it back. I know the brakes need some work so that is my current theory, one of the wheels might not be letting go properly. After that issue is fixed it should be driving well, just needs a full fluid change then I can get on to making sure it will pass rego.
The other week I was putting a sight glass back in a tank when I managed to overtighten one of the bolts and snap it off. I didn't really need to tighten up those bolts that much so it really shouldn't have happened. But accidents happen.
You can see what's left of the bolt snapped off in the bottom right of the fitting.
We came back to this problem over the weekend and fixed it. But fist I had to use a hammer.
Not a particularly heavy one, but big enough to make me nervous about breaking the removal tool which would have been next level bad.
Thankfully this part went well. Once the tool got in far enough to get a good bite it spun the bolt and the whole shebang came out. Then I had to get the bolt off the end of the removal tool. Awkward, but much less stressful than getting the bolt out.
And here is everything buttoned up and no longer holding up progress.
I had a bit of a play with the oil burner as well so keep an eye out for updates on that through the week.
It sure does, it floats, sails and breaks. There wasn't much wind but the hull is driven really easily. Even with the very light wind we were still moving along. Not very fast mind you, but we did get there until better wind came along.
This was the first time out in a new boat and it's been some time since I've been sailing on a dinghy so we took a chase boat along as well.
Here she is, tarped up and with the mud washed off ready for bed. I do need to get a bigger tarp but I should be able to sort that out in the next few days.
Now being a boat there is always something broken. Today we managed to break off one of the jib sheet redirection blocks. These were mounted to pieces of an old kitchen chopping board which turns out couldn't handle the strain. The turning blocks for the spinnaker sheets are in nearly the same spot so we can use those until I can make up some new mounting blocks.
Also the centerboard is very tight in the casing. It was fine to start with, but after lunch it ended up taking us nearly half an hour to get it down, but thankfully after that we got some good sailing in. So the board will need to be taken out and sanded down so that when the timber swells there will still be space inside the casing.
However this is the biggest problem. One of the pintles that hold the rudder on had come loose and nearly fallen off by the time we came in at the end of the day. Unfortunately when these were installed with plain nuts when these should've been locknuts or had jamb nuts installed. Thankfully we didn't loose the pintle so a simple trip to the hardware store will supply the parts to fix this properly.
I broke the last handle I had on a decent hammer, so now that it's cooling down it is not as crazy to have a fire going and there is no point having a fire without red hot meal is there? I just bought a new handle from the hardware store. I'm quite happy with it. It wasn't varnished which is the biggest problem I've found with most new handles you can buy.
Hmmm, good starting point, but difficult to work metal like this.
Still some shaping to go. Lets get to it then.
I started off trying to be sensible and gave the plane a go. Unfortunately it wasn't really that useful. Because of the relatively radical shape of the handle it didn't really cut on the end of the handle. A Spokeshave or Drawknife would've been better tools.
Seeing as the plane didn't work I figured I'd give the rough old hatchet that we've had lying around for ages a go. Unfortunately it is the epitome of not sharpness and would be vastly improved with an hour or so of work. But this did remove material fairly well and though it was a bit rough in the end it worked.
I thought I should probably take a little care of what's left of the edge on this and put a piece of an old pallet on the anvil I was working on. Eventually I will get around to sharpening it properly. But until then I don't need to worry too much about the edge.
This is what the handle ended up needing to fit the head of the hammer. I didn't realise the eye was so small. If I end up making a hammer then this is something I will have to be careful of to ensure that the eye is a reasonable size so that an off the shelf handle will work.
Nearly there. Can you spot what still needs doing?
Wedges!! though perhaps not with sweet chili sauce or sour cream. But still one of the many useful things that make this much easier.
And here it is all finished.
Of course I had to test it. However there wasn't much to see past this point. Particularly after I started to try some charcoal Briquettes. They looked like they were getting hot, but there was no heat in the body of the fire and it died as painful death. Perhaps something to do with this?
Anyway, it could also be that I'm using a dodgy forge design and it's blocked up with ash and dirt. A very distinct possibility.
Now that I have a working hammer however, all that I will need to do is light a fire, get a draft and I can get to it. So look out for more forging posts over the next few months.