Thursday, 30 June 2016

How to hold this?

After going through building the stock for this part I'm going to make with the mill the other day I tried to work out how I am going to hold it in the mill.

As you can see there is a groove all the way around which I had planned to use to hold on to with some clamps and T nuts.

These ones in fact. However what I discovered is that all of the shorter screws that I have are a much coarser thread than what the nuts have so I'd need to pack underneath the longer ones quite substantially. Not impossible but I'd rather avoid that if I can.

So I figured I'd use the little vice that came with the mill. Some comprimises there also, but better than having to space it out by a mile. However do you think I could find it? Option C it is then.

Here we have some longer bolts that we faced the head down a little so that they will fit in the T slots. It isn't ideal as they have a hex head rather than a square head but they do lock in the slots nicely enough. The only problem is that the cutter is sitting on the block and the spindle is pretty close to the ideal height now so it would probably crash into the hold down bolts. Less then ideal.
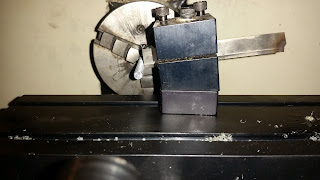
But there is a solution. I have chucked the first bolt up in the lathe and I will part it off as short as possible which will give me plenty of length to hold this down.
Here we are, all set up and ready to go. I probably won't do this before the weekend as I don't want to be making too much noise at night and upsetting the neighbors. That can come later.

So keep an eye out and I will try to get some video of the parting off so anyone that knows a bit more than me can point out where I am going wrong.

Cheers,
Rex

Sunday, 26 June 2016

Drawing with Fusion 360

So I've been having a quick look at Fusion 360 from Autodesk as a program for generating the G-Code for running the CNC Mill. It is possible to write the code by hand, and I have done a little of that for the lathe, and probably will continue to do that for the lathe. However the mill can produce more complex shapes and it will be easy to pass large, complex programs onto it for machining.

Probably most important however is that I can run previews of the toolpaths and the software can calculate the best path using various optimizations or change a tool quickly then re-calculate.

Before I can generate G-Code out of Fusion, I need to be able to draw in it. I am starting by drawing the stock I'm using to make the part out of.

This is a piece of some kind of machineable wax that came with the Mill when it was given to me. It already had the slot in it which I am planning on using to hold down this with. It should be pretty easy on the tools which is good because some of them are pretty blunt.

Here goes. I've had no training on Fusion 360, only other CAD software so I am working mostly from guesswork here. But I did manage to make this part.
I am liking some aspects of this software. It has a number of elements similar to Pro/Desktop which is was I first learnt. Everything can be drawn from constrained sketches which are then transformed. This means that if you've made a mistake in a sketch you can go back to it, fix the mistake and re-calculate all of the parts that are dependent on the sketch. Also being constrained you can make parts that will scale with only one change in dimension.

Keep an eye out for some chips coming soon.

Cheers,
Rex

Tuesday, 21 June 2016

Yes... I did buy another car

Some of you may have seen on facebook the other day I had a picture of me with a car on a trailer.


The reason for this is I have a friend with some paddocks, and we felt they needed a little bashing. So between us we have obtained a couple of cars that fit into the category of Paddock Bashers. This one is mine. It's an old Nissan Pulsar SSS. It's got a pretty big ding in the front but probably could have been put back on the road. But that would have been more than the car is worth to do that.

Here we are ready to have a go. We stripped the interior and replaced the key with some switches. Why? Because we can. And the plan is to race each other to see who has the best, worst car of all of us. I can justify the whole key thing, the key does fall out of the barrel. But really it's just because I want to.

Time for this seat to come out. Really thankful for the rattle gun for my birthday. Makes this sort of work much easier.
What have we here, hiding under the seat? A big old CD stacker. Amazing what you can find in a second hand car. If I can make it work on the bench at home I might do something with it, otherwise it's old technology that has well and truly been replaced by my now old. But still very useable iPod.

And it's gone. I didn't get any more photos as we were having a bit too much fun. But once the weather clears up a bit and I head up there when there's some sunlight I will get some pictures to show what we have done to the interior. A Vast improvement I think. In weight anyway.

Cheers,
Rex

Sunday, 19 June 2016

I have control over the fire now

As I mentioned in my last post about setting up a waste oil burner I have got an extra needle valve for controlling the air to the nozzle separate to the air going into the tank. You can see the new valve on the left of the tank above, at the base of the handle. It's a bit easier to control than what I was doing before:
I managed to run out of Kerosene for the blowtorch so to light the burner I was experimenting with using a little methylated spirit burner just below the intake so the flame was getting sucked into the pipe. It worked, however there is a leak in the burner so I'll have to make another one or find another way to get this working as the burner goes out almost as soon as the flame is removed from the intake.


The next thing I will probably try is to make a low pressure high volume burner. Using my reversible shop-vac as an air supply. Another thing I may try is to get a Delavan burner nozzle which have removable jets and can be configured with different spray patterns. This would give me quite a bit of flexability in terms of what I do with the burner.

Cheers,
Rex

Wednesday, 8 June 2016

I'm Glad something was warm on the weekend

On Sunday we managed to find the warmest thing in town, and a good thing too. It would've been a fairly miserable, cold day otherwise.
That's one very big heater. This is the NSWGR Beyer Garratt 6029 which was running tours out of Bathurst over the weekend. We decided to drop by and have a look. I also managed to grab some video of it starting and also of it climbing the hill at Tumulla.

This is a piece of burned coal that managed to get caught in my hair when we actually rode the train. It was fair getting going so there was a good bit of draft. With a stronger draft the fire is made hotter but it also causes stuff like this to get pulled out of the chimney.

This is a video I took of it starting from the platform at Bathurst:


And here it is going up the hill at Tumulla. I didn't have a tripod for my phone and my hands are far too shaky to hold a camera for this sort of video so I sat the phone on top of a star picket as a kind of monopod. While not being perfect I think it dis help greatly.


That's all for now. I'm off to find another heater though.

Cheers,
Rex

Friday, 3 June 2016

Sparkline

So today at work I came across a really cool feature in Microsoft Excel 2013. Enter the Sparkline.

Probably more of a gimmick but they look cool. They are a little chart that is just inside a cell. It can be a line,column or win/loss. They are easy to create and could be used if you don't the all of the features and hassle of a full chart.

Here's how to create a sparkline in excel:
Start by putting you data into one column. There aren't any labels so they don't really matter for this.
Then in the Insert tab on the ribbon find the Sparkline section and choose the style you want. This time we will create a win/loss style.
This will open the Sparkline dialog.
Select the data range. Make sure you don't select any labels as this will give an error.
When the Sparkline is created it will be small, the size of your cell so you will probably want to make the cell bigger.
And there you have it.

Probably just a gimmick but might be useful eventually.

Cheers,
Rex