Showing posts with label Computers. Show all posts

Monday, 14 November 2016

Amazing how much difference having a clear space to work makes

Today I took a day of leave as recovery from the weekend I just spent training on the James Craig. I figured I would still be pretty tired and not having to get up too early would probably be a good thing.

With half a day to fill and it raining a bit too much to get the brakes finished on the Land Rover I decided to get the desk inside where I keep my radios & computer tidied up.
This is more or less what it looked like before I started to clean up. Actually probably worse as there has been a fair bit of time for junk to accumulate since that photo was taken.

I also turned the desk around. This means that I can access the back side where the 12V power supply is. And it also lets me plug & unplug anything into mains power depending on what my current project is.


This is what I have now. If I put my laptop away then I have a huge desk that can be used for whatever project I have at the time. This extra bench space will be very useful with the couple of electronics projects I have in the back of my mind coming up.

Cheers,
Rex

Tuesday, 2 August 2016

Spacing it out

We've managed to fill up all of the hard drive space I put in the NAS (Jerry) Thankfully it hasn't been too critical and we have been able to continue as normal basically without noticing that we can't store anything more on there.

However this is something that does need to be fixed. So I bought some more hard drives. I'm using Western Digital Greens from ebay with the head park adjusted with WDIDLE3 to extend their life. I know these are not ideal drives for use in a NAS, but they are cheap and the RAID 6 configuration means that I have time for a new drive to arrive if one dies.
Here I am setting the head park idle time to reduce the number of head parks which can wear out these green drives quite quickly as the default time is very short. It makes sense when you think they are designed for absolute minimum power consumption, but it can be a problem.
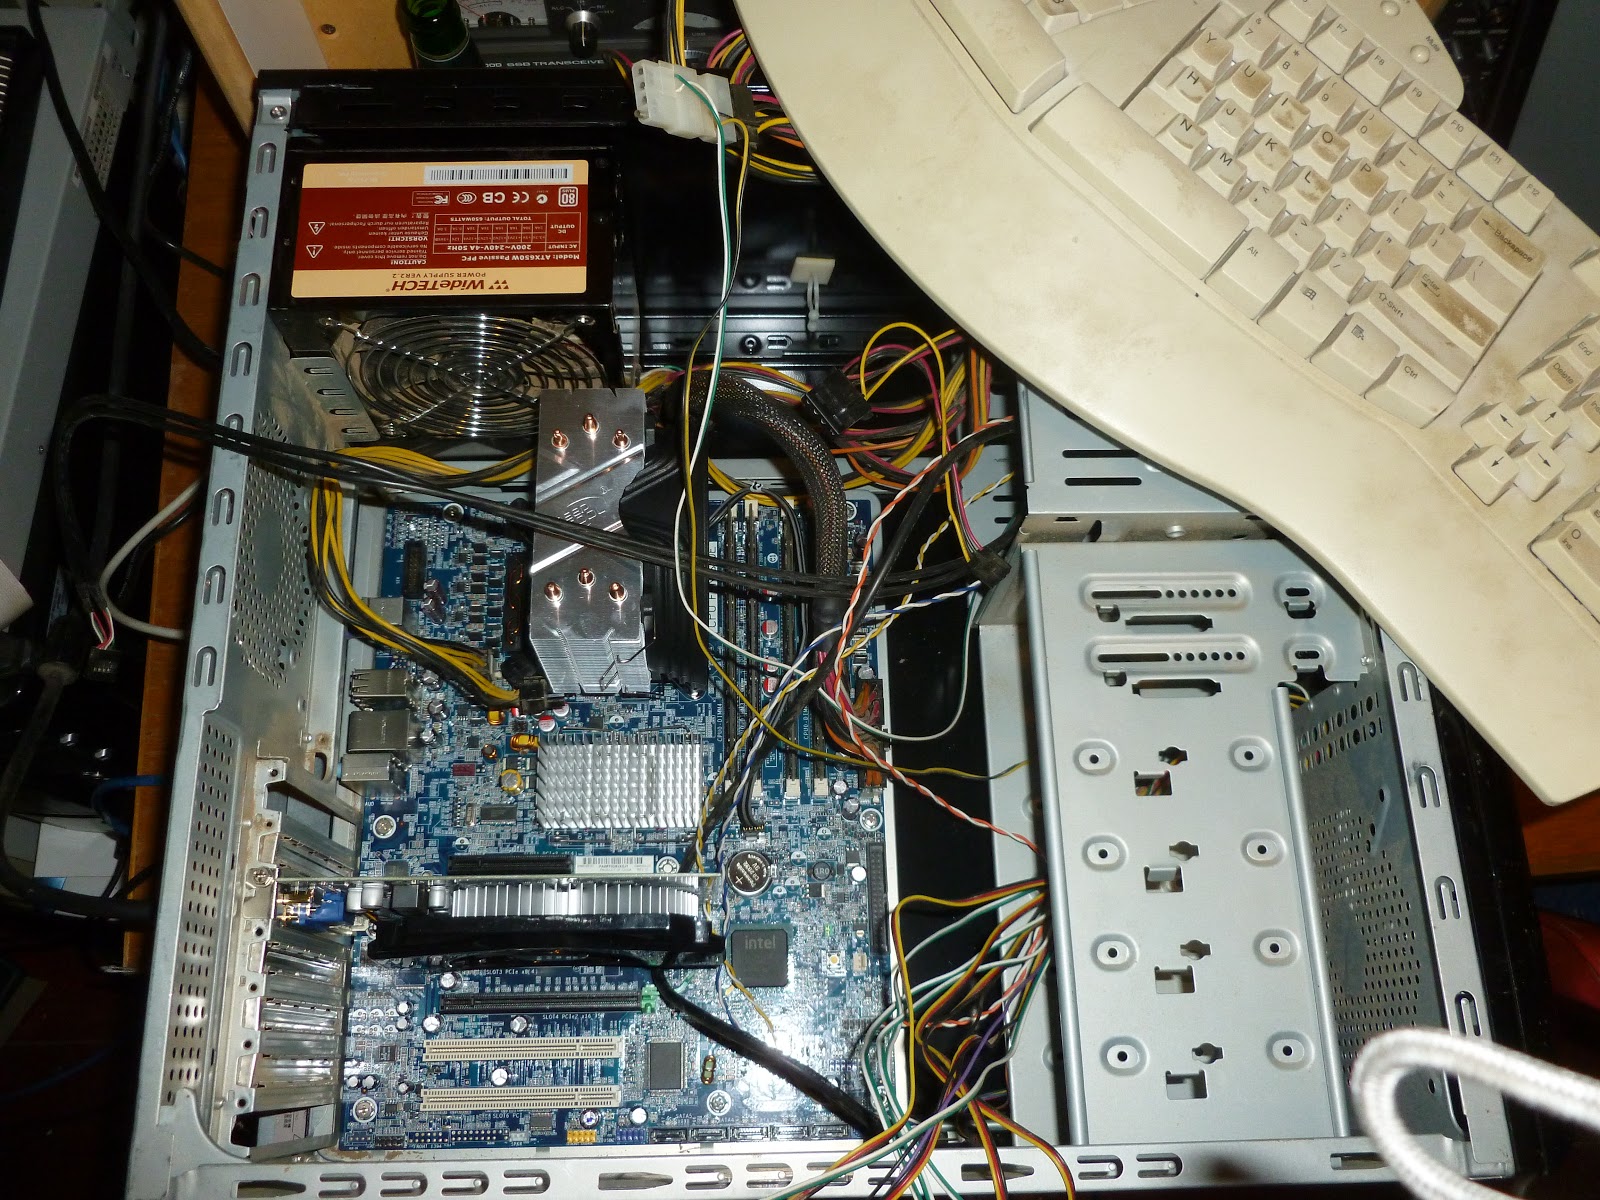
I don't have a computer set up as a test bench for doing stuff like this so I have to pull some cables out of my normal use desktop.It's not too bad to have to do. But all the same having the space for a dedicated machine with swappable drive bays for this sort of thing would be nice.

Make sure you label your CD's!!! I had a dozen or so un-labeled disks I had to go through to find my boot CD. They have now all been labeled and put in a sensible spot.

The new drives are in. This means that I just need to expand the array and it will all be done, right? Not quite. Turns out that you can't expand an array using a p400 RAID controller if the battery backup for the cache is busted. Thankfully these parts can be had for only a few dollars from ebay.
The replacement part.
Drag the whole mess out.
Apparently orange = bad.
And here we have it. The new part in and all ready to go. It was a pretty simple replacement however there were one or two parts that had to be jiggled the right way to come free.
Here we are, expanding the array. Unfortunately I think the whole data set has to go through the cache on the card which is only 256 mb or thereabouts. The array is approximately doubling to about 4.5 tb which is a lot to have to shift through 256 mb. I'm expecting this should be finished copying by the end of the weekend but that is pretty much a guess.

Once the RAID card has expanded the drive I think I will need to expand the filesystem so I will do a writeup on that because I will need to remember as well.

Cheers,
Rex

Tuesday, 26 July 2016

It can be better to pay first

Paying for a good tool or a part can be a bit offputting as the initial expense seems to be much higher. However cheaping out and getting something that might not work properly will most likely be more expensive in the long run.
I have had that idea highlighted for me while I was setting up a KVM switch so that I can run both the beaglebone (Mill) and the 386 (Lathe) through the same monitor.
These are the parts I tried to use. I got the keypad, kvm and an extra VGA cable from The Junktion for $5. All of them seem to work and are in good condition and would probably work in a more normal situation.

This is the KVM switch. It's better than the last ones I had because it gets all of it's power from the computers. However it's a bit different in that it needs a set of keys to be pressed on the keyboard to change the controlling computer. I don't use scroll lock much, particularly on these computers so that won't be a problem.

The stack of adapters. The fan I had wasn't working so this was going to be fine for a test. I do have an HDMI to VGA adapter somewhere that will let me have a fan and get video out; but I can't find it at the moment so I'll make do.

And here we have the rat's nest. I don't do a lot of cable management because I am changing things so often that having a strict management system would get more in the way then a mess like this. Regarding noise and crosstalk between the cables, anything back here with a signal is shielded and the only thing with significant power other than the mains cables is the drive to the stepper motors which is reasonably heavily shielded. So I don't think noise will be a problem and I certainly haven't had any issues yet.

With everything plugged in I powered it all on and... It... didn't work. It would display the screen from the 386 but I could not change it to display from the beaglebone. I think what has happenend is the KVM switch is expecting to be plugged into PS/2 ports (That's why it has them I guess) but I am plugging it through an adapter into an old style keyboard connector and that's it. No mice or keyboard from the Beaglebone.

I think this is causing it to run out of power and just not work properly.

To fix this I am doing what I should have done in the first place and buying a cheapy from ebay that is completely passive. From the picture of it's guts I saw it is very basic which will be perfect for this as then there is less chance it will not work.

So sometimes it pays to just buy the right thing in the first place. But for a hobby, while it can be frustrating and demoralizing it usually isn't too bad. In a business situation however it can cause major problems.

Cheers,
Rex

Sunday, 26 June 2016

Drawing with Fusion 360

So I've been having a quick look at Fusion 360 from Autodesk as a program for generating the G-Code for running the CNC Mill. It is possible to write the code by hand, and I have done a little of that for the lathe, and probably will continue to do that for the lathe. However the mill can produce more complex shapes and it will be easy to pass large, complex programs onto it for machining.

Probably most important however is that I can run previews of the toolpaths and the software can calculate the best path using various optimizations or change a tool quickly then re-calculate.

Before I can generate G-Code out of Fusion, I need to be able to draw in it. I am starting by drawing the stock I'm using to make the part out of.

This is a piece of some kind of machineable wax that came with the Mill when it was given to me. It already had the slot in it which I am planning on using to hold down this with. It should be pretty easy on the tools which is good because some of them are pretty blunt.

Here goes. I've had no training on Fusion 360, only other CAD software so I am working mostly from guesswork here. But I did manage to make this part.
I am liking some aspects of this software. It has a number of elements similar to Pro/Desktop which is was I first learnt. Everything can be drawn from constrained sketches which are then transformed. This means that if you've made a mistake in a sketch you can go back to it, fix the mistake and re-calculate all of the parts that are dependent on the sketch. Also being constrained you can make parts that will scale with only one change in dimension.

Keep an eye out for some chips coming soon.

Cheers,
Rex

Friday, 3 June 2016

Sparkline

So today at work I came across a really cool feature in Microsoft Excel 2013. Enter the Sparkline.

Probably more of a gimmick but they look cool. They are a little chart that is just inside a cell. It can be a line,column or win/loss. They are easy to create and could be used if you don't the all of the features and hassle of a full chart.

Here's how to create a sparkline in excel:
Start by putting you data into one column. There aren't any labels so they don't really matter for this.
Then in the Insert tab on the ribbon find the Sparkline section and choose the style you want. This time we will create a win/loss style.
This will open the Sparkline dialog.
Select the data range. Make sure you don't select any labels as this will give an error.
When the Sparkline is created it will be small, the size of your cell so you will probably want to make the cell bigger.
And there you have it.

Probably just a gimmick but might be useful eventually.

Cheers,
Rex

Tuesday, 10 May 2016

Something a little different

So I dont like doing things the normal way. Here is more evidence.

This is an iMac G3 and I am planning on setting it up to control the CNC mill and hopefully I can find a way to use it to drive the lathe as well.

Tuesday, 12 April 2016

A bit of fun, What's inside a Hard Disk Drive?

One of my relatives who recently got a computer upgrade had the old Hard Drive from the old machine and was concerned that there could be some sensitive data on it still. So, being the helpful young man I am I volunteered to destroy any data that might be hiding in there still.

This is where we start, It's an older IDE drive that I could probably use in one of my machines, but I have given in to the SATA cables and now I have a very hard time justifying why I should be keeping a drive that needs a ribbon cable, so I won't.

These are what hold the top on. These are just a normal Torx T8 screw. If you buy a small toolkit from Jaycar or many other electronics hobby stores you will probably find it includes some of these.

There's a sneaky one here hiding under the label. Make sure you unscrew it because otherwise no matter how hard you try, that top isn't coming off.

Once all the screws are out just prise around the edges with a screwdriver or another fairly thin tool.

The top should come off fairly easily after that, if not look for more screws under the label. (Ask me how I know.) If you look closely you can see there is a bead of some kind of semi flexible sealant around the edge of the lid. This is to keep air and more importantly dust out. These drives are assembled in a cleanroom type environment as any particles can significantly reduce the life and reliability of these.
Some drives do have a vent in them. Those that do always have some kind of filter over the vent to keep contamination out of the drive. The vent is required as during operation the internals of the drive change temperature. This causes the air inside to expand and it needs somewhere to go, otherwise it may damage the case.

Here we can see the interesting parts of the drive. The big silver disk is the platter where the data is actually stored. The metal arm that is pointing to near the center of the platter is the read/write head. The very end of it floats on an air bearing when the drive comes up to speed. If the air bearing fails for whatever reason the head can crash into the platter which can cause scratches and other damage.

This is a short video I put together of me destroying this Hard Disk. Don't watch if you have strong Hard Drive sympathies.

For anyone who doesn't want to load the video this is what the top of the platter looked like after machining it with a screwdriver bit.

I don't think anything is going to be recovered from this drive. But to be sure I'm going to be keeping a magnet on top of it and moving it occasionally, just to be sure.

If there's anything else you want to see inside and/or tortured like this drop a not in the comments and we'll see what I can do.

Cheers,
Rex

Monday, 4 April 2016

CNC Mill Moves, With evidence

The mill is running again, in it's new spot inside the house so I should be able to get to work on it a bit more often. This is where it is now, on the new desk with my laptop beside it running the controls
I had the lab power supply out to see if I could run the spindle off it. However even with the knob for current all the way up it was still getting limited so I think that's going to be a no-go. The good news is that I can still run it from the accessories port on the Lathe control box because I haven't gutted it yet.
It's a little bit dirty but not too bad and with the shield shut then there shouldn't be any issues with bits getting into the rest of the room which is good considering this is above my servers.

Here's the interface I am using for now. I'm hoping to get Machineface/Cetus/mkwrapper working so I can use any computer to control this, but for now I'm connecting with a VNC connection because mkwrapper doesn't seem to like being run in such a way as it can be accessed from outside that computer.

Finally, here is a short video I took while I was making sure everything still worked. I still need to set the maximum speed and tune the acceleration for each of the axies but I will get to that eventually. You can hear that when it's set right it's nice and smooth. But otherwise it sounds like somethings grinding.


Cheers,
Rex

Monday, 28 March 2016

Getting closer

So I finally have a space inside for me to work on the CNCs. This is a drastic improvement over where they were. outside. Where I would freeze in winter, cook in summer and be attached by mozzies at any time of the year.

I had planned to build a set of bespoke shelves that would allow me to put the servers above the machines rather than below them as you see here. However that didn't quite work out so in order to be able to actually get these inside before it gets cold I got a pair of shelves from Super Cheap Auto in town
I have not complaints about these shelves. They are fairly solid; and while I needed to give them a few taps with the hammer to get them to clip together fully that does mean that they won't be falling apart any time soon.
Each of the pieces are fairly flimsy, but once everything is together it becomes fairly rigid and I have no problems putting as much as will fit onto these shelves as inevitably will happen.

The next thing I am looking for is an old monitor that I can connect to the computer for the Lathe so I can control it and ideally a rack mount cabinet that I can fit both of the servers in along with the switch so that the cables are a bit neater and I can put them away from any possible shavings that might be leaking out of the machines.

I have a few things coming up. We got some good photos at the Lakemac Heritage festival so I will be sharing those. These CNCs will be running again very soon and I have a few things I would like to make with them that might actually happen now. And I have a Hard drive that I have been asked to destroy for data security so I will go through the details of construction with that.

Cheers,
Rex

Tuesday, 8 March 2016

There's the right way, then there's my way.

Sometimes you just can't do things the "right" way straight off the bat.
This is a great example of that. I've been trying to get Jerry (The NAS server) working so we can share files among our LAN. Unfortunately the RAID card in there doesn't like to play nicely with *BSD so I've gone back to Linux which I know. And has drivers for the card.

Unfortunately I couldn't find an easy way to boot from the USB drive that FreeNAS was using. So I had to use a normal Hard Drive. The only one I had spare with SATA was a little 2.5" laptop drive. That is fine, except I don't have 2.5" caddys for the bays in the front and I can't see any other spots to put this. So I've attached it to the backplane and you can see to do that it couldn't be sitting right on the bottom of the tray. However if I left it like that there could be problems with dust or rodents. So I slipped a normal caddy in, lifting up the front of the drive a little to slide it under.
Hmmm, a bit sketchy, but it let me test this idea without spending money or stupid amounts of time on it.

It's in the bottom tray here, just before I boot to test this. The middle caddy has my big drive and is unplugged to make sure it doesn't cause issues. The top one is just a blanking caddy.

So sometimes you can get away with doing something without having everything perfect. So don't let the fact that it's not the best way to do something don't let it stop you from doing it.

Cheers,
Rex

Saturday, 5 March 2016

Nathan's Computer Benchmarks

In may last post about Nathan's Computer I promised to share some quick benchmarks and thoughts about the build. So here they are, I'll start with the benchmarks. I just used Cinebench because that's a name I remembered and I wanted to see how fast the 8 threads would go through the picture on the CPU test. For monitoring temperatures I used Speedfan because I've used it a lot in the past.

 This was right after we got everything working before playing around with drivers or graphics cards. A respectable score for the CPU of 369. A reasonable improvement over my laptop.

Here we also tested the GPU, a GeForce GT730. This was the one that we ordered before finding the case with some stuff in it. The framerate of 30.39 is pretty close to 10x what my laptop scored.

And here we see the final configuration. The GTX550 that was in the case Nathan found. As we can see the score is nearly twice what the GT730 got so that was the card we left in this machine.

All the time these benchmark were running I was watching the CPU temp with Speedfan. I don't have any screenshots there, but none of the cores really went above the mid 60 degrees C.  These temps are much, much better than I have been used to with my laptop over the last few years and almost makes me want to build a personal desktop machine so I don't have to worry about the system killing itself when there is a constant high load. The cooler we used was a Deepcool Gammaxx 300 I was a bit nervous about having such a big heatsink hanging off the motherboard without any bolts going through. However if you don't push on the actual cooler itself then it seems to stay on fine. If there are problems however I'm sure we can find a solution at the hardware store.

If I were to do this again would I change anything? Probably not. However I probably would've looked longer for a motherboard. While the one we got was good and had everything we needed it is a custom HP part and doesn't have a standard power socket pinout or any labeled power switch pins. Eventually I did find solutions to each of these problems but it took a lot of searching. Because not many people are buying the motherboard out of a HP z400 to stick it in a completely different system without any of the HP stuff. So going down that route can cause headaches.

All in all I think it has been a good project and Nathan seems to be happy with this machine so far. If you would like to see some of the other projects I have on the go at the moment follow this link to my Projects page which I keep updated with the status of my other projects.

Speaking of other projects, now that this is finished I'll have to start on something else. Or perhaps finish building the shelves for the CNCs so I can do some more work on them.

Cheers,
Rex

Wednesday, 2 March 2016

Nathan's Computer: The conclusion

So the computer I have been building for my younger brother Nathan is now finished. He now has it at his home and is finalising the driver install and starting to set up the games that we actually built this machine for. We managed to save quite a bit of money by finding a case which actually had nearly everything we need inside it.

It was a little grotty but we needed a case and DVD drive. While we also didn't need anything else that was in the case we made good use of it because it brought the total system cost down for Nathan. In the end we had ordered RAM, a Power Supply Unit and a graphics card that we ended up using from this machine because the ones in here were better than what had been ordered.

Unfortunately it was very dirty and dusty. We tipped it up on end and all this fell out onto my nice, clean(ish) carpet. Luckily I had Nathan there to help me, so after removing everything from the case he cleaned it all with the vacuum cleaner and did a fairly good job of it I must say.

We were very, very excited when we found this. There was a total of 16GB of RAM in the case. Somewhat more than we had expected to be putting in there right away. So right off the bat Nathan got a RAM upgrade. Also a PSU upgrade as the one in the case was about 100W bigger and had other comparable specs. Also a massive graphics card upgrade. Comparing the GT730 we had bought and the GTX550 that we found there was just about an exact doubling of the Cinebench OpenGL test. From 30 FPS to 60 FPS. It was a huge improvement.

This is how we tested the system initially. If my experience building computer has taught me anything, is that test at every possible point. In this case we tested with the absolute minimum of parts in the machine. RAM, PSU, CPU, CPU Cooler and Graphics card.

Unfortunately I got a bit excited and forgot to take a picture of the first POST screen. Suffice to say that it POSTed and I was very happy and there was much rejoicing.

After that we put everything in and got windows installed. Another very happy moment.
You may have noticed a funny circle in the front of the case:

This is actually a fan controller/temperature monitor that runs from 12V pulled from a molex connector on the power supply and (we guessed) 5V from a funny shaped connector neither of us recognise, let alone have attached to the PSU. So I did what I'm good at and came up with a solution. I cut the funny plug off then soldered the wires onto the 5V going to the power light. I checked the current draw on this when we tested that it was actually 5V using my benchtop power supply and the current draw was not registering on the scale, so less than 0.5 mA which I was quite happy to pull from just about anywhere.
The astute amongst you will notice that the above picture is showing an adapter for 20pin ATX power supplies to drive 24pin ATX motherboards. I had this lying around from another project that I ended up doing the right thing and buying a new PSU for.

The tricky thing about buying parts off ebay is that they may not always work together. The motherboard is from a HP Z400 workstation which looked fine on paper. However initially it wouldn't POST. This is because HP decided to use +12V on some of the pins of the 24pin plug where the ATX standard that everyone else uses at +5V and +3.3V. Not very useful. So I had to splice in this adapter that I already had to a molex Y-splitter so we can get the extra +12V power.
This is what it looked like before installation.

And here we see it in situ.

So there you have it, the build is finished and tested. In the next few days I will do another post detailing the parts list, final cost and some benchmarks (also some thoughts on that parts I used) so keep an eye out for those if you are interested.

If you want more detail on how to build a computer let me know. I have another build coming up in the next few weeks that won't be as crazy as this one but will still give me an opportunity to show how it's done in great detail.

Cheers,
Rex