I broke the last handle I had on a decent hammer, so now that it's cooling down it is not as crazy to have a fire going and there is no point having a fire without red hot meal is there? I just bought a new handle from the hardware store. I'm quite happy with it. It wasn't varnished which is the biggest problem I've found with most new handles you can buy.
Hmmm, good starting point, but difficult to work metal like this.
Still some shaping to go. Lets get to it then.
I started off trying to be sensible and gave the plane a go. Unfortunately it wasn't really that useful. Because of the relatively radical shape of the handle it didn't really cut on the end of the handle. A Spokeshave or Drawknife would've been better tools.
Seeing as the plane didn't work I figured I'd give the rough old hatchet that we've had lying around for ages a go. Unfortunately it is the epitome of not sharpness and would be vastly improved with an hour or so of work. But this did remove material fairly well and though it was a bit rough in the end it worked.
I thought I should probably take a little care of what's left of the edge on this and put a piece of an old pallet on the anvil I was working on. Eventually I will get around to sharpening it properly. But until then I don't need to worry too much about the edge.
This is what the handle ended up needing to fit the head of the hammer. I didn't realise the eye was so small. If I end up making a hammer then this is something I will have to be careful of to ensure that the eye is a reasonable size so that an off the shelf handle will work.
Nearly there. Can you spot what still needs doing?
Wedges!! though perhaps not with sweet chili sauce or sour cream. But still one of the many useful things that make this much easier.
And here it is all finished.
Of course I had to test it. However there wasn't much to see past this point. Particularly after I started to try some charcoal Briquettes. They looked like they were getting hot, but there was no heat in the body of the fire and it died as painful death. Perhaps something to do with this?
Anyway, it could also be that I'm using a dodgy forge design and it's blocked up with ash and dirt. A very distinct possibility.
Now that I have a working hammer however, all that I will need to do is light a fire, get a draft and I can get to it. So look out for more forging posts over the next few months.
So I have finally got everything in place to use my CNC Lathe. To test it I ran it in manual mode. I stuck with the default settings of 80 mm/min, 0.25mm X incremental feed & 0.1mm Z incremental feed. I had a play with the spindle speed just to see what would give the best finish. There didn't seem to be much difference but I was just using a pretty soft piece of some kind of plastic.
This was all I did, the spindle is quite loud so I didn't want to be running this too late. I'm not quite sure what kind of plastic this was but I did get a fair few pieces of what seems to be Delrin that I will be experimenting with once I work out how to hold them as the chuck doesn't open far enough to hold them.
This machine is fairly old and is controlled from a 486 running windows 95. Not the world's oldest machine. But fairly old. The interface is all DOS based so to improve startup time I have disabled the windows GUI entirely and just boot into DOS. The interface, while definitely classic it isn't too hard to use or hard on the eyes, which can be a problem with some of these older user interfaces.
I shot a video of me machining this piece with my phone sitting on top of the safety shield. During the video you can hear the different pitches as I adjust the speed of the motor to see if that would change the finish. Watching the video and also while using the machine there is a lot of backlash evident in the Z axis so I will try to work out what is causing that and hopefully remedy it.
With this now working I should be able to power the spindle for the mill from the accessory port on the control box for the lathe. This will give me a chance to fully test and even start using it to make parts.
I have the manuals for this lathe so I will probably put together a program that will allow me to turn down the Delrin blanks so I can mount the securely in the better chuck. But we'll see about that.
The mill is running again, in it's new spot inside the house so I should be able to get to work on it a bit more often. This is where it is now, on the new desk with my laptop beside it running the controls
I had the lab power supply out to see if I could run the spindle off it. However even with the knob for current all the way up it was still getting limited so I think that's going to be a no-go. The good news is that I can still run it from the accessories port on the Lathe control box because I haven't gutted it yet.
It's a little bit dirty but not too bad and with the shield shut then there shouldn't be any issues with bits getting into the rest of the room which is good considering this is above my servers.
Here's the interface I am using for now. I'm hoping to get Machineface/Cetus/mkwrapper working so I can use any computer to control this, but for now I'm connecting with a VNC connection because mkwrapper doesn't seem to like being run in such a way as it can be accessed from outside that computer.
Finally, here is a short video I took while I was making sure everything still worked. I still need to set the maximum speed and tune the acceleration for each of the axies but I will get to that eventually. You can hear that when it's set right it's nice and smooth. But otherwise it sounds like somethings grinding.
On the weekend I had the opportunity to play with the CNC mill again.
We last left it running, with the power supply integrated into the case. The old computer power supply had enough juice to run the beaglebone, but unfortunately not enough grunt to energize the stepper motors. As soon as I tried to power them up some kind of overload protection would shut the whole thing down.
To help pinpoint the exact problem here I connected my benchtop powersupply in parallel with the computer supply over the stepper driver input. This worked and I could switch machine power on and off without issue. To see if the problem was just an initial surge overloading the PSU I unplugged the benchtop supply to see if everything would still run. It did; but the PSU started to make a funny sound and I'm sure I could smell something wrong. I plugged the benchtop supply back in and the noise went away immediately, with the smell disappearing shortly after.
So it looks like I don't have a big enough power supply. The solution? I've ordered a 240V to 12V 20A swichmode supply from eBay. At the price I decided to get the 20A model as it might be a little marginal at the rated power. By getting well over I should have plenty in reserve, particularly if I want to run the spindle off it as well.
Hopefully this will arrive by the end of the week and I'll be able to install it either next weekend, or the weekend after.
Busy times at the moment, I've got something else on order from eBay that should arrive early this week. That will be an interesting little project. And I picked up something interesting from the market today which I'll do a little post on as well. So keep an eye out for those coming up.
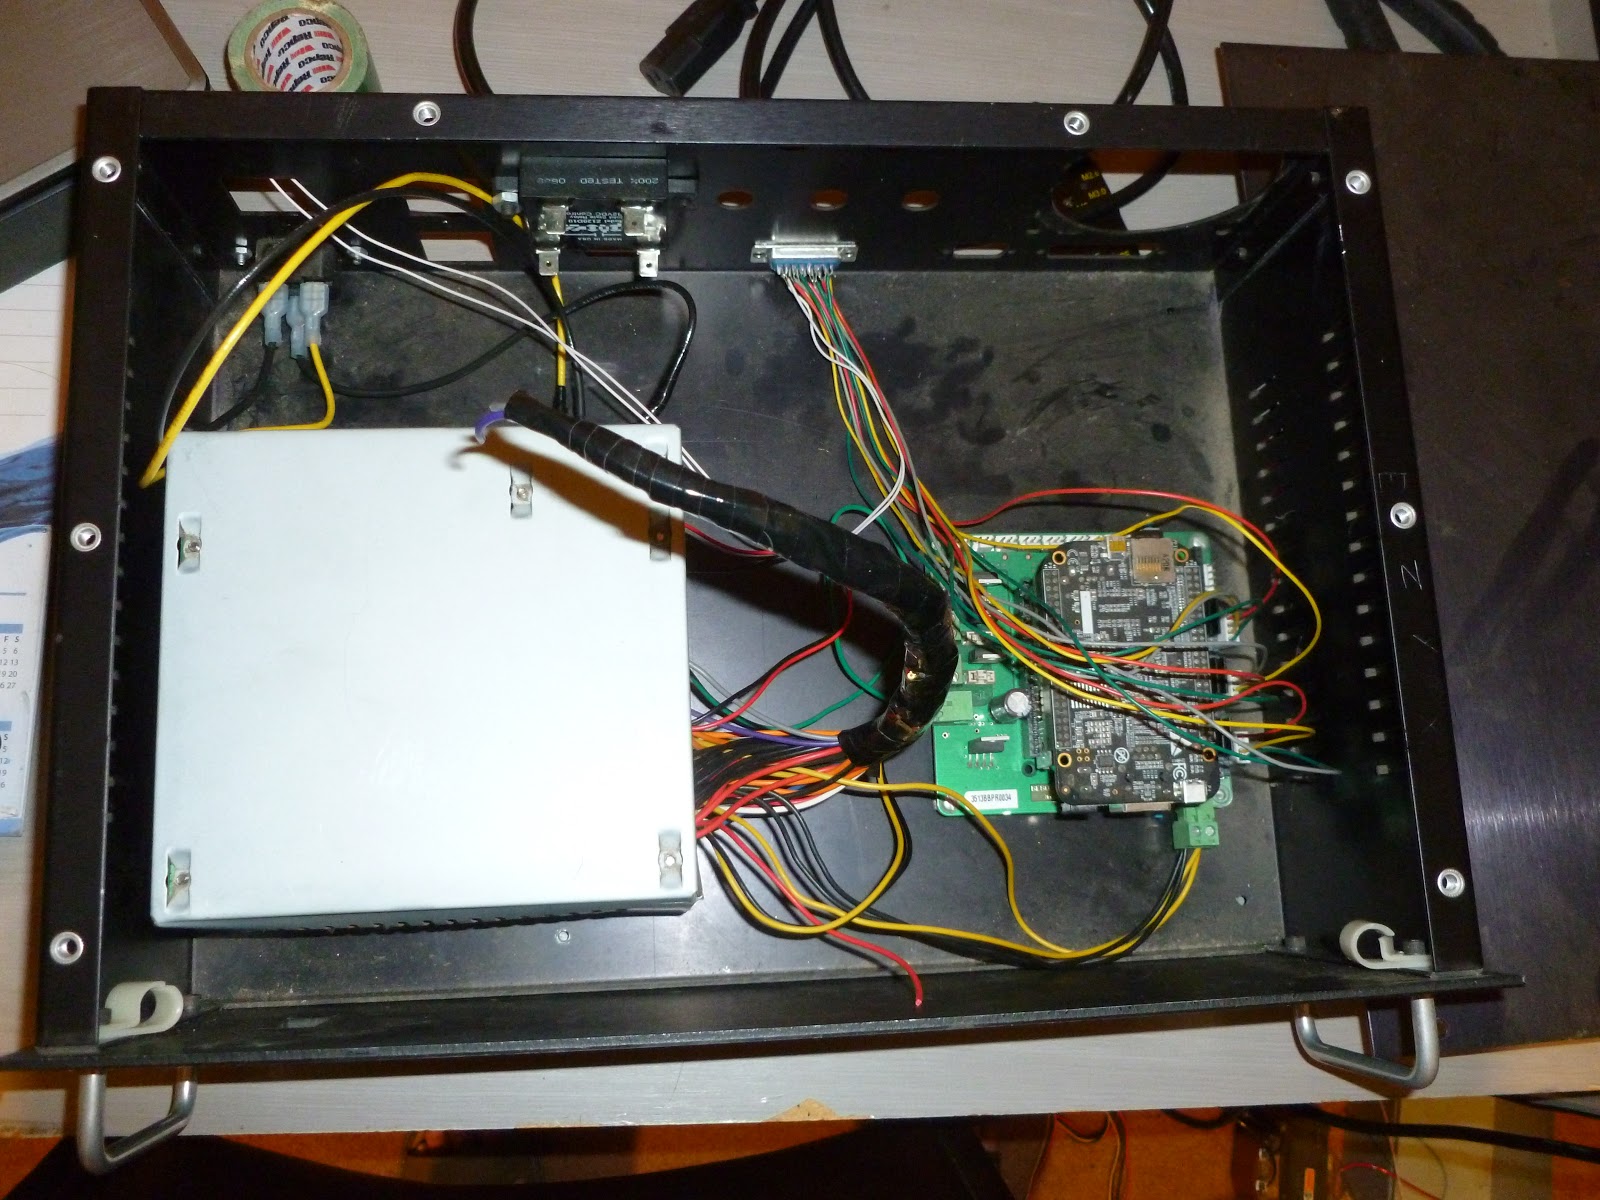
I've finally got more work done on the Mill. I was hoping to get a shot of the control box powered up with the laptop running the control software next to it for the cover photo. However it seems that I need to keep playing with the software a little longer.
Instead you get a photo of the finished product as it stands. I know the wiring isn't the neatest or prettiest. But you can take my word for it that it does work now. Follow on after the break to see how I got to this point.
So I wanted to use my new diy forge to make something recently. The only problem there is I didn't have a hammer to use as my housemate has been using his elsewhere for a while. My brother had a few old hammer heads that he has found around the place so I figured that with some of the old wood that has been in the shed for a while we could make a new handle for a hammer.
This is what we started with.
For a brief look at what is possible to do for free follow on after the break.
So one of the other projects I did some work on over the weekend was the Mill. I now can move all 3 axes and using the mkwrapper tool I can control it from my tablet, laptop or phone without having to put a screen onto the Beaglebone that is running the mill. Something I think I will have to add though is a button as part of the GUI that allows the Beaglebone to shut down cleanly without having to ssh into it. That shouldn't be too hard and will probably be one of the things I will work on along with the rest of the GUI now that it will move.
Below are some pictures of what I did. Not very exciting though mostly just soldering and tracing wires. I even managed to get 2 out of 3 motors spinning in the right direction.
This is with the Z Axis and the X Axis wired up, Z on the right, X on the Left.
Now all 3 have been done. The 3 unconnected wires will be used for e-stop and some limit switches I think, possibly for spindle speed manual override. I have another Cable that I will use for the other needed signals.
In the back right you can see the connections I have made so far. I will put a proper enclosure over the connection before I call this project finished.
This is a closeup of the final connection. The knot is for strain relief in the main cable.
Thinking back now even before I have finished there are some things I would do differently. If I were to start again I would probably not cheap out and use more plugs, one between each motor and an enclosure proably on the back wall, then the big grey cable would have a plug on both ends rather than being soldered to the mill at one end.
Anyway, full speed ahead and onward ho. If I get to the end and decide it isn't working then I'll change it.
I have another 1 or 2 projects that I got up to over the weekend coming up so keep a wearther eye out.
Not much to report tonight, pretty much got everything sorted for removing the head tomorrow. Got the exhaust disconnected from the extractors from under here:
And above here:
That was probably the nicest pair of nuts to undo today, even though there was only enough space for the ratchet to move 2 or 3 clicks at a time.
Got the bolts holding down the head off like this:
I only got to this state after removing a 11/16" nut holding down an earth strap. Unfortunately I didn't realize there even was a 11/16" spanner in the house, let alone that was the size for a good 20 minutes.
Also the manual says that the bolts holding the head on are 1/2" or 13mm. I tried them with a 13mm spanner and started to strip the 12 point head so I decided to buy a slightly smaller 1/2" deep socket. The fun thing about the 1/2" deep sockets sold at Bunnings is the hole in the middle is tapered, with the smaller end towards the bolt. This meant that the brand new tool I'd just driven across town and bought was actually not going to work. So after messing with sandpaper and getting nowhere a round file was found that was used to enlarge the narrow end of the taper just enough to be able to be pushed over the studs. However that is still not the end of the story. Because after loosening some of the bolts the socket would get stuck on the stud. The solution involved a hammer, a 1/4" drive socket extension and a sharp corner in the engine bay. By putting the extension down the middle of the socket so it was resting on the end of the stud, putting a sharp corner in between the socket and the stud I was able to tap them out. Thankfully.
By this time tomorrow I should have the engine in halves and some very interesting photos to show just how bad this engine has become.