Monday 31 October 2016

What a bunch of stick in the mud's

Yep, It's Stuck.

In the process of helping Mum & Dad move out to a new property we decided to take my ute and go for a tour, right up the back. Apparently to ground up the is pretty boggy and we managed to get my ute stuck in there. The ground was solid enough until after you drove over it. Once you did that and disturbed the crust then all the loose soft stuff below would just let you sink.

Then when we came back the next day with another ute it got stuck as well.
That lighter coloured mud was oozing out from under the wheel while we were standing there talking about what to do next.

This may have had something to do with why we got stuck.

We ended up getting a set of recovery tracks. (Not this brand but similar) and all of a sudden we were out. These things worked so much better than we thought. Even my 2wd ute with an open diff was fine. Until I reversed a little close to a tree for comfort and had to stop again.

The first one goes free.

We put some old carpet in front of the cars so that they had something to help stop them sinking through again. It seemed to help, particularly in the first bit getting up speed again.

We were stuck pretty well. There were a few diff shaped divots in the ground as well.

Cheers,
Rex

Wednesday 5 October 2016

Long weekend, Means more time on project cars

So with Monday being a public holiday for me I decided to get some more work done on the land rover. I didn't get a whole lot done but I made some good progress on fixing what was stopping the car from moving properly. First I removed the screws that hold on one of the brake drums.
Some jobs just can't be done without the proper tools. In this case an impact screw driver. Greatfully borrowed from dad. Turns out this was the easiest drum to do. Later in the evening I tried to get the fronts loose. No luck at all. Until I brought out the blue wrench. With a little bit of heat I managed to get the screws free. I didn't get the front drums off as they were still pretty stiff and I didn't want to bang too much as it was starting to get late.

What I did manage to do however was completely loose my brake pedal. No, It was still on the floor. It just went all the way there without any resistance. The brakes were always a little spongy since I bought it so they were on the to do list. But this made it a bit more urgent.
Could this be the cause? The inner part of this reservoir seems to be for the clutch as it was still working and had a bit of fluid still there. However the outside did not have any left at all.
The fix? No. But the first step. After filling the reservoir up I could hear the master squeezing something around. For a little I was worried that the master may be dead and started thinking about ways to test that. Then I realized. I was overthinking this.
If the reservoir was empty then the master would have been sucking air. If it was sucking air then it would have been pushing air out. Then there would be air in the brake lines. Therefore the brakes probably need to be bled.
This is what ended up coming out before the bubbles stopped. This was on one wheel. As soon as I nipped the bleeder back up the brake pedal was firmer than it ever has been. I only ended up bleeding the one wheel as that has restored the brakes to where I am happy with them for now. Currently all 4 wheels are off and it is on stands so I am not going to be trying to stop it any time soon. Also I may be pulling some stuff apart on the brakes depending on what is needed which means that I will need to bleed it again. No point doing something twice.

Now I need to go up the front and see if I can find the problem and fix it so the car will roll freely in high range.

Cheers,
Rex

Tuesday 4 October 2016

We were sailing

On Sunday we were lucky enough to have some great weather and took our boats out. We took out both of the dinghy we have, both my parent's Vagabond and my Fireball. It was a good day, despite both of the boats needing some repairs that we have been putting off since we last used them. The fireball needed a pintle for the rudder put back on after this trip. The vagabond needed the line that hauls up the centerboard to be fixed. That line had been getting sun burned for some time and on the last trip it finally failed, thankfully both were easy fixes.
Before bolting the pintle back on I put some silicone onto the back of it to ensure that water can't get into the buoyancy chamber at the back. I put way too much on but it is a lot easier to clean up a little silicone before it sets then to repair a rotted out hull.
The vagabond all hooked up and ready to go. To put the new line in the centerboard we had to lift the boat up, drop the centerboard out then run the new line through the hole in it and then put it all back in. Not very long to do thankfully.
This is the lake now. I have never seen it this full before. WE have been very lucky and gotten a lot of rain recently. The ground now has so much water in it that almost as soon as we get significant rain now it starts running off and into the rivers and dams.
For a comparison this is what it looked like before. Where the above photo was taken is further up the bank to the right. Quite a long way up.

Unfortunately I didn't get any photos while we were sailing, but it was a very good day for it and we got some good speed up. Nicole did very well as crew, despite me putting the leeward rail into the water quite a long way a few times.

Cheers,
Rex

Monday 3 October 2016

No More Leaks

On Saturday I finished putting the new gasket that was needed onto the waterpump on my Land Rover. I talked about the beginning of the process here.
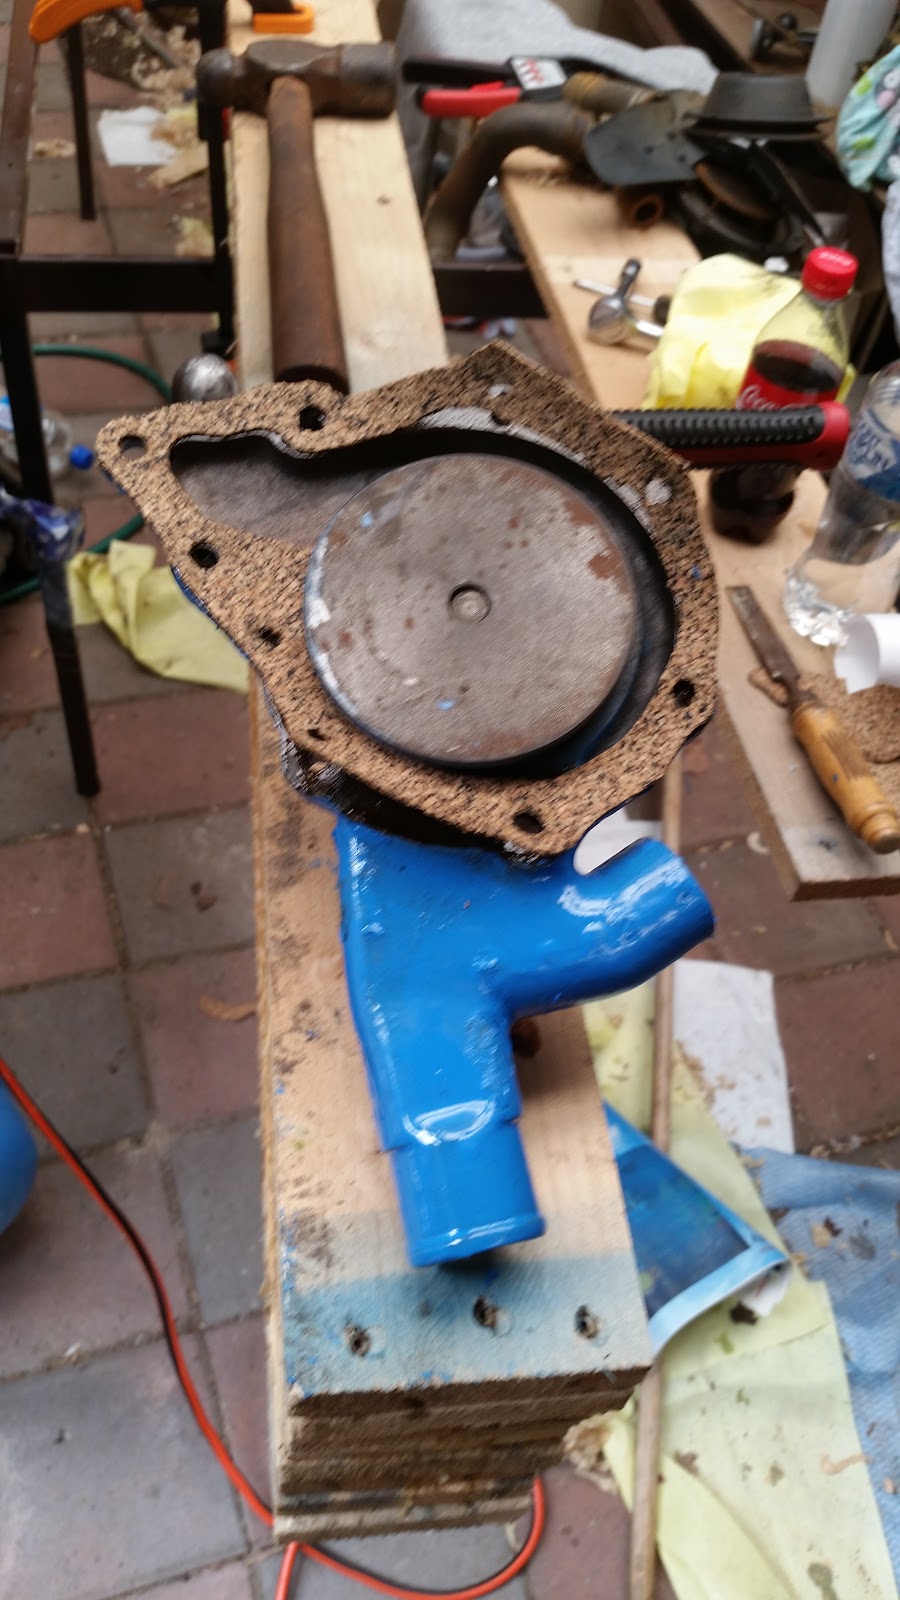
The problem I had was that I needed some kind of gasket as a spacer to make sure that the impeller doesn't contact the block as the back of the housing. I decided to have a go at making a gasket out of cork from scratch for the spacer.
Armed with a memory of instructions I found on the internet on how to do this I got started. Getting the outside shaped was amazingly easy. With my ball peen hammer I tapped around the edge of the housing which cut the cork on the corner of the housing.
The rest was a bit more difficult. The bigger open spaces allowed me to use the same hammer technique, however when it got in close to the impeller the hammer couldn't reach anymore so I had to resort to using scissors and checking against the housing regularly.
To get the bolt holes we got 2 hammers, set the ball peen of one over the hole and tapped. This cut the cork or at least made a mark, enough so that I could cut the rest of the hole out with scissors.
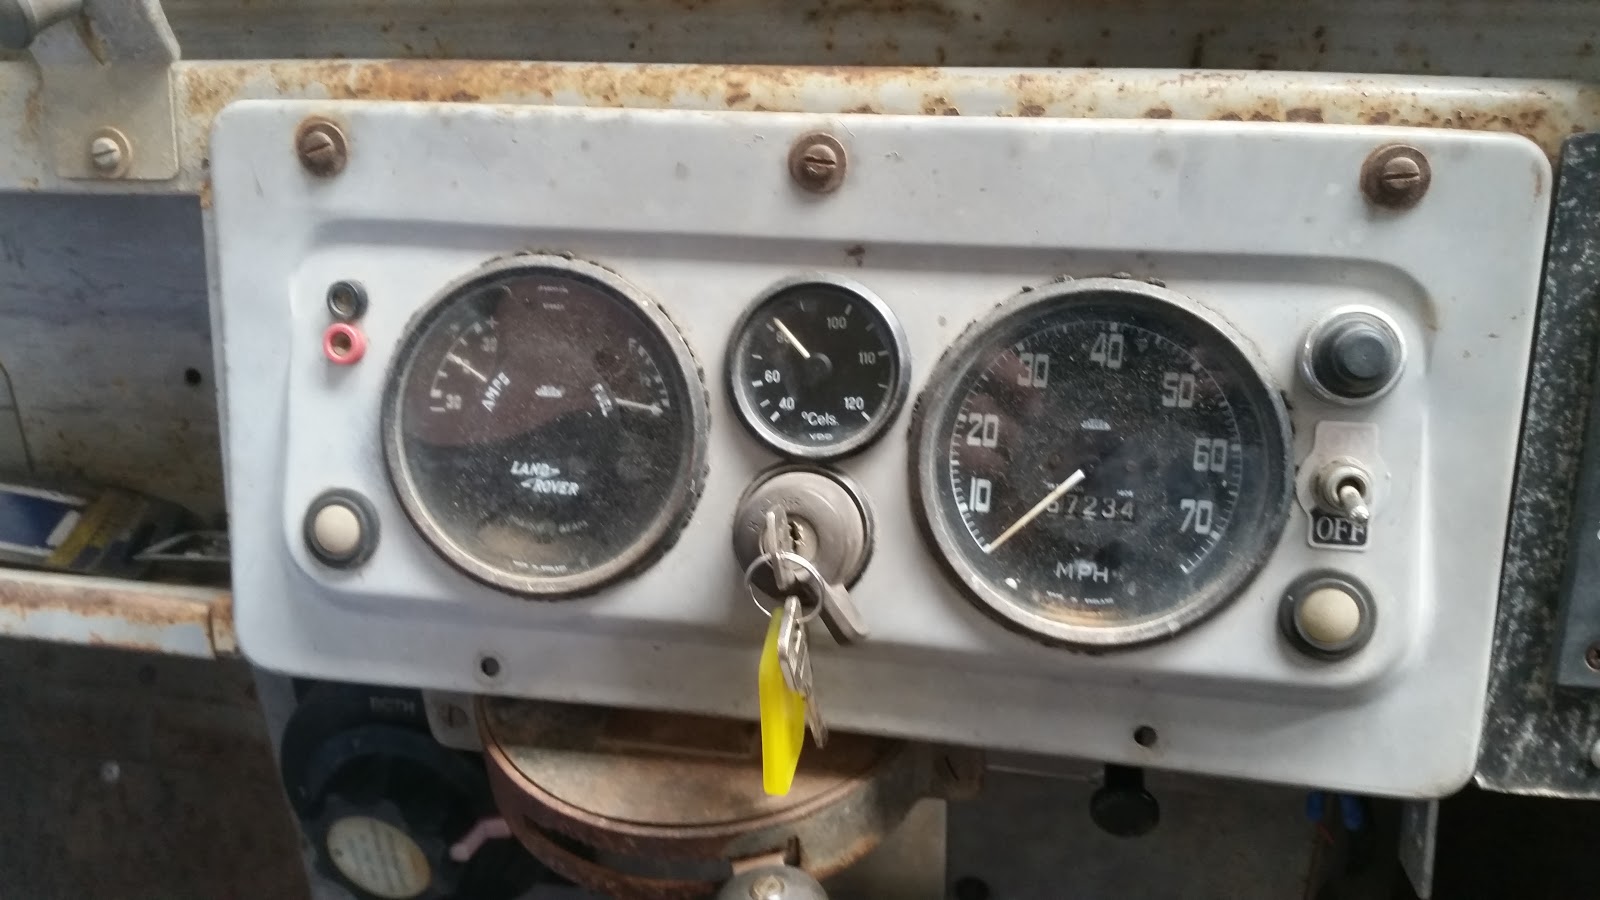
You can just see the pump in place. I probably should have painted the fan shroud while I had it out, but I didn't really have the abrasives to clean it up enough for good painting.
In the middle you can see a temperature gauge reading about 80 Degrees Celsius. This was after driving around a bit and seeing how the brakes go and so on. Because the fan is always going it probably takes a little longer to warm up than I am used to with a more modern car, but it still gets there no worries so no concerns there.
Now sitting in the back of the yard so I could get the fireball dinghy out. It will move under it's own power, but only in low range. in high range there seems to be something holding it back. I know the brakes need some work so that is my current theory, one of the wheels might not be letting go properly. After that issue is fixed it should be driving well, just needs a full fluid change then I can get on to making sure it will pass rego.

Cheers,
Rex