That's right, with compressed air, waste oil and a blowtorch I have made fire at home.
Starting with this beast of a thing on the right:
And a bunch of fittings:
And some Pipe:
I managed to make an oil burner. I put an outlet in the bottom of the tank, blocked off one of the ports and put a T-piece on one of the other ports so I could let air into the tank.
I put the air in through a regulator I got from the hardware store. I'm not sure if it's because it was a cheap one, or it's designed to operate at higher pressure, or the setup was just wrong but I found that by clamping down on the plastic air hose going to the nozzle I could get the burner to run reliably. I had put a needle valve in the fuel flow so I had control of air and fuel. But I think the control of air was still too coarse. Before next weekend I will get another needle valve for the air and use that to control it, rather than a set of multi-grips:
While setting this up I did manage to tidy things up with a bit of cotton twine and parceled the fuel and air hoses together a bit to help control the tangle before reaching the mixer.
Hopefully this weekend I will get some more fittings and then will be able to get a video of this beast of a thing running. I used the blowtorch we saw here to light up the burner, but I had to keep it on hand as it was very prone to flameout which I think was because there was too much air coming through because the fuel is too viscous at the cooler winter temperatures.
Now that it is starting to cool down I have got some Metho for lighting up this burner. Unfortunately I haven't quite got the amount that I need right so starting it gets a little exciting. If anyone is interested I will do a video of me setting it on fire. Erm, lighting it...
I ordered some books a few weeks ago to help me with my boat building project. They arrived from the states the other day. While I haven't managed to read them all yet they look like they will be very helpful in working out what goes where.
Honest...
It might be better if you stop here Mum.
So these followed me home from the Junktion on the weekend. 2 x 40L Air compressors with solid tanks. One of the compressor heads seems to be seized up but it doesn't have a fan on it so that could just be a lack of leverage. The other one can be spun by hand and makes the right sort of whooshing noises so I think it works.
Unfortunately neither of them have any regulators or power plugs on them so I will need to buy some, probably off eBay or AliExpress.
The plan for these is to turn one into an extra resevoir to increase the capacity of my compressor from 20L to 60L. And if I get an extra compressor head or 2 out of it, all the better.
The other one will be turned into a fuel tank for an oil burner I am planning on building for the forge. Similar to the one in this video:
I'm planning on getting that done in the next few weeks or so.
So keep an eye out for an improved forge in the coming months.
It sure does, it floats, sails and breaks. There wasn't much wind but the hull is driven really easily. Even with the very light wind we were still moving along. Not very fast mind you, but we did get there until better wind came along.
This was the first time out in a new boat and it's been some time since I've been sailing on a dinghy so we took a chase boat along as well.
Here she is, tarped up and with the mud washed off ready for bed. I do need to get a bigger tarp but I should be able to sort that out in the next few days.
Now being a boat there is always something broken. Today we managed to break off one of the jib sheet redirection blocks. These were mounted to pieces of an old kitchen chopping board which turns out couldn't handle the strain. The turning blocks for the spinnaker sheets are in nearly the same spot so we can use those until I can make up some new mounting blocks.
Also the centerboard is very tight in the casing. It was fine to start with, but after lunch it ended up taking us nearly half an hour to get it down, but thankfully after that we got some good sailing in. So the board will need to be taken out and sanded down so that when the timber swells there will still be space inside the casing.
However this is the biggest problem. One of the pintles that hold the rudder on had come loose and nearly fallen off by the time we came in at the end of the day. Unfortunately when these were installed with plain nuts when these should've been locknuts or had jamb nuts installed. Thankfully we didn't loose the pintle so a simple trip to the hardware store will supply the parts to fix this properly.
I broke the last handle I had on a decent hammer, so now that it's cooling down it is not as crazy to have a fire going and there is no point having a fire without red hot meal is there? I just bought a new handle from the hardware store. I'm quite happy with it. It wasn't varnished which is the biggest problem I've found with most new handles you can buy.
Hmmm, good starting point, but difficult to work metal like this.
Still some shaping to go. Lets get to it then.
I started off trying to be sensible and gave the plane a go. Unfortunately it wasn't really that useful. Because of the relatively radical shape of the handle it didn't really cut on the end of the handle. A Spokeshave or Drawknife would've been better tools.
Seeing as the plane didn't work I figured I'd give the rough old hatchet that we've had lying around for ages a go. Unfortunately it is the epitome of not sharpness and would be vastly improved with an hour or so of work. But this did remove material fairly well and though it was a bit rough in the end it worked.
I thought I should probably take a little care of what's left of the edge on this and put a piece of an old pallet on the anvil I was working on. Eventually I will get around to sharpening it properly. But until then I don't need to worry too much about the edge.
This is what the handle ended up needing to fit the head of the hammer. I didn't realise the eye was so small. If I end up making a hammer then this is something I will have to be careful of to ensure that the eye is a reasonable size so that an off the shelf handle will work.
Nearly there. Can you spot what still needs doing?
Wedges!! though perhaps not with sweet chili sauce or sour cream. But still one of the many useful things that make this much easier.
And here it is all finished.
Of course I had to test it. However there wasn't much to see past this point. Particularly after I started to try some charcoal Briquettes. They looked like they were getting hot, but there was no heat in the body of the fire and it died as painful death. Perhaps something to do with this?
Anyway, it could also be that I'm using a dodgy forge design and it's blocked up with ash and dirt. A very distinct possibility.
Now that I have a working hammer however, all that I will need to do is light a fire, get a draft and I can get to it. So look out for more forging posts over the next few months.
On the weekend I spent some time volunteering at our local miniature railway club. One of the things I have worked on is the signalling system. It has been built and patched over the years and didn't have any kind of diagram in place. So before anything broke we figured it would be best to build a diagram so that when something does break down we have something to look at.
Where the power starts. 12V DC goes down that PVC pipe into the ground and appears somewhere outside, then feeds the signals.
Here we have one set of points, under one of the plates is a pneumatic motor and a switch that triggers the signals at the station.
Hmmm, I don't remember ever reading about using leaves as insulation. Perhaps we need to start cleaning this out more often.
This is where all the magic happens. The circuit under here is what ensures that all of the signals light when they should.
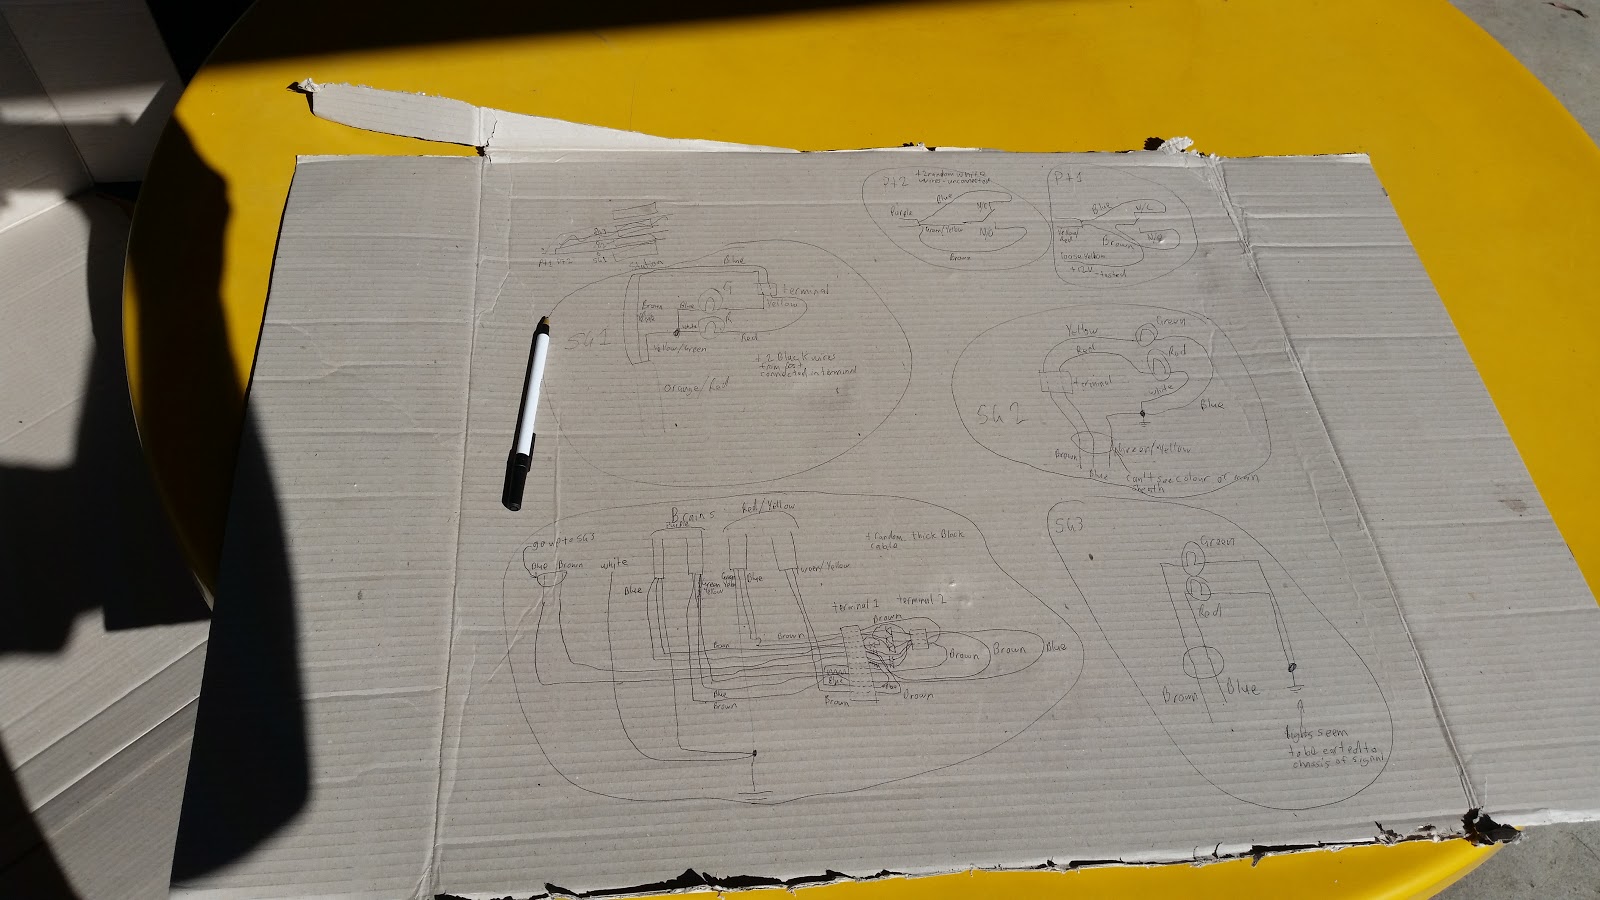
It looks a little less of a rats nest now that it's been pulled out of the box but still pretty confusing to begin with. The trick here is to pick a point to start from, draw a rough sketch that is only for your notes and re-draw later if you need to make anything neater. Being Methodical will help a lot here.
A little offputting, This is the door of the box and bside it is a piece of scale that came off the inside. It certainly pays to clean things up a little before trying to make sense of things. Trying to work out what wire went where would have been much more difficult. It certainly pays to spend a little more time making sure everything is in order before doing what you are in there for.
Notes mk1. These were only done for me, jotted down roughly for me to translate into something that can be understood later.
And here's the super duper accurate neat and legible drawing. No it may not look like much, but you don't need something that has been drawn by engineers with a dozen letters after their names on multi-thousand dollar computers. All that is needed is some time and care to the job being done and anyone can learn to do this sort of thing.
Remember, just because you don't have a piece of paper saying you can do something, doesn't mean that you can't do them. Conversely, having that paper doesn't mean you can do something better than anyone else.
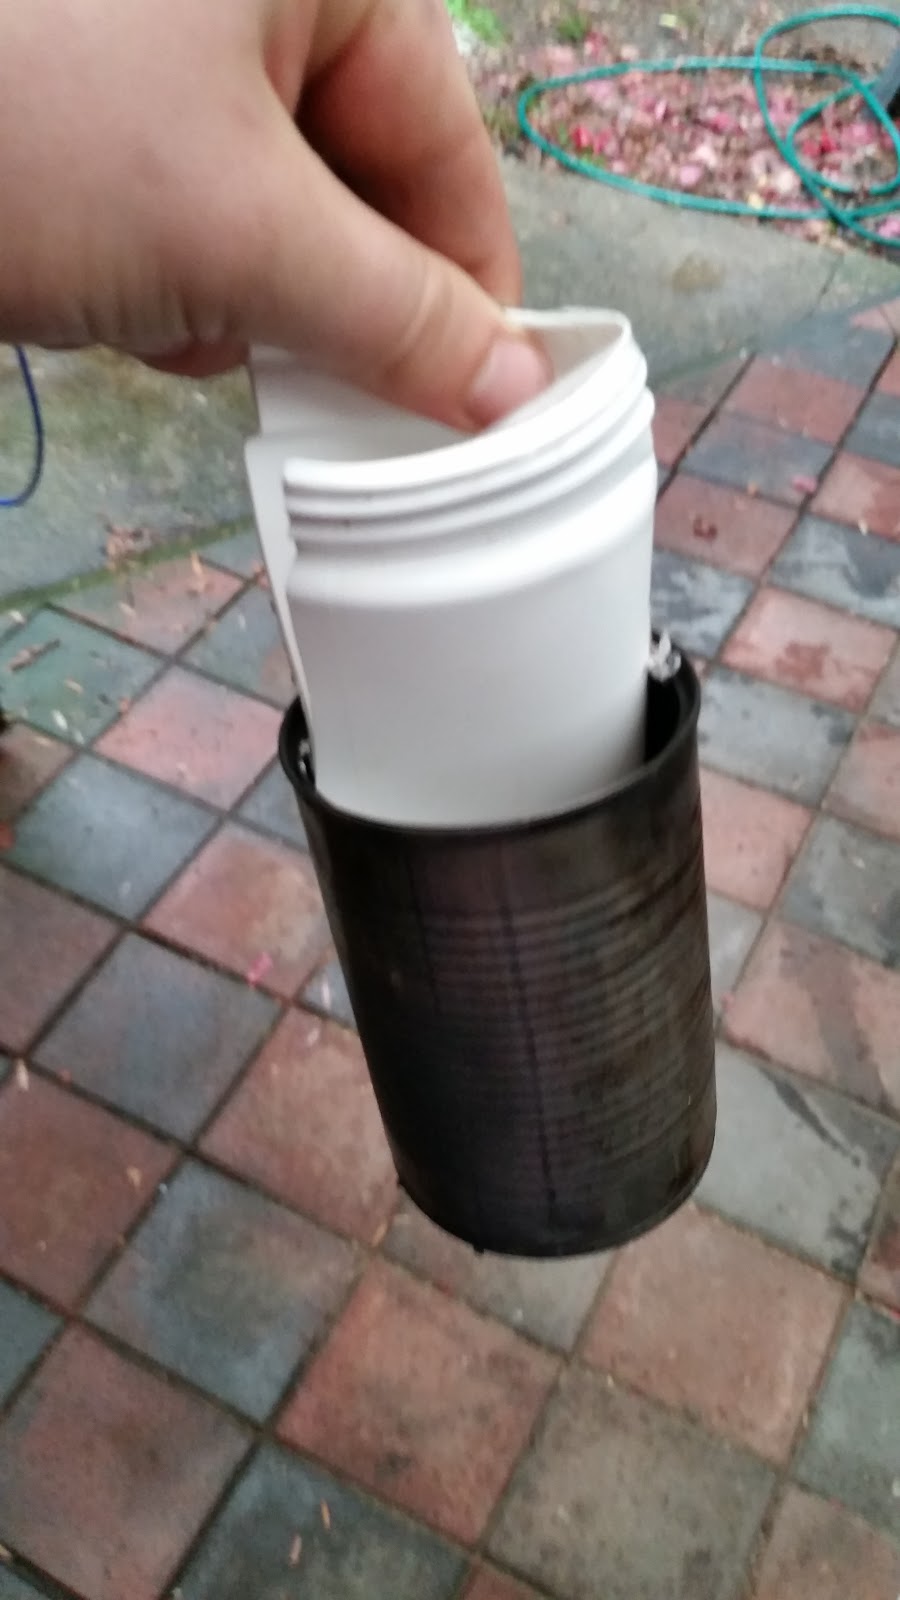
Remember a couple of days ago when I shared how to clean a can easily for an upcoming project I had here? Well here is the project.
For a project that my brother has on the go he asked if I'd be able to make a rot resistant, durable block with a bit of give. I've seen and heard of people melting down various plastics to make things and I figured that would do. After all that is what many 3D printers use as their media.
For the source stock I am using recycled HDPE from various containers that would just get thrown in the recycle bin anyway.
I cut them just enough to be able to fit in, It would probably be better if I'd made the pieces smaller though.
For a heat source I just used the grill on the barbeque. You can see where all the fat has burned off here from heating various tings without cooking. I need to replace the heat beads so that I can cook over a more even heat because really the bit in the middle gets burnt and the edges stay a bit raw. Not so nice.
This is where I finished off, I only had the one container to melt down and they take up a lot less space then I thought they would. So I will have to collect somewhat more material before I finish this off.
You can see the label in there. If you've read my previous post about the can then you will understand how lazy I can be. If I didn't need to take the label off then I wasn't going to. Looks like I probably should've though.
I've had some suggestions on how to more accurately control the heat without having to be as worried about setting the HDPE on fire so I'll give that a go once I have some more feed stock.
Ok, Ok it was rain, but still it's got to count for something right?
Also you might notice that the deck hardware is in place again. We were going to try and rig it on the weekend to make sure that we still had everything and it fitted. But unfortunately the weather got a little too rainy so we left it for the time being.
I didn't get many action shots because we were pretty busy getting everything screwed in and trying to remember where everything went. However I did manage to get a quick snap of my brother "looking busy" shortly before we finished for the day.
Hopefully we get this done before it gets too cold, but if we find a nice day we should be alright.
Those who know me will agree that I'm lazy, very lazy. If there is an easy way to do something I will do my best to find it. So when I had in mind a project that needed a smallish metal container I went looking for the easiest thing I could find.
A tin can will serve nicely for what I have coming up and many other projects in the future. But how to clean it without taking too much effort? Here's what I came up with:
If you look closely you can see I put it in a little fire I lit to burn off some of the tree trimmings from our yard. I got impatient so I pulled out the can rather than just letting the fire burn out. This is what I had left:
It is a little blackened and charred, but a light coating of carbon may actually help with what I have in mind. But if I needed to I could probably clean up the can with a wire brush or some sand paper. But I don't need it clean and I am lazy so it will stay dirty.
So there you have it. If you need a tin can for a project and don't want to spend too much time cleaning it all you need is a fire and the work will be basically done for you.
It is good to be adaptable. If you can only do a few things, even if you can do them really well then eventually the situation will change and you will end up having to do something you are bad at. However if you give everything a go, and ensure that you do your best you will be able to get everything done that comes your way.
On the weekend I had a go at laying some turf. Not really something in line with what I'm normally doing, but that's no reason to stop. We started with this:
And finished with this:
I found that the slope this was getting laid on was fairly slippery so I was wearing my best non-slip footwear:
I'm no turf laying Guru, but the way we did it was to put down a full roll:
Then a half roll below that. Then we just kept putting full rolls in line with each of those until we reached the end of the run. Unfortunately after putting in 2 rows there was still a bit of space between the Agapanthus' and the turf. To fix this we put a row of half rolls in. Now you might be wondering what tool you use to cut a roll of turf in half? Well we tried using a spade; that worked but it was a lot of work and not a very straight cut. The best tool we found was a hand saw. Once we cottoned on to that it was much easier to cut the rolls cleanly into half.
So with the turf down I went through with a bag of mulch and put that around the Agapanthus' to make a nice neat edge at the bottom of the fence. Hopefully in a few weeks we will be able to see that we did this properly and there will be a lice lush stable lawn in that part of the yard.
But remember, you don't need to know what you're doing to get something done. All you need is to be careful, think about what the end target is and don't give up after a setback.