Sunday 31 January 2016

Fixing a worn out power supply in a computer

A bit of a nerdy one today.

I have recently gotten an older PC that I will be using as a Home Theatre PC (HTPC) Unfortunately it has been having issues with instability and would shut down randomly and then when shut down properly it would not boot back up again. Sometimes it would not even reach POST (Power On Self Test), others there would be an issue with the POST. Once I even had it say there was a problem with the BIOS flash memory itself.

The original Stats. It's had a RAM upgrade and a new graphics card.
As you can see, not the most exciting computer. But it has a discrete graphics card which immediately blows anything else I have here out of the water for a HTPC. The computer I had been using did work, however there was often a lot of stutter during playback and complete CPU usage. This machine does not have that issue.

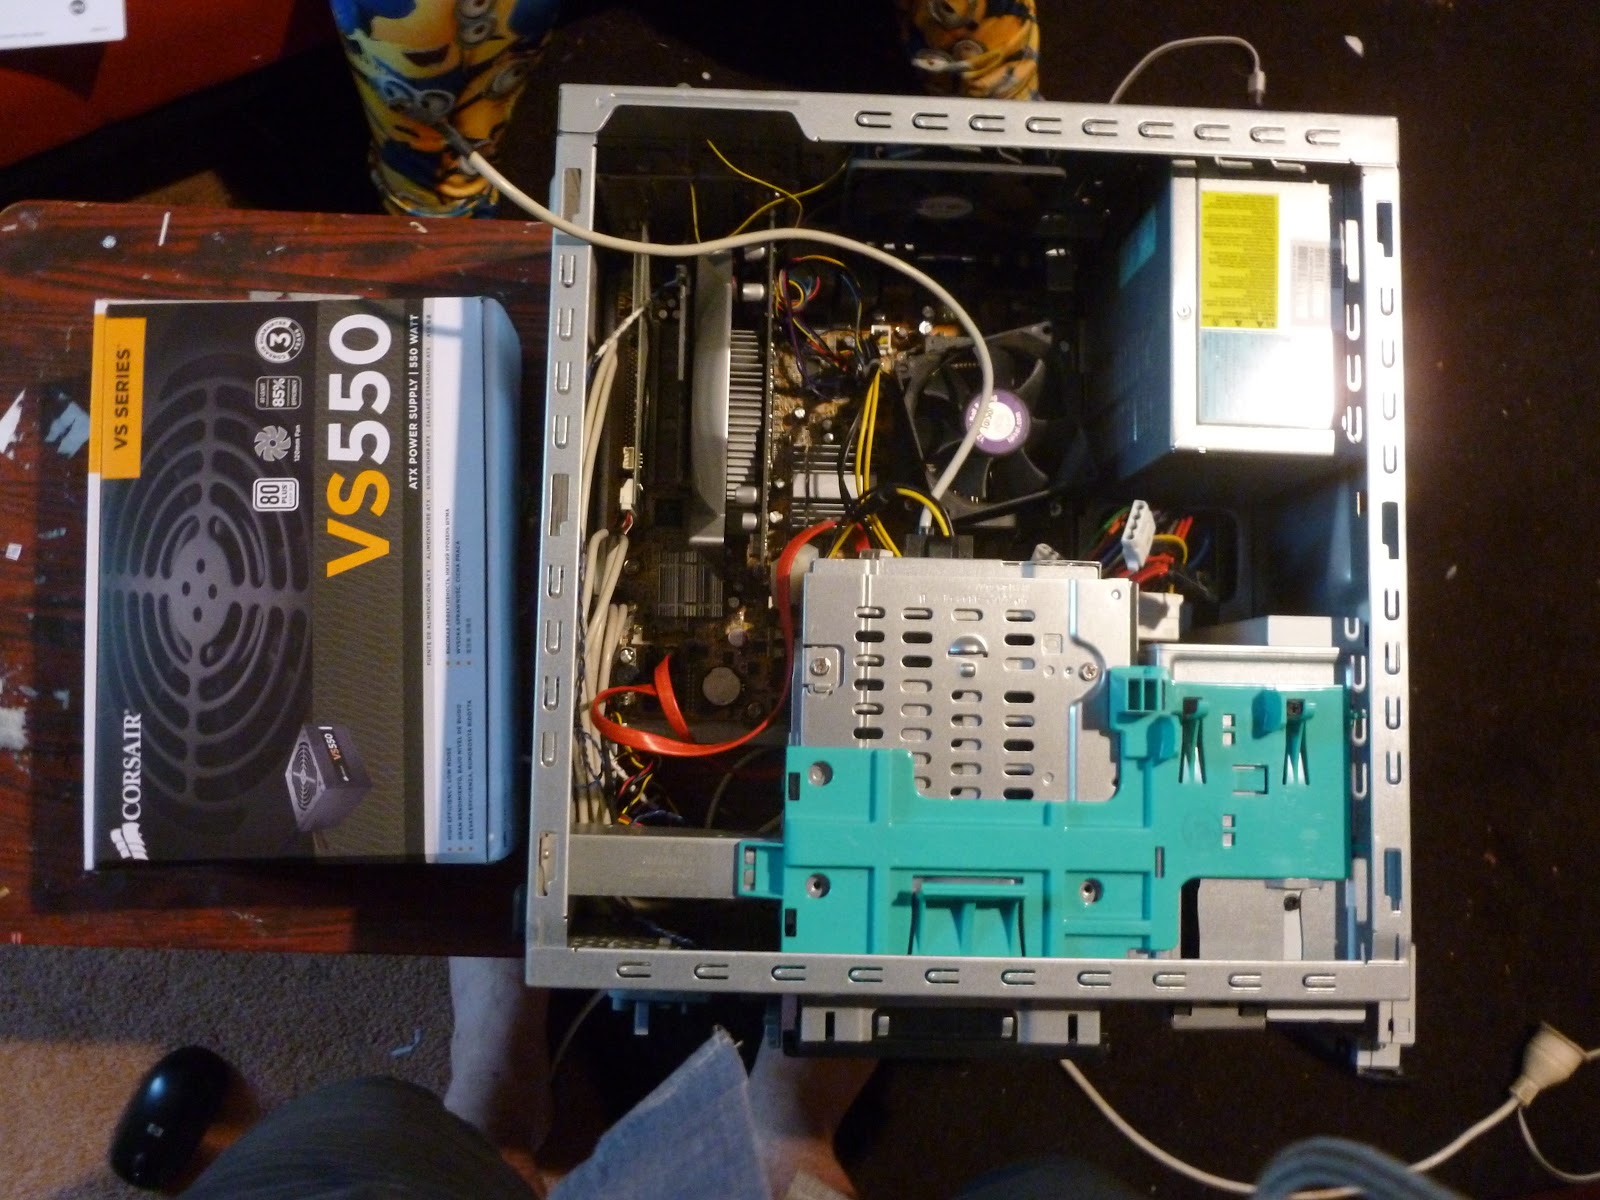
Here we see the new power supply next to the case. Originally it had a 300W supply. I have upgraded it to a 550W as the newer graphics card recommended somewhat more than the orginal 300W. I think this may have been one of the contributing factors that lead to the original supply failing. Often a supply will handle being overloaded. But it will cause it to fail much much sooner.

It's a pretty tight fit in this case. The only way for me to un plug the motherboard power cable was to first remove the hard drive and personal media drive bay. I was lucky that it came apart fairly easily and soon I had the motherboard un plugged.

With the motherboard and drives all un plugged; all that needs doing to remove the old PSU is taking out the 4 screws on the back. These all came out easly like they should. If this had been in a factory or somewhere where it's likely to corrode a bit it would've been a different story.

Here we have a side by side comparison to check that the old (left) and new (right) are actually the same size. They were. Time to reverse everything and put it all together.

If I was willing to spend the money on this computer I could've gotten a modular power supply. With a modular PSU you can remove some of the cables so you don't get a mess like the one above. As it was I was lucky enough to have to find a way to get this spaghetti monster into the case without jamming in a fan.

Before putting too much effort in I like to check that I have fixed the problem. This is what you see here. I plugged in only enough for the motherboard to boot off the BIOS chip and run it's POST. With that done I can finish buttoning up the system and getting the loungeroom back to a reasonable state.

With a little coaxing it all went back together reasonably well.

Success. Now I just need to set up Mythtv on here. If anyone is interested in seeing a writeup on how to configure a Mythtv Frontend, Master Backend and Slave Backends please let me know. I am not particularly happy with the current arrangement and if it would be of interest to someone then I would be happy to document the process.

Replacing a power supply is something that is not too difficult once you know what plugs go where and you are willing to take your time to work out what each part does the first time around. Also like this computer that was likely to be tossed, it is a relatively easy test that you can do that can extend the life of your computer.

Any questions, or thoughts please leave them below in the comments.
Cheers,
Rex

Tuesday 19 January 2016

Building a kegerator at home

Well I finally bit the bullet and did what I've been threatening to do for a while. I bought a keg, beer tap and gas for dispensing.
That's right, I've turned this:
Into this:
It's nearly time to tap this newfound resource.

I bought the kit from the local homebrew store. The install was quite simple. I decided to put the CO2 bottle inside the fridge. This means that I only needed to drill one hole in the door.

If I needed to put a hole in the side to put the CO2 bottle externally I run the risk of drilling through one of the refrigeration lines which would the release the magic (possibly toxic) smoke and the won't work very well after that. If I were drilling through the side, and if I end up putting the bottle outside the fridge then I will do it outside with good ventilation. This will ensure that if I do bust a line then it will be as safe as possible.

AS it was I only put a hole through the middle of the door which on this fridge was just a layer of sheet metal, a lot of foam, then the internal plastic liner. I just cut this with a cheap multi size hole saw from the hardware store for $5 or so. I did work, but I got a bit impatient and got the tool a little hot. I also wasn't quite straight, this meant that the saw broke through on one side and started biting. At this point I could just bend the plug out with a screwdriver and a pair of pliers.

I then went to the inside and drilling through the centre drill hole from the outside. I could drill quite easily through the plastic on the inside and shortly had a hole on either side and a bunch of foam on the inside. To remove this I shoved a knife through the foam and cut around the outside of the hole using the two holes I drilled as guides. This allowed me to just push through the remainder of the foam to have a clear hole.

Then it was just a case of connecting everything together with the supplied hoses and clips. This was fairly easy, except for forgetting to put the threaded collar for the beer line onto the line for it. A simple fix though, take off the fitting, put the collar on, then put the line back on again.

After this was all sorted I set up the fermentation vessel to make some beer to put into the keg. After all not much point having a tap without beer.

This was done with the help of +Nathan O'Regan who made the process a whole lot more fun.

If you have any experience with homebrew or kegging, please share with us so we can all learn from your experience.

Cheers,
Rex

Friday 15 January 2016

Bad Youtube Playback arch

Shortly before I left on my holiday I came across a problem that has been getting worse and worse over time. When I watch a video on Youtube on my laptop it would use quite a lot of CPU. Inititally I thought well that makes sense, seeing as it is a video and I know videos are a fairly intensive thing to handle.

However it got worse, to the point where my laptop with a quite reasonable for the task Core i5 processor and practically nothing else running would eventually reach thermal cutout temperatures (>100 degrees C) and eventually to the point where it couldn't really play videos. Surely there must be a better way.

And it turns out there is a better way, seeing as I am currently running Arch Linux on there. Also I didn't have that problem on Windows or Debian on the same computer.

Turns out that in Chromium (Not quite Chrome) there is something funny with the rendering for web based playback. This causes massive CPU usage for no good reason.

The Solution?

Go to the URL chrome://flags then enable "Override Software Rendering List" (#ignore-gpu-blacklist)

I'm not 100% sure what it does, but a guess for the blacklist mentioned in the # name make me think that perhaps it was trying to do all of the rendering in the CPU. Rather than getting the GPU (Integrated but still better) to do that part of the hard work, for which it is much more suited.

This may also work on Windows or Mac if you are having similar problems. It certainly hasn't hurt my computer and has made it barely load the CPU at all with video playback now.

If you have any other tips or tricks for Chrome/Chromium that make it perform better please let me know so we can help share this information.

Cheers,
Rex

Monday 11 January 2016

Updates to the blog

Hi, Just a quick update today.

Over on the left of the page I have added a new link to the Projects page.

Here I have listed my current ongoing projects, their status and links to the labels the belong to. There aren't many yet, but as I start new projects and remember others I have put on hold I will add them to the page.

If there is any project you would like to see more of please let me know and I will try and focus on it a bit more.

Cheers,
Rex

Saturday 9 January 2016

Home again

Some of you may have noticed that I haven't posted recently. There has been a good reason.

For the last few weeks I have been in New Zeland on a family holiday. I had a great time and have come up with some new projects to get through and some changes to on-going projects. I also have a few changes and additions that I'm going to make to this blog.

So have a happy, exciting new year and keep an eye on here for all kinds of new stuff.

Cheers,
Rex