Saturday, 31 December 2016

Serious disassembly has now started

Yesterday I continued on with the work I discovered I need to do on the Land Rover the other day. Namely to remove the front axle so I can get easily to all sides of the hub assemblies and the diff because they seem to have managed to fill with water and grit.
This jack has been doing quite a bit of work since I bought this land rover. It is just the one that came with my ute for replacing the occasional flat. Whereas for a while now it has been lifting up the land rover almost regularly to pretty close to the limits of the jack.
Hmmm. There seems to be a problem here. Unfortunately the wheels had to come off to be able to fit under the bullbar.
That will fit a bit better.
Now I found another problem. This whole assembly is way yonder too heavy for me to pick up and put the wheels back on. So I just dragged it until it would be in a spot where I can pull it apart without it getting in the way.
This process has made me want to remove everything and do a complete restoration rather than just a quick get back on the road. This rod (Not sure what it's called. Ties the hubs together so they turn at the same time.) has ball joints at each end. This is what they look like:
There is no more rubber boots at either end and both of them are stiff and don't really move very well at all. These will both need to be replaced and I will need to check the other ball joints as well. Also when I detached the prop shaft from the diff I discovered that the bolts were surprisingly loose.
These are issues that would get fixed with normal maintenance on any car but from the previous use I was told about. There would have been between practically none and actually none.

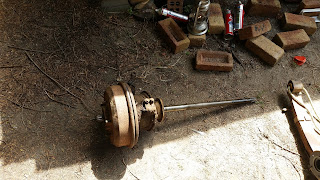
One grotty hub with the axle still in. I figured that I would clean everything up a bit so it's a little nicer while I'm pulling this all apart.
It's a bit hard to tell in the pictures, but just a few minutes with the pressure washer and the bulk of the grot and oil have been washed off. As it was starting to get pretty warm and I had been hit with a fair bit of spray from cleaning this up and needed a shower. I decided to call it a day. So a heavy coat of WD-40 and this is ready for me to finish pulling apart and cleaning properly.

I'm tossing up while I have everything apart getting some proper chassis paint and cleaning everything with a wire wheel and painting it properly.

Cheers,
Rex

Thursday, 29 December 2016

I've been working on the railroad

In a stark contrast to yesterday when I spent the day inside in the air conditioning, I decided to go down to the Zig Zag Railway today and sweat a bit. Or a lot. More like a lot.

We decided to replace a couple more sleepers along middle road that have become damaged. This contraption is a sleeper puller that makes this job much easier. All you need to do is pull some levers and it will pull out the old sleeper. Then line up the new one and push it home with the power of hydraulics.

The way this machine has been built is quite simple. A petrol fueled hydraulic power pack that is just connected on the the valving. This meant that during construction an off the shelf part could be used. Eliminating the complicated and fiddly design and set up of petrol motor, hydraulic pump & reservoirs and cooling for each.

Unfortunately there seems to be a problem with the fuel pump. Once we had pretty much finished the first sleeper we started having fuel starvation issues. With the motor stumbling then picking itself back up again. Eventually it died and we finished off that sleeper by hand. We were able to get it started again by getting the fuel filter filled. However that only lased a few minutes before we had to fill it again. Eventually we did get both sleepers changed and are now in place ready for baseplates & spikes.

Heading back down for lunch. He seems to be pretty keen for it!

Cheers,
Rex

Trying to get a fan

Yesterday to try and keep out of the heat I stayed inside and tried to get some work done on the CNC Mill. I have tested all of the steppers and everything looks good there. However the Pololu stepper drivers I have only have a fairly small heatsink on them. I am not exceeding the rating that is recommended with the supplied heatsink, but I am at the limit of what can be done there. So with that in mind, I would like a bit more headroom.

When LMC built this control box they quite kindly left a fan shaped cutout for me. Unfortunately the fan that was originally in there ran from the 110V mains this was set up for. So I plan to use one of the PC fans that I have sitting around here instead.
This fan is close enough to a good fit in the cutout that it will work fine. However, upon testing I found that it would not spin. The cogging effect was increased though. Then I looked at the small print. It is a brushless DC motor. I do not know much about these, but it seems they need a varying DC waveform rather than pure DC.

So where in here can I get a varying DC waveform from? One of the PWM outputs from the BeBoPr Beaglebone cape of course. The plan was to get machinekit running and then set up a user controlled variable to adjust the PWM duty cycle until I found the sweet spot. Then set it u so that whenever the machine is turned on in Machinekit then the fan would start.

That was a good plan. Except for the fact that because I haven't done anything with this for months and months. I couldn't get machinekit to run at all. Then I tried a new, clean image to make sure that there wasn't a setting causing the problem. However then I ran into a problem with my HDMI to VGA adapter. Apparently the Beaglebone Black doesn't supply enough current over the HDMI port to run a passive adapter. So I either have to hook this up to the TV in the loungeroom, buy an active adapter or I can mod the passive adapter. I actually have all the parts I need to be able to regulate the 12V down to 5V needed and wire up the regulator. So I might end up doing that.

So keep an eye out for either a fan installation, or modding a passive HDMI to VGA adapter.

Cheers,
Rex


Actually I just remembered that I have a fan in one of my servers that is run from a molex connector for the disk drives. That means it runs from 5 or 12V DC and can be made to work here. Seeing as I am not using the servers anymore I might just re-purpose it for this.

Monday, 26 December 2016

A frustrating discovery.

Today I was hoping to start using my shiny new tools that I was lucky enough to recieve at Christmas. One of the front wheels on the land rover has had a leak on the back of it, apparently from a failed swivel ball seal. The procedure from replacing one of these can be somewhat of an ordeal at the best of times so I figured I'd have a crack when I had the week off work. However I only got this far:
I thought that I could pull the axle out, then I could separate the hub from the axle and replace the seal without actually removing the hub or the brake hose. Unfortunately as I broke the seal that should have been holding in a heap of EP90 oil there wasn't any oil come out. In fact there was a little water come out. All of a sudden this job went from something that would be a pain but doable in a few days, replace a seal with a generic one from one of the shops in town and then all done. To, dismantle the entire hub assembly, degrease, clean & check for rust on every component. Get new seals & bearings where needed, clean, paint and reassemble. Then I will have to do the other side to make sure that it has not had the same issue.

My unfortunate discovery, with a little old brake fluid to start the cleaning process.

Actually come to think of it, I might pull off the front axle, leave the body on jack stands and strip it all down. Just to be sure that the diff is good as well and it hasn't had it's oil contaminated.

Anyway, watch this space. Lots to happen soon on this now.

Cheers,
Rex

Monday, 28 November 2016

Garage sale = Danger

I don't think I should be allowed near garage sales unsupervised. This weekend was a fine example. I went just for a look, and possibly to get some woodworking hand tools. But this is what I came home with

A nice big pedastool drill press that came with 2 vices and a slightly dry drizabone. Both of which are things I've been thinking about getting, but don't need, critically anyway. However both will be getting a lot of use in the coming years I dare say and I will be happy to have bought them then.
Not quite it's final resting spot, but for now it makes a very good hat stand.

Cheers,
Rex

Thursday, 24 November 2016

Which do you think was faster?

While up at my mate's farm where my Pulsar is. We decided to go for a little drive. He in his AWD Subaru and me in my FWD beat up Pulsar.
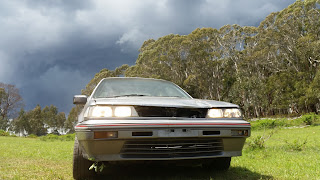
And who won? Me of course. Despite the nissan having this happen to it
Though it may have been like that before we started. We can't remember now. Thinking about it though, that may have had something to do with me not being able to turn particularly well. Especially the bottom corner, a big 180 bend. I could steer nicely through the first half, but then it would just go straight for the next couple of meters no matter what I did.

And we did our part for the environment. There are now a few less blackberry bushes standing in that paddock. They may still be there, but they are a lot flatter now.

With a big storm coming over the hill we decided to get a bit artsy with the car.
Credit has to go to my Mate for this one. I'm pretty happy with how it ended up so I might claim it. After all it was taken on my phone.

If we remember, next time we will get the Go-Pro out. It was sitting in the car we drove up there, but we completely forgot to get it out once we started the cars.

Cheers,
Rex

Monday, 21 November 2016

A ute will keep you in demand

Part of owning a ute is being the person who can move the big or heavy or dirty things around without an issue. So when my parents needed some help to get some concrete slabs home I had myself an excuse for a nice drive.
Here is the first one in place and ready to go. Having a quick breather before moving the second one. Each of these weighs about 80kg so I'm sure you're wondering how we moved them? Well thankfully we didn't have to just muscle them. In a pinch 2 of me could move one, however it would be quite hard work and slow going; with plenty of potential for hurting yourself.
This picture might help. You can just see what we used to make it so easy to move these.
Thankfully Mum & Dad have an engine hoist which easily lifts loads like these. We had a couple of proper lifting slings so with those under the slab and someone to steady the load it was very easy to roll the hoist over to where they needed to go. Once they were nearly there we could just slide the slabs sideways by their width and the lifting was done.

And why did we need to put in some big heavy slabs? In this box are a heap of big batteries for running the house. Batteries like these need a very solid base that ideally is slightly elevated so anything on the ground needs to climb a bit before getting to them. Hopefully these slabs will hold them for years to come.

So thank you Mum & Dad for giving me a reason for a nice drive out there and a chance to ogle at their new power system going together.

Cheers,
Rex

Thursday, 17 November 2016

Parts on order

I'm back at a point where I can start buying more parts to get the Land Rover back on the road.

You may have noticed that there are some lights missing from it. Namely the indicators, park & brake lights.
If you hadn't, this picture shows where 2 of them go nicely.

I have ordered a set of replacements from Rover Parts which will look like this:
Image from http://www.roverparts.com.au/

They are not quite exactly identical to the original parts. However they have just come off a later model. They will still fit in the same space and get wired up the same.

I have tested some of the wiring that is still in the back. The wire for one of the indicators is still good and works, but I'll need a helper to test the brake lights. Also I'm hoping a little more load from more lights will mean that the indicator flasher can has enough current going through it to cause the lights to actually flash.

Another post coming regarding the install.

Cheers,
Rex

Monday, 14 November 2016

Amazing how much difference having a clear space to work makes

Today I took a day of leave as recovery from the weekend I just spent training on the James Craig. I figured I would still be pretty tired and not having to get up too early would probably be a good thing.

With half a day to fill and it raining a bit too much to get the brakes finished on the Land Rover I decided to get the desk inside where I keep my radios & computer tidied up.
This is more or less what it looked like before I started to clean up. Actually probably worse as there has been a fair bit of time for junk to accumulate since that photo was taken.

I also turned the desk around. This means that I can access the back side where the 12V power supply is. And it also lets me plug & unplug anything into mains power depending on what my current project is.


This is what I have now. If I put my laptop away then I have a huge desk that can be used for whatever project I have at the time. This extra bench space will be very useful with the couple of electronics projects I have in the back of my mind coming up.

Cheers,
Rex

Monday, 7 November 2016

Back door now installed

I have had a door for my Land Rover since I bought it, however it was not installed, nor did it have enough bolts to just put it on. So on the weekend I fixed that.

In this photo you can just see a hand holding the door on. Before you could use the top hinge to locate it and hold it in place. This didn't really do much other then prove the door fitted. But it was a start.

The nuts I found were too small for the holes that have been drilled in the frame of the door. So I had to make up a backing plate to stop them from pulling through. This came from a piece of scrap angle I had sitting around. A few minutes with the grinder and the drill and it was ready to go.

It is still a mess inside. But that isn't as obvious now with the door shut. I'm not sure if it's supposed to, but the geometry of the hinges means that it half wants to open itself. Not a bad thing, but interesting.

Unfortunately for now this is my latch. I don't quite have a complete lock mechanism for the door so while I sort out how to lock it properly this will do.

This was a nice, fairly quick project that has definately helped make the car more weatherproof. Hopefully soon I will have the brakes sorted and then I can move onto the next part. Possibly the lights which are missing.

Cheers,
Rex

Saturday, 5 November 2016

It's not worth putting off an easy fix

I've had some trouble in the past with getting a white buildup around the negative terminal of the battery in my rodeo ute. I have always been able to get it going again, but it has always been some fiddling around when it gets bad.

When this happened the second time I bought a new battery terminal and put it in the car. Ready for me to install it. However because the problem didn't come back I didn't end up getting it installed.

Yesterday I had the same problem. I park on a slope at work and there is enough electricity getting through the terminal to hill start it, which I did. However when I got home there wasn't even enough getting through to run the central locking. So I had to fix it.
This is the old terminal. Just an extension of the crimp that gets bolted around the battery post. It looks pretty rubbish for a factory part, but I guess it's worked for the last 10 years.

This is the new part. I just cut the strap off the crimp and left the main body of the crimp alone so all of the little wires would stay in one bundle. According to the packet this terminal is lead which is the same material as the battery post so there should be no compatibility problems there. What will be interesting is if the problem goes away, or if it moves to where the wires meet the new terminal.

Cheers,
Rex

Monday, 31 October 2016

What a bunch of stick in the mud's

Yep, It's Stuck.

In the process of helping Mum & Dad move out to a new property we decided to take my ute and go for a tour, right up the back. Apparently to ground up the is pretty boggy and we managed to get my ute stuck in there. The ground was solid enough until after you drove over it. Once you did that and disturbed the crust then all the loose soft stuff below would just let you sink.

Then when we came back the next day with another ute it got stuck as well.
That lighter coloured mud was oozing out from under the wheel while we were standing there talking about what to do next.

This may have had something to do with why we got stuck.

We ended up getting a set of recovery tracks. (Not this brand but similar) and all of a sudden we were out. These things worked so much better than we thought. Even my 2wd ute with an open diff was fine. Until I reversed a little close to a tree for comfort and had to stop again.

The first one goes free.

We put some old carpet in front of the cars so that they had something to help stop them sinking through again. It seemed to help, particularly in the first bit getting up speed again.

We were stuck pretty well. There were a few diff shaped divots in the ground as well.

Cheers,
Rex

Wednesday, 5 October 2016

Long weekend, Means more time on project cars

So with Monday being a public holiday for me I decided to get some more work done on the land rover. I didn't get a whole lot done but I made some good progress on fixing what was stopping the car from moving properly. First I removed the screws that hold on one of the brake drums.
Some jobs just can't be done without the proper tools. In this case an impact screw driver. Greatfully borrowed from dad. Turns out this was the easiest drum to do. Later in the evening I tried to get the fronts loose. No luck at all. Until I brought out the blue wrench. With a little bit of heat I managed to get the screws free. I didn't get the front drums off as they were still pretty stiff and I didn't want to bang too much as it was starting to get late.

What I did manage to do however was completely loose my brake pedal. No, It was still on the floor. It just went all the way there without any resistance. The brakes were always a little spongy since I bought it so they were on the to do list. But this made it a bit more urgent.
Could this be the cause? The inner part of this reservoir seems to be for the clutch as it was still working and had a bit of fluid still there. However the outside did not have any left at all.
The fix? No. But the first step. After filling the reservoir up I could hear the master squeezing something around. For a little I was worried that the master may be dead and started thinking about ways to test that. Then I realized. I was overthinking this.
If the reservoir was empty then the master would have been sucking air. If it was sucking air then it would have been pushing air out. Then there would be air in the brake lines. Therefore the brakes probably need to be bled.
This is what ended up coming out before the bubbles stopped. This was on one wheel. As soon as I nipped the bleeder back up the brake pedal was firmer than it ever has been. I only ended up bleeding the one wheel as that has restored the brakes to where I am happy with them for now. Currently all 4 wheels are off and it is on stands so I am not going to be trying to stop it any time soon. Also I may be pulling some stuff apart on the brakes depending on what is needed which means that I will need to bleed it again. No point doing something twice.

Now I need to go up the front and see if I can find the problem and fix it so the car will roll freely in high range.

Cheers,
Rex

Tuesday, 4 October 2016

We were sailing

On Sunday we were lucky enough to have some great weather and took our boats out. We took out both of the dinghy we have, both my parent's Vagabond and my Fireball. It was a good day, despite both of the boats needing some repairs that we have been putting off since we last used them. The fireball needed a pintle for the rudder put back on after this trip. The vagabond needed the line that hauls up the centerboard to be fixed. That line had been getting sun burned for some time and on the last trip it finally failed, thankfully both were easy fixes.
Before bolting the pintle back on I put some silicone onto the back of it to ensure that water can't get into the buoyancy chamber at the back. I put way too much on but it is a lot easier to clean up a little silicone before it sets then to repair a rotted out hull.
The vagabond all hooked up and ready to go. To put the new line in the centerboard we had to lift the boat up, drop the centerboard out then run the new line through the hole in it and then put it all back in. Not very long to do thankfully.
This is the lake now. I have never seen it this full before. WE have been very lucky and gotten a lot of rain recently. The ground now has so much water in it that almost as soon as we get significant rain now it starts running off and into the rivers and dams.
For a comparison this is what it looked like before. Where the above photo was taken is further up the bank to the right. Quite a long way up.

Unfortunately I didn't get any photos while we were sailing, but it was a very good day for it and we got some good speed up. Nicole did very well as crew, despite me putting the leeward rail into the water quite a long way a few times.

Cheers,
Rex