Showing posts with label Housework. Show all posts

Monday, 14 November 2016

Amazing how much difference having a clear space to work makes

Today I took a day of leave as recovery from the weekend I just spent training on the James Craig. I figured I would still be pretty tired and not having to get up too early would probably be a good thing.

With half a day to fill and it raining a bit too much to get the brakes finished on the Land Rover I decided to get the desk inside where I keep my radios & computer tidied up.
This is more or less what it looked like before I started to clean up. Actually probably worse as there has been a fair bit of time for junk to accumulate since that photo was taken.

I also turned the desk around. This means that I can access the back side where the 12V power supply is. And it also lets me plug & unplug anything into mains power depending on what my current project is.


This is what I have now. If I put my laptop away then I have a huge desk that can be used for whatever project I have at the time. This extra bench space will be very useful with the couple of electronics projects I have in the back of my mind coming up.

Cheers,
Rex

Thursday, 21 July 2016

You have to maintain a jacket?!

I had to re-waterproof my rain jacket at the end of last year. (More detail on the process here and here). This style of jacket needs to have the waterproofing re-applied about every 6 months or when the jacket dries out too much again.

So it is a bit overdue for getting this re-done so I tried to get through it after work last night.

First though I had to re-melt the beeswax waterproofing. To do that I had to move all of the stuff that's on top of the Barbeque because I've been using it as a workbench.
That's better.
Last time I did this I felt the jacket was still a little too waxy after melting it in so that means I needed to add some more drying agents. Probably the best thing to add would be some more gum turpentine but I don't have any of that so I added a bit of linseed oil.

All of a sudden I looked back in the melting pot and a heap of wax had welled up from the bottom and was cooling again on top of everything. It did look a bit cooler in person.

Then things got a bit too exciting. Stirring to try and speed up the melting process and a little splashed over the side and managed to set the whole lot on fire. Not that surprising really considering everything in that mix is classified as flammable. Even the wax burns once it's got a bit of heat in it.

Now not as exciting. Much better.
The fire seemed to make the mixture somewhat blacker than before so it will be interesting to see, once it cools if the whole batch has been darkened.
Wipe on.
Melt in. Repeat for the next section of the jacket.

I only got a bit of the jacket finished before it got too late and I had to go to bed. But what I have done feels and looks much better and more waterproof again. I'm just hoping I will get this finished before I need to stay dry again.

It was a bit of a pain doing this because it was fairly cold and I was essentially outside. Next time hopefully I will be doing this somewhere it's a bit warmer so the waterproofing will melt into the jacket easier.

Cheers,
Rex

Monday, 2 May 2016

Nothing like a bit of variety

It is good to be adaptable. If you can only do a few things, even if you can do them really well then eventually the situation will change and you will end up having to do something you are bad at. However if you give everything a go, and ensure that you do your best you will be able to get everything done that comes your way.

On the weekend I had a go at laying some turf. Not really something in line with what I'm normally doing, but that's no reason to stop. We started with this:


And finished with this:

I found that the slope this was getting laid on was fairly slippery so I was wearing my best non-slip footwear:
I'm no turf laying Guru, but the way we did it was to put down a full roll:
Then a half roll below that. Then we just kept putting full rolls in line with each of those until we reached the end of the run. Unfortunately after putting in 2 rows there was still a bit of space between the Agapanthus' and the turf. To fix this we put a row of half rolls in. Now you might be wondering what tool you use to cut a roll of turf in half? Well we tried using a spade; that worked but it was a lot of work and not a very straight cut. The best tool we found was a hand saw. Once we cottoned on to that it was much easier to cut the rolls cleanly into half.

So with the turf down I went through with a bag of mulch and put that around the Agapanthus' to make a nice neat edge at the bottom of the fence. Hopefully in a few weeks we will be able to see that we did this properly and there will be a lice lush stable lawn in that part of the yard.

But remember, you don't need to know what you're doing to get something done. All you need is to be careful, think about what the end target is and don't give up after a setback.

Cheers,
Rex

Wednesday, 27 April 2016

The dangers of Teflon Tape

Thread tape, Plumbers tape, whatever you want to call it. You may have seen it used on hose fittings to help keep fluid inside. What many people don't know and can cause quite major problems is that you must be very careful about how it is applied. I recently replaced the shower rose in our bathroom so I will use that as an example here.

These are pictures of the old fitting and the wall fixture. It's a little difficult to see but the tape has been cut off the end of the thread and has gotten into the pipe and is partially blocking flow. In a shower this is not much of an issue, however when I used thread tape to seal up the transmission cooler hoses on the Jeep I had it could've caused some quite major problems if pieces had come loose.

These are the bits that I pulled from both the shower head and the wall fitting. Could be bad.
This is how I've been taught to apply this tape. Yes I know it's pink not white but it's all that I found around the house.
You need to wrap the tape so that when the fitting screws in it tights, not undoes the tape. On a standard right hand thread this means going clockwise around the thread. Another, lesser known trick is to feed the roll of tape in such a way that you can maintain even tension. If you look at the above picture you can see that the roll is away from the pipe. This means that I can ensure there is enough tension on there to pull the tape down into the threads and make for a good seal.

I usually do 2 or 3 wraps, but this depends on the depth and sharpness of the threads. Putting too much on will make it hard to screw the fitting together and can cause bits to be cut off and carried into the flow. To finish applying the tape I just pull quite hard on the tape while keeping it as if I just wanted to increase the tension of the wraps. This will stretch the tape until it tears and will leave it nice and neat.
If you find that you've wound the tape the wrong way when you start to screw the fitting together then simply unwind the tape and start again in the other direction.

Here we are, a new water saving shower head that will hopefully start to save us some money. A fairly easy thing to do for the average homeowner and over the course of a number of years can make quite a considerable difference.

I hope you find this useful at some point and if you've got any other ideas on how to apply plumbing tape please share below in the comments.

Cheers,
Rex

Thursday, 25 February 2016

Shelves for the CNC's

Even though I've been spending a fair bit of time recently playing with my computers and setting those up I am still working on my other projects. The biggest other thing I have been doing is preparing to make some shelves for the CNC mill and lathe to be put on so I can have them inside.

This is what it should look like. I sketched these up with the new CAD software at work over some lunch breaks to help familiarise myself with it.

I didn't get a picture of the stack of board before I started, but with a lot of help from +Ben O'Regan and +Nathan O'Regan we were able to rip down the sheets to a much more manageable size using a circular saw.
This was what we had after the first day. Unfortunately that had to be cut short as Nathan got caught by an offcut and we thought it prudent to stop there.
The evil piece that caught Nathan.
This is what is left of what we ripped down. We didn't fully optimize and allowed ourselves an extra length of 700mm wide just in case we made some mistakes cutting. Thankfully we didn't need this extra piece. However we do need a new saw blade. The one we had been using is pretty blunt now and wouldn't complain about being retired to use on soft pine.


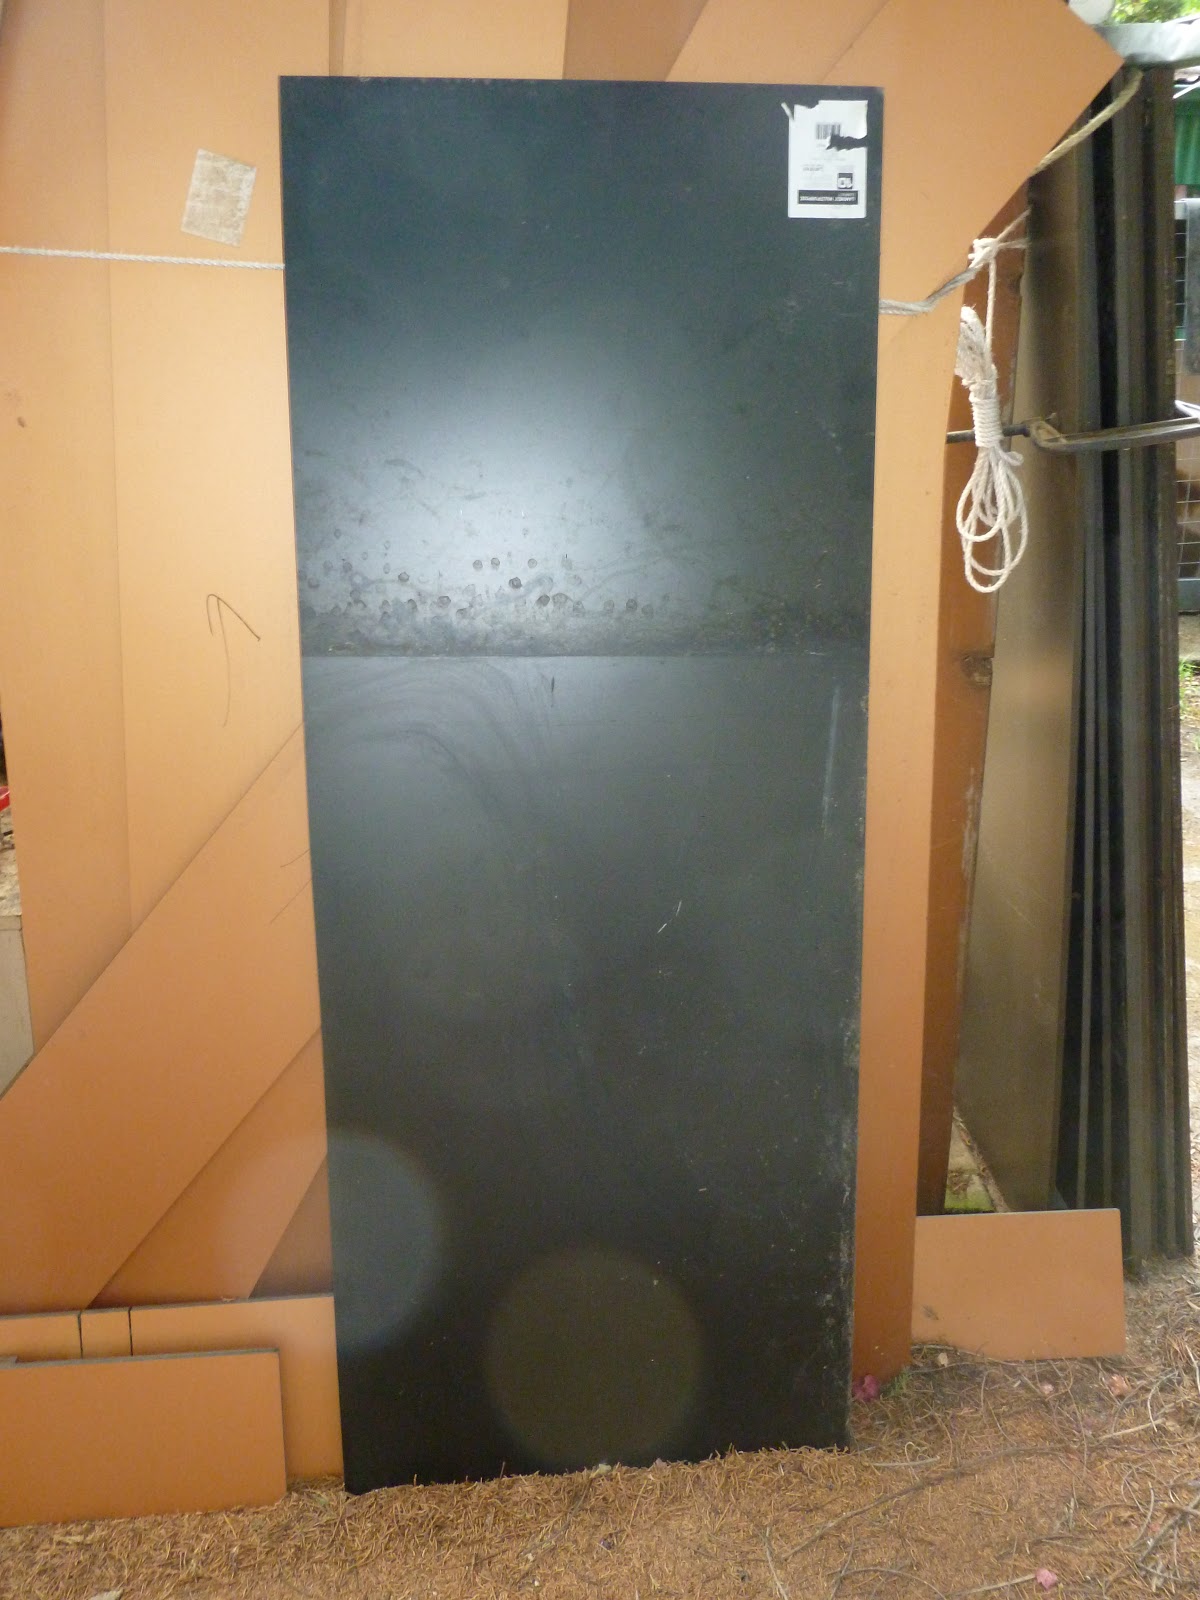
All these black pieces are what's going to make up the shelves. After getting a wash though I think. It doesn't look like much but it was a very hot sweaty afternoon to get to this point. However we are almost there. Just need to route the rebates on some of the shelves and then fit it together. Then look for more CNC updates because they will be inside and I won't have to fight the mosquitoes to stay out there.

If you have any tips on cabinetmaking or other furniture manufacture please let me know. I need all the help I can get on this one.

Cheers,
Rex

Sunday, 31 January 2016

Fixing a worn out power supply in a computer

A bit of a nerdy one today.

I have recently gotten an older PC that I will be using as a Home Theatre PC (HTPC) Unfortunately it has been having issues with instability and would shut down randomly and then when shut down properly it would not boot back up again. Sometimes it would not even reach POST (Power On Self Test), others there would be an issue with the POST. Once I even had it say there was a problem with the BIOS flash memory itself.

The original Stats. It's had a RAM upgrade and a new graphics card.
As you can see, not the most exciting computer. But it has a discrete graphics card which immediately blows anything else I have here out of the water for a HTPC. The computer I had been using did work, however there was often a lot of stutter during playback and complete CPU usage. This machine does not have that issue.

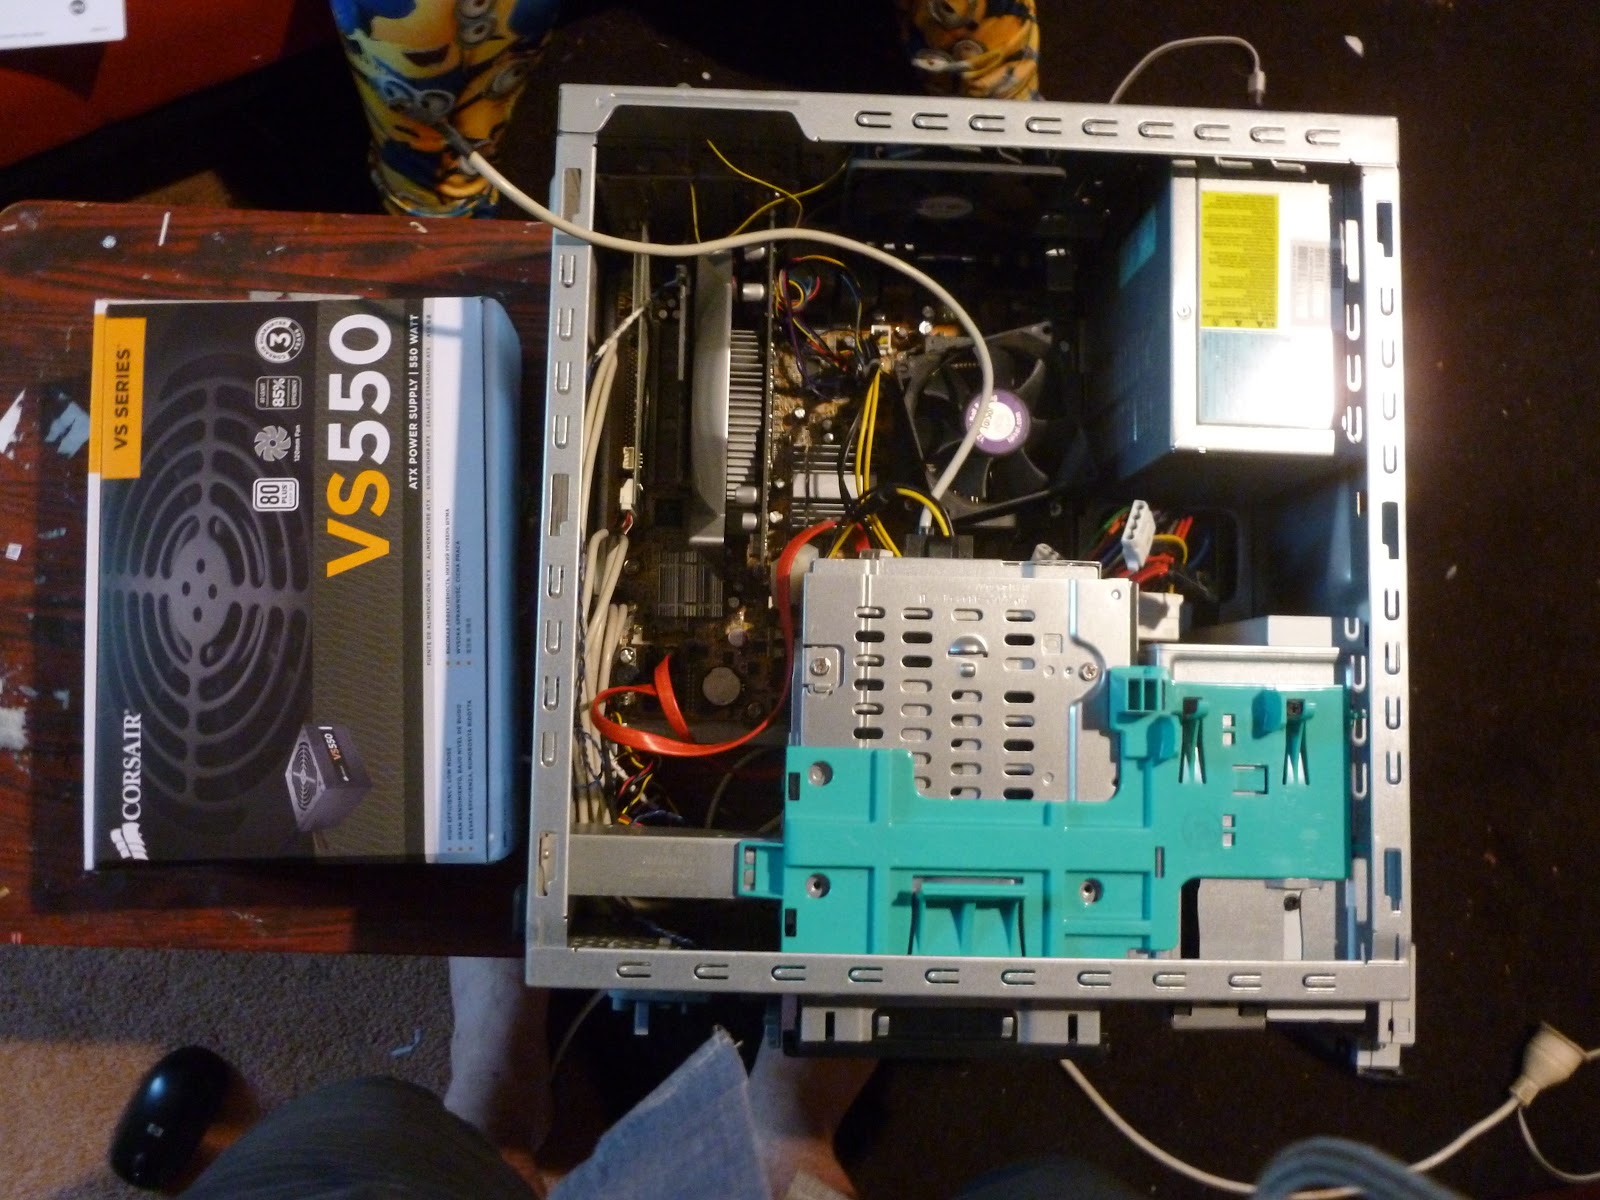
Here we see the new power supply next to the case. Originally it had a 300W supply. I have upgraded it to a 550W as the newer graphics card recommended somewhat more than the orginal 300W. I think this may have been one of the contributing factors that lead to the original supply failing. Often a supply will handle being overloaded. But it will cause it to fail much much sooner.

It's a pretty tight fit in this case. The only way for me to un plug the motherboard power cable was to first remove the hard drive and personal media drive bay. I was lucky that it came apart fairly easily and soon I had the motherboard un plugged.

With the motherboard and drives all un plugged; all that needs doing to remove the old PSU is taking out the 4 screws on the back. These all came out easly like they should. If this had been in a factory or somewhere where it's likely to corrode a bit it would've been a different story.

Here we have a side by side comparison to check that the old (left) and new (right) are actually the same size. They were. Time to reverse everything and put it all together.

If I was willing to spend the money on this computer I could've gotten a modular power supply. With a modular PSU you can remove some of the cables so you don't get a mess like the one above. As it was I was lucky enough to have to find a way to get this spaghetti monster into the case without jamming in a fan.

Before putting too much effort in I like to check that I have fixed the problem. This is what you see here. I plugged in only enough for the motherboard to boot off the BIOS chip and run it's POST. With that done I can finish buttoning up the system and getting the loungeroom back to a reasonable state.

With a little coaxing it all went back together reasonably well.

Success. Now I just need to set up Mythtv on here. If anyone is interested in seeing a writeup on how to configure a Mythtv Frontend, Master Backend and Slave Backends please let me know. I am not particularly happy with the current arrangement and if it would be of interest to someone then I would be happy to document the process.

Replacing a power supply is something that is not too difficult once you know what plugs go where and you are willing to take your time to work out what each part does the first time around. Also like this computer that was likely to be tossed, it is a relatively easy test that you can do that can extend the life of your computer.

Any questions, or thoughts please leave them below in the comments.
Cheers,
Rex

Monday, 14 December 2015

I'm Guttered

We've had a gutter on the back veranda that for the last few months has been hanging halfway off, then propped up with a stick. What remained of the down pipe was also pretty much blocked up so as soon as any leaves from the neighbor's trees that overhang the roof got washed down it would clog and over flow.

That is now fixed. Below is a few of the steps that I had to go through to get this finished. Unfortunately I didn't get all of the steps as this because one of those projects that just needs to get done and I forgot to take any photos.

This was the most interesting part of the whole process really. What I should've done is bought an appropriately sized hole saw when I got all of the other parts from the hardware store. I forgot so I had to make do.

The fist thing I did was to trace around the outside and the inside of the down pipe insert. This let me know how far I had to cut out the hole in the middle and gave me a distance that I could go until it wouldn't seal. You can see a little scratch from where I tried to drill through with my biggest drill without a pilot hole. That didn't work very well so I went around the outside with a smaller drill then opened out the holes to the size of my largest drill.

Who can see the mistake yet?
With all of the holes opened out there was only a little metal holding the centre of the hole in place. To punch through those I put a house brick underneath and used a chisel to punch through the holes in the brick. What I should've used is a cold chisel. However I only had an old half busted wood chisel that needs a fair bit of time on the grinder before it will cut anything. Anyway because it was no good I just used it to punch out the little tangs that are left.

My mistake should be very apparent now. And it wasn't long after I took this photo that I realised it too. I chain drilled on the inside line. This meant that the material left by the round holes encroaches on the space the insert takes up. The right tool to fix this would be a half round file. I don't have any files in good enough condition for this much work so I had to find an alternative. What I ended up doing was using the brick as an anvil and with the ball pein on my hammer I rounded the edge of the hole so it opened up enough for the insert to be forced through. Never though I'd be using blacksmith techniques to put up a gutter.

Of course this took a bit of time which could have been avoided if I'd drilled the holes a little furthur out rather than right on the line. However I did get a good bit of practice doing this and next time I have to peen something over like this I'll probably be a bit better.

This was the end cap before I riveted it in and added the silicone.The edge of the gutter pulled in with the rivets and the silicone filled the rest of the gaps.

Here is my ultra safe and accurate measuring system for where to put the first bracket in. I held the gutter with 1 hand, then pushed the blade into the board until it would hold then pulled the blade out of the knife. Then I sat the bracket on top of the blade and put the nails in enough to hold it, then removed the nails.

Next steps here is to get a thing to catch the leaves as they come out of the gutter, then connect this up to some kind of tank so I can water the grass here without worrying about how much water I'm using.

If you want more details, have any suggestions or questions please get in tough or leave a comment below.

Cheers,
Rex

Friday, 11 December 2015

Re-Waterproofing an oilskin Jacket - Part 2

At the end of the last post I had a bucket of a beeswax mixture that was cooling to be used to re- waterproof my oilskin jacket. Now this jacket has over the last year or 2 become very much noticeably not waterproof. To the point where I have been considering it a good solid canvas jacket and not really a waterproof jacket.

This is where I started, It's a bit difficult to tell but the jacket feels dry and without any waterproofing to it. To apply the waterproofing I let it cool fully overnight, then with a rag I rubbed it onto the jacket then went over it with a hair dryer on hot to soften the mixture and help it run into the fabric.

This is what it looked like after putting the mixture on, but before running the hair dryer over it.

Here you can see the difference between treated (top) and untreated (bottom). It needed this pretty badly methinks.

When I was doing the seams I scooped up a small amount of wax with my finger and worked it into the seam by rubbing it against the seam so a small fillet built up along the whole seam. These took a little longer the melt in with the hair dryer, but I think it will help in the long run.

And here we are, finished. This took, probably 2 hours and the bucket of wax mix is still very full. As you can see from the last photo it looks like the wax is cracking where the material has bent. It isn't flaking off or anything, but it may reduce the waterproofness. To stop this happening I think I will add some more turpentine to thin it a little and see if that helps.

A quick word on turpentines. I used pure gum turpentine. This is the more traditional product made from the oil of trees. A cheaper alternative that most people are familiar with is mineral turpentine. This is a similar product however it is made from oil rather than trees. The mineral turpentine would probably work and if I had no choice I wouldn't hesitate to use it. However after standing over it for a few hours breathing in the fumes I am very glad I used the gum turpentine as it smells much nicer if the smell is going to be hanging around for a while.

So there you have it. For about $50 and a few hours of your time you can waterproof just about any porous material. The rag I used to apply the mix is a much looser cotton weave than the jacket and it is now waterproof as well.

If you have any questions or tips, please comment below so we can all learn something together.

Cheers,
Rex