Showing posts with label Metalwork. Show all posts

Monday, 7 November 2016

Back door now installed

I have had a door for my Land Rover since I bought it, however it was not installed, nor did it have enough bolts to just put it on. So on the weekend I fixed that.

In this photo you can just see a hand holding the door on. Before you could use the top hinge to locate it and hold it in place. This didn't really do much other then prove the door fitted. But it was a start.

The nuts I found were too small for the holes that have been drilled in the frame of the door. So I had to make up a backing plate to stop them from pulling through. This came from a piece of scrap angle I had sitting around. A few minutes with the grinder and the drill and it was ready to go.

It is still a mess inside. But that isn't as obvious now with the door shut. I'm not sure if it's supposed to, but the geometry of the hinges means that it half wants to open itself. Not a bad thing, but interesting.

Unfortunately for now this is my latch. I don't quite have a complete lock mechanism for the door so while I sort out how to lock it properly this will do.

This was a nice, fairly quick project that has definately helped make the car more weatherproof. Hopefully soon I will have the brakes sorted and then I can move onto the next part. Possibly the lights which are missing.

Cheers,
Rex

Friday, 29 July 2016

Waste oil burner. This time with videos.

Last weekend I fired up the oil burner again. This time I prepared a reasonable amount of fuel for pre-heating. I even tried to light it without accelerants. Unfortunately everything was wet and the kerosene was so close to hand. So I did cheat a little.
Here I am, with the pile of wood just starting things happening.
Maybe a little quick. But I didn't quite kill it.
Starting to burn down nicely.
Starting to get a bit excited with a little oil and air added.
I managed to turn the oil down too far without realizing it as the fire got a little too smokey. It was taking off but it didn't feel quite right so I fiddle with the oil and lo and behold. It starts to take off.
Lets see if I can make stuff hot with it.
A little hard to see here, but the bar certainly did get forging hot.
Lets see if we can make something a little more substantial properly hot.
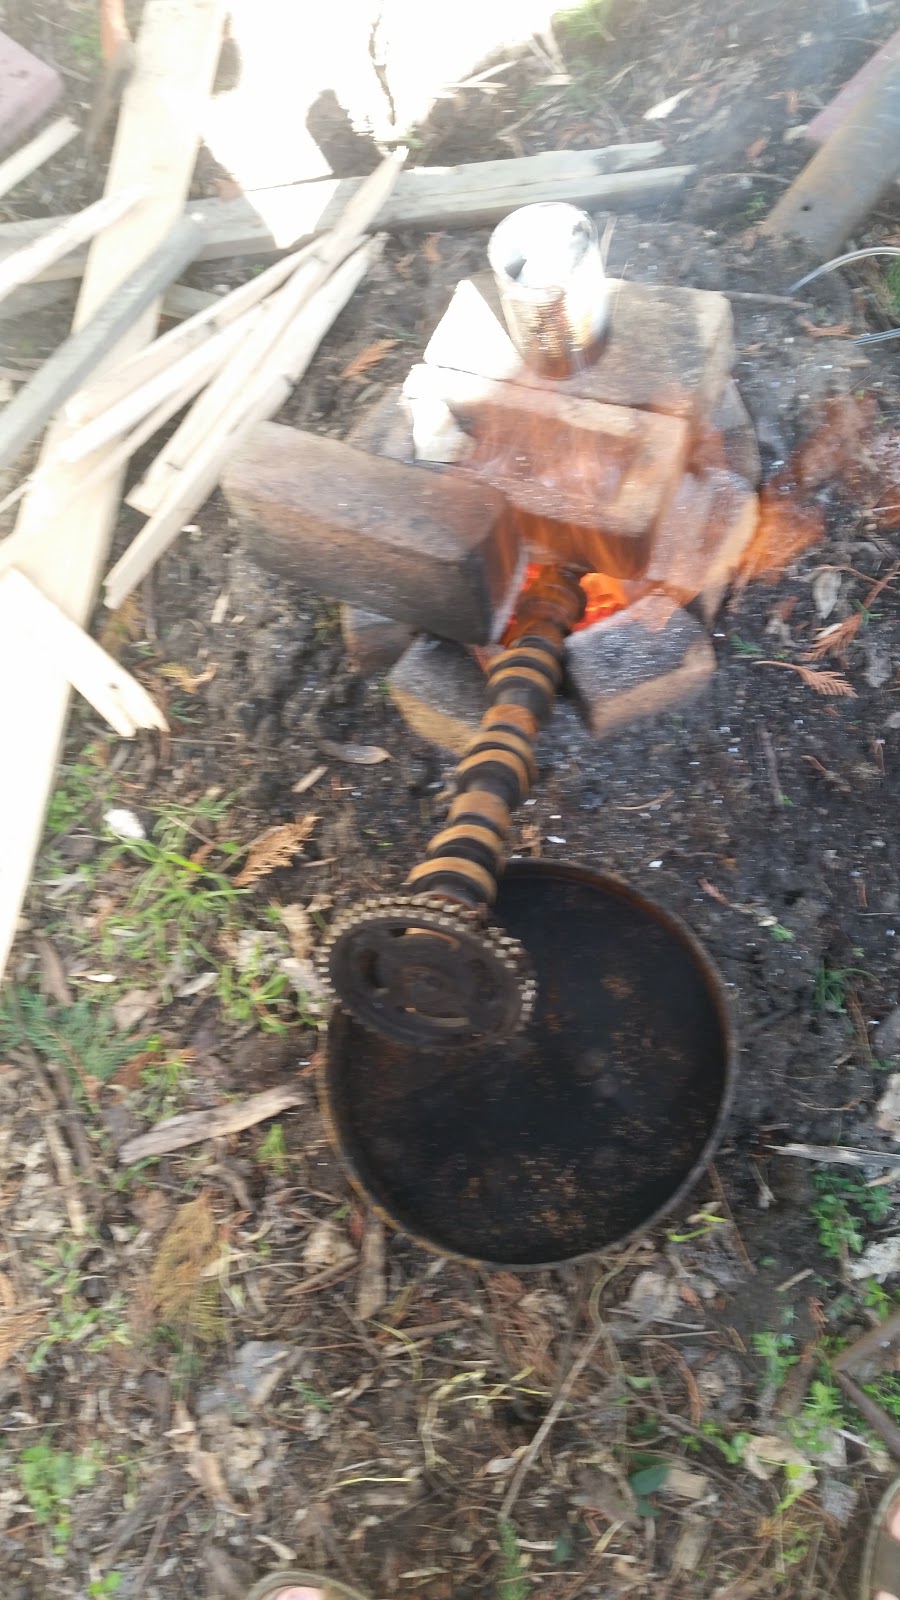
The end of the camshaft needed a little support to keep it in the hottest zone.
While it probably would've looked much better at night it did get hot enough to move some metal around a little. I think the white coating is fine ash from the wood getting blown around by the blast from the burner and coating everything.
Just before I shut it down.
And here we are cooling down. When I came back an hour or 2 later there was still a fair bit of heat radiating out from the bricks. They were definately hotter than you would want to touch.

Here is a quick shot of me pre-heating the fire pit before anything got too exciting.
Here we are with the burner running and adjusting the air/oil mix a little.

I'm hoping to get some more shots of interesting stuff getting done this weekend so keep an eye out for those next week.

Cheers,
Rex

Thursday, 7 July 2016

A Little more practice needed

So tonight I decided to have a little play with the Lathe. I probably should've gone to bed early for work tomorrow. but it was calling me.
You may remember that I am setting up a fixture on my mill to experiment with parts drawn in Fusion 360 then exported through to it. Unfortunately as you can see in the above picture the hold down bolts I have are a little too long. To fix this I could cut them down with the hacksaw. But I thought it would be a lot cooler and good experience to use the lathe.
So I set everything up as near as I could figure to correct.
I put a little oil on the part. I was planning to add a drop halfway through, but the spindle doesn't run with the face shield up so I had to put a drop on then just let it go. Probably not too big of a concern with this part at it's fairly small and although it will produce some heat it shouldn't get too bad.
The result of the first pass. The spindle started to load up a little then the tool seemed to jump over the little nipple that was left without actually cutting through it. So perhaps the tool is too high? Simple solution, lower it then.
Hmmm. Possibly too low. This picture looks much worse than it did in real life.
Here we go. I did add another drop of oil, but it had pretty much been thrown off by the time the tool came in, I probably won't worry in the future.
It worked. Kinda. It's a bit difficult to see in the pictures. But the surface finish on the part in the chuck isn't great and while it did cut through it wasn't particularly happy about it.

I thought it must be too low now so I moved everything around again and had another crack at this. Just for practice now.
Unfortunately this attempt was an unmitigated disaster. The tool got caught in the threads and was deflected off to the side. Then it started to cut. Thankfully I stopped the machine before anything snapped.
The Solution? Turned out not but it was a fun thing to try. I set up another tool opposite the parting tool. This is more or less how the machine was when I received it. I wish now that I'd played around more as it was. But hindsight is 20/20 and I knew even less then than I do now. However I was able to turn this to a fairly good surface finish quite easily.
The feed was set at about 10mm/min, the depth of cut was about what looked pretty good and the spindle was set at 1/4 of the way between 200 and 2000 on the dial for it. Not sure how accurate that is though.

So now that we have a nice flat surface that isn't going to deflect the tool lets try again.
This was the result. The tool just rubbed and pushed the workpiece around. It actually crushed some of the threads in the chuck so the steppers at least have a bit of go to them even if the spindle is a bit weak.

At this point I decided to call it a night and had a quick look at the turning insert I was using.
Thankfully no visible damage as I expected. However it is always good to double check.

I will probably go back to playing with the wax and delrin(?) blanks I have for a little while, at least until I get a better feel for how each of the tools work and getting them set properly. The good news there is that means I will probably get to the mill sooner again. I will rig up a fan that actually works to send some air over the stepper drivers as they do get quite hot although I think they are still just within spec for passive cooling. Then once that's done, I have worked out a method for driving the spindle so it will be full speed ahead for making some chips over there too.

Cheers,
Rex

Wednesday, 6 July 2016

I can make stuff hot again

So in my experiments with waste oil burning I have reached a new milestone. On Friday night I managed to make something hot using waste oil and compressed air alone.

I can also still break hammers. I think I trimmed too much off when I fitted the head on last time so it has just slid over the taper the wedges put in the wood. I have a few plans on how to fix this so it doesn't happen again. I'll be bringing you along for my experimentation there as well.

It took me a little while to get the fire going this good. To start with what I was trying was dripping the oil into a stream of air from my shop-vac on blow, atomizing(?) it then carrying it through into a fire that I'd already lit to get some heat into the fireplace. Unfortunately that didn't work.
I had some charcoal in the bottom of the fire to help get a decent bed of hot ashes to be spraying the oil onto. Unfortunately with any kind of draft, even from the hairdryer. The charcoal turned into embers which were getting picked up by the wind a little and heading towards the neighbors yards. Not so good.

The next thing I tried was to just jamb the nozzle from my previous test(here) through a gap in the bricks and backfill with dirt. Unfortunately I forgot to take a photo of that as well.

This was the result:
A nice big ball of flame, with relatively few sparks as there is much less air moving. I put a spring in the fire as this is something I have been toying with a bit recently and it did get hot.
It did take a fir while so there is plenty of room to improve but a good proof of concept. It will burn when feeding into a smallish, pre-heated chamber.


Here I was deliberately running rich to get the big fat flame to come out of the fireplace and shed some light on the surrounding area so I could see what I'm doing.

It's impressive the amount of control I have over this, for a pretty crude piece of engineering.

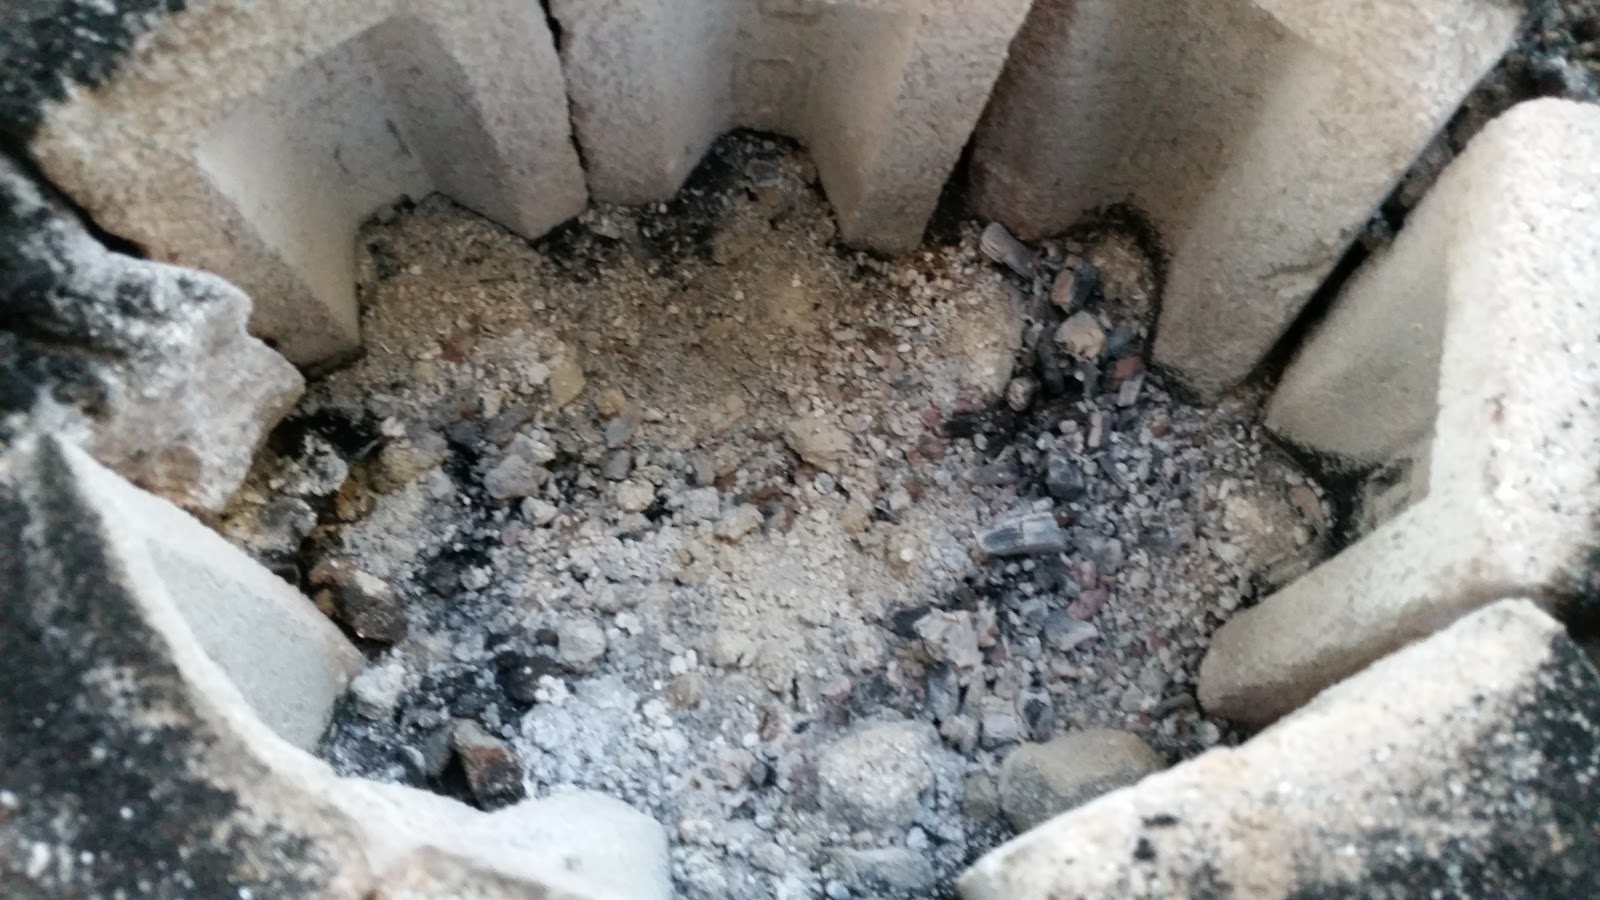
After I turned off the burner this is what it looked like inside the fireplace. I put some bricks on top as it was spitting a little and I was hoping to stop the bricks surrounding the fireplace from cooling too quick and cracking. The glow is what's left of the fire I was using to get everything started, scraps of wood and charcoal mainly.
This is what was left a few days later. The burner is over on the left and can't quite be seen.

I took a little video of this and I will share that as soon as I have it edited together. I am going to play with this fireplace as it is for a while and see if I can get a bit more heat out of it, then I have a small gas bottle that will probably become my new forge. I will probably be lining that with some kind of fireproof material to help stop the steel from burning out.

Cheers,
Rex

Wednesday, 25 May 2016

I'm not trying to start a collection.

Honest...
It might be better if you stop here Mum.

So these followed me home from the Junktion on the weekend. 2 x 40L Air compressors with solid tanks. One of the compressor heads seems to be seized up but it doesn't have a fan on it so that could just be a lack of leverage. The other one can be spun by hand and makes the right sort of whooshing noises so I think it works.

Unfortunately neither of them have any regulators or power plugs on them so I will need to buy some, probably off eBay or AliExpress.

The plan for these is to turn one into an extra resevoir to increase the capacity of my compressor from 20L to 60L. And if I get an extra compressor head or 2 out of it, all the better.
The other one will be turned into a fuel tank for an oil burner I am planning on building for the forge. Similar to the one in this video:


I'm planning on getting that done in the next few weeks or so.

So keep an eye out for an improved forge in the coming months.

Cheers,
Rex

Monday, 14 December 2015

I'm Guttered

We've had a gutter on the back veranda that for the last few months has been hanging halfway off, then propped up with a stick. What remained of the down pipe was also pretty much blocked up so as soon as any leaves from the neighbor's trees that overhang the roof got washed down it would clog and over flow.

That is now fixed. Below is a few of the steps that I had to go through to get this finished. Unfortunately I didn't get all of the steps as this because one of those projects that just needs to get done and I forgot to take any photos.

This was the most interesting part of the whole process really. What I should've done is bought an appropriately sized hole saw when I got all of the other parts from the hardware store. I forgot so I had to make do.

The fist thing I did was to trace around the outside and the inside of the down pipe insert. This let me know how far I had to cut out the hole in the middle and gave me a distance that I could go until it wouldn't seal. You can see a little scratch from where I tried to drill through with my biggest drill without a pilot hole. That didn't work very well so I went around the outside with a smaller drill then opened out the holes to the size of my largest drill.

Who can see the mistake yet?
With all of the holes opened out there was only a little metal holding the centre of the hole in place. To punch through those I put a house brick underneath and used a chisel to punch through the holes in the brick. What I should've used is a cold chisel. However I only had an old half busted wood chisel that needs a fair bit of time on the grinder before it will cut anything. Anyway because it was no good I just used it to punch out the little tangs that are left.

My mistake should be very apparent now. And it wasn't long after I took this photo that I realised it too. I chain drilled on the inside line. This meant that the material left by the round holes encroaches on the space the insert takes up. The right tool to fix this would be a half round file. I don't have any files in good enough condition for this much work so I had to find an alternative. What I ended up doing was using the brick as an anvil and with the ball pein on my hammer I rounded the edge of the hole so it opened up enough for the insert to be forced through. Never though I'd be using blacksmith techniques to put up a gutter.

Of course this took a bit of time which could have been avoided if I'd drilled the holes a little furthur out rather than right on the line. However I did get a good bit of practice doing this and next time I have to peen something over like this I'll probably be a bit better.

This was the end cap before I riveted it in and added the silicone.The edge of the gutter pulled in with the rivets and the silicone filled the rest of the gaps.

Here is my ultra safe and accurate measuring system for where to put the first bracket in. I held the gutter with 1 hand, then pushed the blade into the board until it would hold then pulled the blade out of the knife. Then I sat the bracket on top of the blade and put the nails in enough to hold it, then removed the nails.

Next steps here is to get a thing to catch the leaves as they come out of the gutter, then connect this up to some kind of tank so I can water the grass here without worrying about how much water I'm using.

If you want more details, have any suggestions or questions please get in tough or leave a comment below.

Cheers,
Rex

Wednesday, 29 July 2015

The big reveal...

So last week I put up a photo of a largish brown box in my ute.
A Pretty unassuming box.
So contained within this box was a brand new welder. This is what I bought. A MIG 220BZ 3-in-1 welder from Rossi. This will do MIG, TIG and Stick welding and hopefully allow me to finish some projects I've had in the back of my mind for a while. After the break you can follow along with me as I open the box and give my initial thoughts (Uneducated in the nuances of welding as they may be)