Showing posts with label Engine. Show all posts

Tuesday, 24 January 2017

Southern Cross Stationary Engine has us beat.

My Brother bought a small stationary engine the other day and has it at my house for now. It is a Southern Cross 3 1/2 HP Diesel model EF-D. I found it on a buy/swap/sell group on Facebook and mentioned it to him. A couple of days later and here it is.

The bloke he bought it from gave us a little instruction on starting it. However we were unable to get a demonstration as it didn't have a base at the time. So with a couple of bolts holding it on to an old pallet I had at home the process began.

First we tried to bleed the pump. This worked really well, after I opened the correct bleeder valve. At this point diesel started to run out quite fast. Then bleed the high pressure line to the injector. Crack the nut and pump until fuel comes out without any bubbles. This done we poured oil down the hole we were told to pour it down then time to start it up.

My Brother with the key. No fancy electronic start here.
Maybe electronic start isn't such a bad idea. He managed to clonk himself on the knee then the chin. Drawing a little blood.
On the safety of starting these engines. The nut that the crank handle engages with has a slope on it so that if the engine starts then it will push the handle out. It will not throw it if you don't let go but it will push it away from the engine. Also some of the similar engines were actually able to run backwards if you didn't get it started right. These ones have had a slight modification to the head to stop them from doing this.
After a little break I decided to have a crank. I managed to get some puffs of smoke out of the exhaust but it never even coughed.
Being that we were both worn out we decided it was time to pack up and try another day so here it is sitting in the naughty corner.

After this I ended up finding a manual online and discovered that we had the governor set wrong for starting. Hopefully this is what has been causing it to not start and we can start it next time.

Cheers,
Rex

Monday, 28 September 2015

It's getting better

So you may notice that the Jeep has moved; and there is not a huge stream of ATF leading to it. Unfortunately as you can see there is still a small leak and there were a few little spots on the ground in work's carpark. But I think that s getting caused by dodgy pipe dope that I used to seal the fittings rather than the plumbers tape I used last time which didn't seem to leak.

Eventually I'll be happy with the state of the car... Probably not before I find a new owner though. A little more work and she'll look like new I think.

Cheers,
Rex

Wednesday, 15 April 2015

Work on the next project commencing

Over the weekend I got to start some work on the next project I'm starting. This is the car one. The plan is to turbocharge my mate's 2001 Ford Falcon AU II 4.0L inline 6. The first step in this process is going to be replacing the stock ECU with a custom DIY one, most likely rusEfi. So we went out to my "donor" car that I rolled a few years ago.
It isn't in particularly good shape, but before water got in it too badly it would run. However now the excellent smartshield immobiliser system is working (BEM and ECU or Key Barrel aren't talking I think) and won't let us even turn it over. We headed out to this in an attempt to get the diff out so we can weld it up and make it "Locked" rather than an "Open" diff. That didn't work because we realised that to get the centre of the diff out we would need to remove the entire back axle assembly.


As you can see the outside of the diff was fairly dirty and the muck made it a little difficult to get the cover off. An interesting point to note is the cover had some rust in it, possibly from sitting for too long in a paddock?

Deciding that would be too much work we put the cover back onto the diff and went to work on removing other more interesting things. Julian began removing the remaining few intact windows. He had a process of putting a piece of small wire (from an old tire actually this time) in behind the glass from the outside and working it backwards and forwards until it heated up enough to cut through the caulking holding the glass in place. An easier way to do it is with jumper leads to a car battery so the wire is heated by electrical current rather than friction. However as we don't car about the condition of the body of the car and we didn't have any jumper leads with us we just used friction which also damaged a little of the paint.
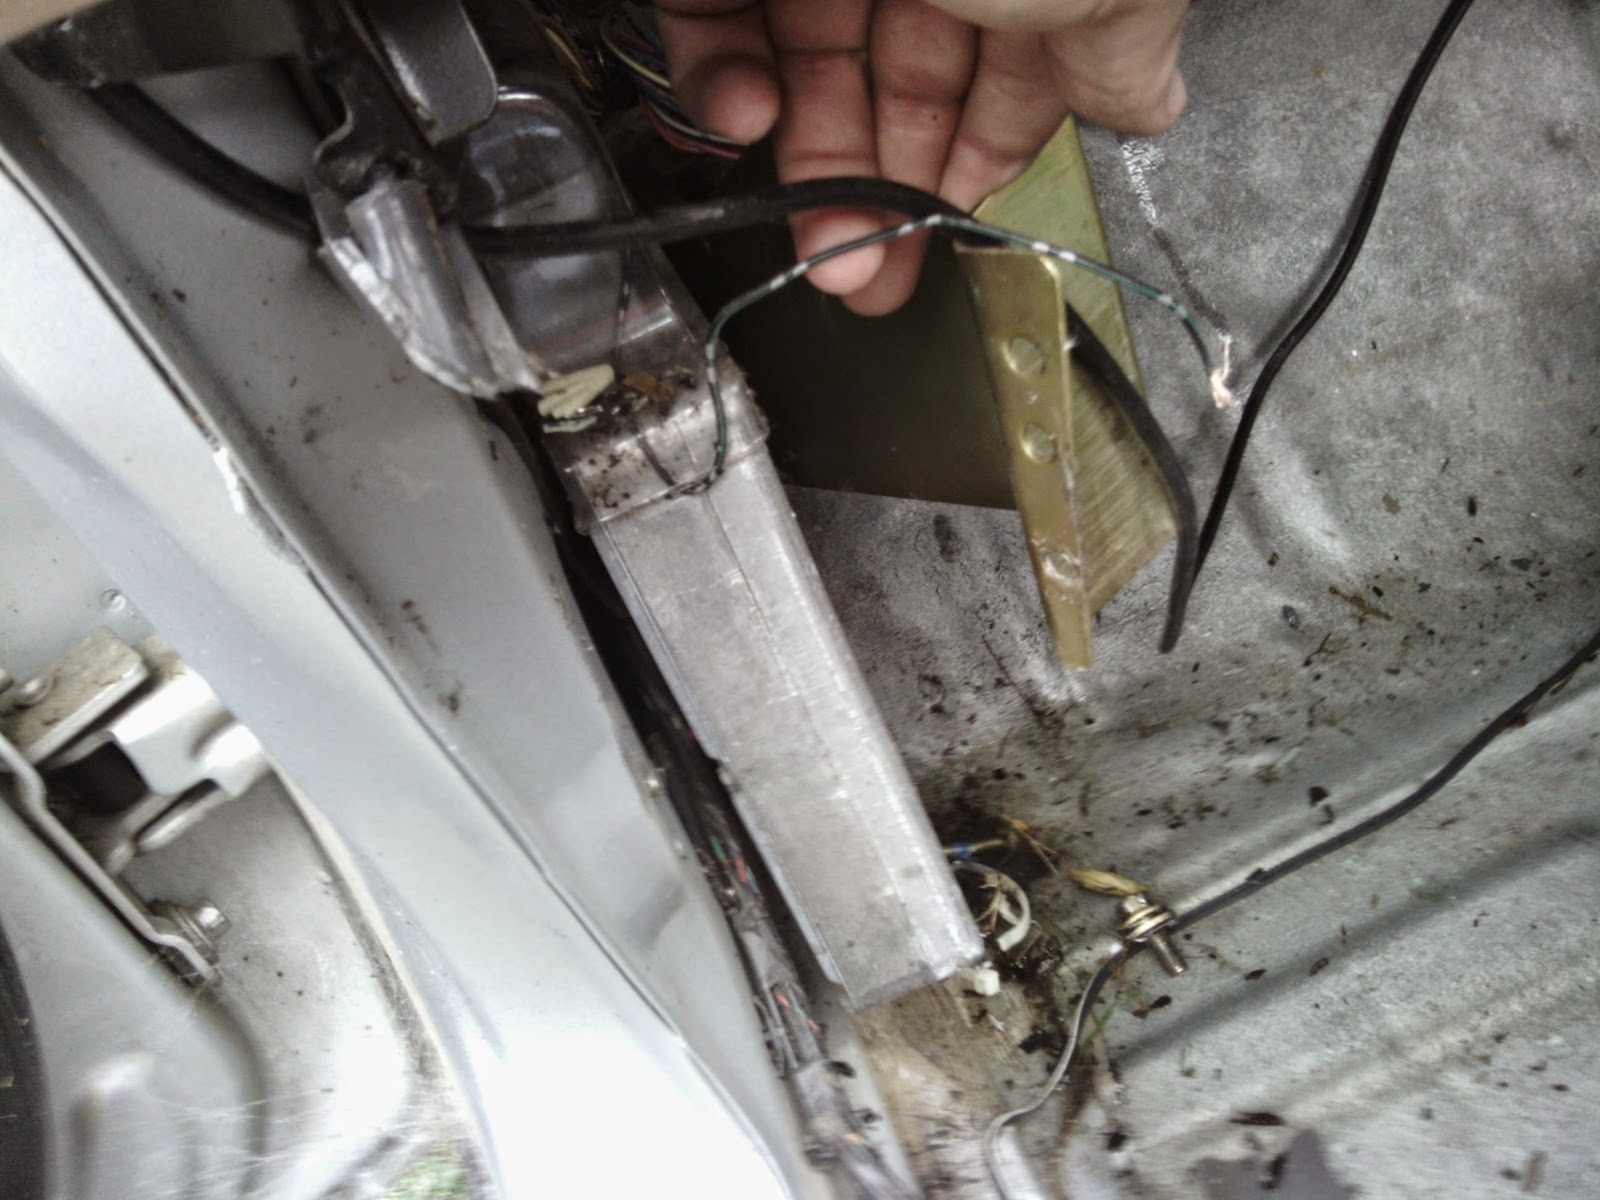
Here Julian is trying to cut out a piece of the trim around the second window so we can get to the edge of it. In the background you can see the damage I managed to do getting the ECU out. That was the other thing that needed to get done while we were out there. So I can easily swap between the stock and custom ECU I am hoping to gut the original enclosure and use the original socket. To get the ECU out of these Falcons first you need to remove a rivet that holds the enclosure down. I didn't have a drill so I used the grinder I got for Christmas.
In my case there was also an earthing wire attached to the rivet that didn't really get much in the way of getting it out. Once the rivet is out then the enclosure will just lift off with a little jiggling and rotating.
With the enclosure out of the way the ECU just lifts out of the way allowing me to remove it from the car. Either through the week or possibly on the weekend I will start tearing down the ECU to see if I can re-use the enclosure and/or the plug and socket. For now here are some pictures showing more details of the ECU and it's plug/socket.


Cheers,
Rex

Thursday, 2 April 2015

On with it's head, then off again. And a return to normal viewing

So I haven't posted for a while, mostly because I have started to use a camera and have since lost all of the photos.

So the long and the short of it is, that I got the head back on, the engine running and everything good; even booked in for rego. Then the welch plug in the back of the head that I hadn't seen while it was off began to leak. Badly. Eventually I managed to not get it out with everything in place so I ended up taking everything off again including the head. With the head off it took all of around 10 minutes to remove and then install a new welch plug. With everything back on I got it started, no leaks. Phew.

From there I got it registered, drove it for a few weeks, took it to Sydney. Took the old oil that I'd put into it out and replaced it with fresh stuff. and gave it a good clean inside, still needs one outside though.

After Driving it for a while I noticed a strange noise from the front end while in 4wd mode. Solution 1, change the oil in the front diff and check what it loos like inside. No dice. Next, start researching online. One option seemed to be that it was "Angry Sparrows" or a squeak from something potentially worn in the front drive shaft. So off with that. It turned out to be a piece of cake, just 8 bolts to remove. Upon inspection I discovered the the apparent reason for the noise was a lack of grease in the ball in the middle of the double carden (CV) joint near the transfer case.

After pulling the double carden apart and damaging(?) one of the universal joints grease was worked into the ball because a replacement kit was around $100 which is somewhat more than I was willing to spend. Everything got re-assembled and then a short drive was taken. Silence, no more angry birds for me.

With that fixed I started to think about the trip I am leaving on tonight and the fact I will be towing a trailer ~1000km each way in an automatic of less than ideal status. I looked into a transmission oil cooler and discovered that there was already one installed. I also wanted to be able to measure the oil temperature so I installed a SAAS oil temp. gauge as a transmission temperature gauge. The install was very straight forward and didn't take too long except for the cutting of the hard line. That had to be done by hand with a hacksaw blade as we had nothing else that would fit in the small space.

So from here I have a 3 new projects all of which are exciting and I am looking forward to all of them. One involves a road trip this weekend, one involves rainwater and the last involves my wreck, EFI, turbos and someone else's car. All will be exciting and lots of learning will be done in all 3 new projects.

Until next time, Cheers.
Rex

Thursday, 22 January 2015

Off with it's head!

Last night I got the head removed from the XJ Jeep Cherokee I've been working on. This is what it looked like before I started:

I decided to leave both manifolds on and just deal with the extra weight. It was heavy but it was still easier to do that than remove the bolts that are hidden under the intake manifold.

It's not very obvious but on this bolt there is a very thick black gummy something all over the threads. Not sure what it is but hopefully I'll be able to clean it off before I put this all back together.


Here's a shot showing my highly sophisticated lifting mechanism with it halfway out:
One of the bolts on the top for the manifolds is pretty well in the middle weight wise front to back so with the chain over that. With the chain secured I put a foot above the firewall and another one above the radiator; and lifted. Thank goodness for joining a gym is all I can say. I was able to lift it and with my able helper guiding the head I could move it between 1' and 6" at a time. Everntually I got it off the car and a bit lower, this is what it looked like then:

From there it was fairly easy to get my hands under it and carry it over to the bench; where it got turned over for removal of the gasket and preliminary inspection:

The gasket is still on here, as you can see near cylinder 1 it seems to have blown out completely and around cylinder 6 it's deformed and blown into the cooling jacket. Not good, you'll see the results of that a little further on.

It looks like when I had gotten it running cylinders 1 & 6 weren't working at all and as such don't have any sooty buildup in them. The other 4 cylinders do which makes me think that it possibly wasn't running properly, but that may have just been because it was cold and only had 4 cylinders going.

One more interesting point here is the exhaust manifold. From the build quality I hope nobody was paid to do it. The welds are not very fine and there were long bits of welding wire were sticking out in a few spots.

This is what the block looked like once I got back to it:


Not a very pretty sight. Just to see what would happen I tried turning it over with a socket. This went well and pretty easily. This allowed me to get that water out of number 6 and get a good spray of WD-40 over everything to help reduce any corrosion that may yet happen.This is what it looked like then:

Most of the water in Number 6 ran out over the back of the block. So it will only need a little bit of mopping to get the rest out.

That's pretty much all there is, from not it will just be cleaning up parts, checking tolerances and buying replacements for a little while. So if I don't post for a little while don't worry, just getting everything prepared for the next stage.

Tuesday, 20 January 2015

Soon, Soon

Not much to report tonight, pretty much got everything sorted for removing the head tomorrow. Got the exhaust disconnected from the extractors from under here:

And above here:
That was probably the nicest pair of nuts to undo today, even though there was only enough space for the ratchet to move 2 or 3 clicks at a time.

Got the bolts holding down the head off like this:

I only got to this state after removing a 11/16" nut holding down an earth strap. Unfortunately I didn't realize there even was a 11/16" spanner in the house, let alone that was the size for a good 20 minutes.

Also the manual says that the bolts holding the head on are 1/2" or 13mm. I tried them with a 13mm spanner and started to strip the 12 point head so I decided to buy a slightly smaller 1/2" deep socket. The fun thing about the 1/2" deep sockets sold at Bunnings is the hole in the middle is tapered, with the smaller end towards the bolt. This meant that the brand new tool I'd just driven across town and bought was actually not going to work. So after messing with sandpaper and getting nowhere a round file was found that was used to enlarge the narrow end of the taper just enough to be able to be pushed over the studs. However that is still not the end of the story. Because after loosening some of the bolts the socket would get stuck on the stud. The solution involved a hammer, a 1/4" drive socket extension and a sharp corner in the engine bay. By putting the extension down the middle of the socket so it was resting on the end of the stud, putting a sharp corner in between the socket and the stud I was able to tap them out. Thankfully.

By this time tomorrow I should have the engine in halves and some very interesting photos to show just how bad this engine has become.

Bad, Bad Oil

So I didn't end up getting much (Anything) done on the Jeep last week and the weekend was busy with sailing on the James Craig and then doing maintenance at the Zig Zag Railway. However yesterday I feel I made some good progress and got the rockers and pushrods out. I also got the bucket with the old sump oil out from under the car. This is what it looked like after I pulled it out:

You can see some little bits of green from the coolant that has been getting into the oil.
This is what it looked like aft I stirred it up a little. The same as when it came out originally.


I also got the rocker cover and rockers/pushrods out.

It was pretty awkward to get to so this was how I was getting to pretty much everything:
There was also a bolt hidden right at the back that I had no hope of getting a socket onto it so back to doing it the old way with a 5/32" ring spanner. Once I managed to find the damn thing and get it undone this was the sight I was met with:


Yes that is more nasty oil on the rockers and even little drops of water on the bridges between the intake and exhaust. That's how much water was in the oil, not good. We'll have to see what else is going to be going on and broken in the next few days getting further down into the engine. So this is what all that looked like after being removed from the engine:


There's a lot of that nasty oil that will need to be cleaned up and hopefully there won't be any surprises while cleaning it all up that can't be at lease ignored until we squeeze the last few thousand km's out of this engine before it is going to need more work than just a gasket.

Today hopefully I'll get the exhaust undone from the headers which should be the last thing left to do before finally removing the head completely.

Thursday, 15 January 2015

The saga begins

Last night I got started on my mate's Jeep that I was talking about in one of my previous posts. It had an unfortunate accident with a lake (about halfway up the engine bay) last month and has been sitting out the front in the way since then. It was agreed that I can put it near the back veranda until the start of next month so I'll be trying to get this all finished by then.

After messing about for a few hours we managed to get it running, very, very roughly (3 or 4 cyl out of 6) and clouds of coolant out the back. After getting it going to this point we decided to top up the coolant with plain water then drive it around the back so we can work on it a bit easier. While filling I thought it was taking more water that I expected so I had a little look and water was pouring out around the head gasket. So it looks like I'll be stripping the head off at the least.

This is where it was as I started pulling everything out. If you look closely, on the right hand side you can see the throttle body where the plenum and the air hose from the filter were held on with silastic and fell off while we were getting it started earlier. Most of the oily stains that can be seen are from us spraying WD-40 around to make sure no water was in the electrics.


Here is another look into the engine bay. Off to the right you can see the air filter. It has definitely gotten wet and there are small holes in the bottom of the air box that seem to have let water in which has probably contributed to the gasket failing.


At the moment I have removed the Power Steering pump, fan and alternator. I have also drained the oil and coolant. Unfortunately I didn't get a very good picture as the light was starting to fail, however I will get one this afternoon.

This afternoon is looking like removing the heater hoses, injector electrics and possibly the fuel rail.

If anyone wants more detail on a particular area let me know and I will do up a post on that.